Getting Started with Antigravity Studio
2026/05/22You've wrapped up your flight and are ready to bring your footage into the studio to craft your next masterpiece, so you open up the software and...whoa. Where do you even start? We get it; with 360 footage, things can get a little overwhelming. What was once a breathtaking view from the sky becomes an infinite creative canvas inside the editor, stretching off into the distance. How do you choose the right perspective when every angle is available? Or go about creating the smooth, cinematic camera movements seen in the reels you love?
Well, you've come to the right place. This guide will help you start your creative journey by introducing the core features of Antigravity Studio, so your edits don’t just get off the ground — they truly soar.
Let's Dive In
First things first. We need to download the software. You can get the latest version of Antigravity Studio here (https://www.antigravity.tech/us/downloads/antigravity-a1?from=nav&ref=footer_hk-en) for both Windows and macOS.
When you first open Antigravity Studio, you'll be immediately presented with the choice to create a new Project. No pressure, right? If you want to use Media mode instead, you can close this window and then select it from the top of the app.
What's the Difference?
Media is designed for editing a single clip, with a streamlined interface that keeps the focus on your creative process. It’s ideal for making a quick video or working with just one piece of footage.
Project is the more advanced option, giving you access to additional tools for building more complex edits. It lets you combine multiple clips seamlessly, add epic transitions, and enhance your video with text and music.
In this article, we’ll focus on the Project tab, taking note whenever a feature is only available in Project mode. When creating a project, you'll be asked to fill in a few details, such as the project name and where it will be saved. One important setting is Performance, which lets you render your footage at a lower resolution while editing to keep things running smoothly. Don’t worry about the finished video, as this only affects the editing experience. You’ll still be able to export your completed work in its original resolution without issue.
Understanding the Interface
The Antigravity Studio interface is split up into different panels: 1) Library, 2) Player, 3) Function Bar, 4) Clip Panel, 5) Timeline.

To start editing:
Click the "+" button in the Library Panel to add clips or drag the clips that you want to edit into the panel.
Drag the clips you want to use onto the timeline (not needed in Media).
Project: You can crop the clips using the bars on either side or cut a clip in two using Split.
Media: You can crop the clip by marking the start and end points.
The Player is where you can preview your clip in real time and adjust the angle to find the perfect framing for your story. Click and drag to change the viewing angle, and scroll up or down to adjust the field of view. You can also tap the button at the top to reset the view.
Using the buttons below the Player, you can:
Change the aspect ratio to suit different social media platforms and creative styles
9:16 - Vertical video (Instagram Stories, TikTok)
16:9 - Regular horizontal (YouTube)
1:1 - Square (Instagram posts/Facebook)
2.35:1 - Widescreen Cinemascope (Cinematic videos, short films)
Adjust the preview quality (Project Only),
Capture a screenshot of your current view
Switch to full-screen mode.
The Function Bar provides a range of useful editing tools, such as Keyframes and Deep Track, while the Clip Panel includes helpful settings for refining your image and adjusting other video settings.
Function Panel
Keyframes
Keyframes are a core part of the 360 editing experience. Keyframes tell the video where you want to look in your shot and fix the perspective to the one you choose. There are two ways to add keyframes: manually, by right-clicking in the Player or tapping the '+' button on the Function Bar, or automatically, by using Adaptive Keyframes, which lets Antigravity Studio do the work for you.
Once you add a keyframe, you can fine-tune it to your heart's content, changing the angle, distortion, tilt, and more. During playback, Antigravity Studio automatically fills in the motion between each keyframe, creating smooth, cinematic transitions without extra manual work. For example, if you want a dramatic reveal that swings backward to unveil a stunning view, place one keyframe facing forward and another later in the timeline facing behind. On playback, the camera angle will glide seamlessly from front to back, creating an epic shot that's sure to impress. If you change your mind and want to remove a keyframe, simply click on it and tap the Remove Keyframe button.
With Adaptive Keyframes, you can take a breather and leave the editing to us. Click the Adaptive Keyframe button, select a segment where keyframes will be generated, and set the keyframe density. The software will automatically identify key subjects and add dynamic camera angles that make full use of Antigravity Studio's capabilities. Don't forget you can also freely adjust the generated keyframes if they don't quite match your creative vision or even add your own.
Other Keyframe Effects
Tiny Planet
A 360 video classic that creates the illusion that looks like you're on a miniature planet.
Scroll through the footage and find the frame you want to add the effect to
Add a keyframe to the selection
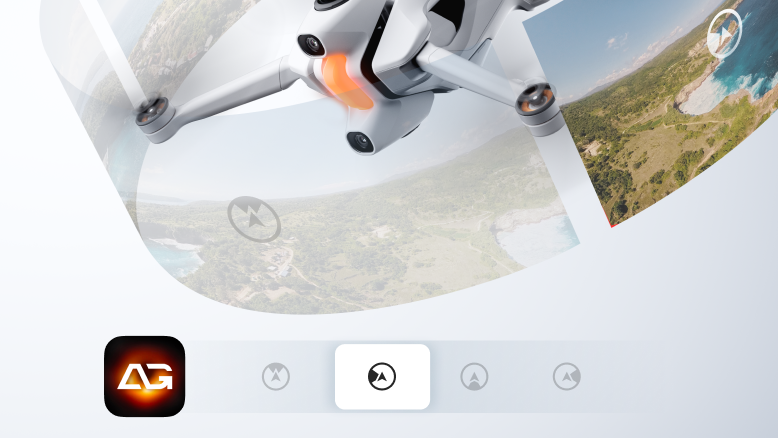
Select the 'Tiny Planet’ View Angle Gear
This effect can be used in either direction: you can start with the Tiny Planet effect and unfold into your scene, or collapse into Tiny Planet at the end for a striking visual finish.
Barrel Roll
Do a barrel roll! This display of aerial acrobatics spins your footage a full 360 degrees for a dynamic rolling effect.
Set two keyframes around 1-4 seconds apart. For best results, set the horizon to be centered on the first keyframe
Tap 'Roll' on the second keyframe and set it to 360 degrees
Your shot will now do a 360-degree flip
And that’s just the beginning. With Antigravity Studio, the creative possibilities are endless. Mix and match keyframe settings to create unique effects that showcase your personal style.
Deep Track
Using Deep Track, you can keep your shot locked onto the subject of your choice. It’s perfect for keeping up with fast-moving action or smoothly keeping your subject centered in frame. To start, click the Deep Track button and highlight your subject. The camera view will then stay fixed on that subject. If the subject moves out of view due to drone movements or obstructions, a pop-up will let you know Deep Track was interrupted. Simply reselect the subject and continue tracking if you want to continue tracking.
Clip Panel
In the Clip Panel, you can adjust stabilization, stitching, imaging, watermarks, and other settings for your footage. Here are some of the key features:
Stabilization: Turn FlowState Stabilization on or off. When turned off, the footage will play as it was originally recorded.
Stitching: Toggle whether the drone is using propeller guards and select the type of image stitching you want to use.
AI Stitching: Our most advanced stitching algorithm. This option is recommended in most situations, but it also has the highest demands on performance, which can result in choppy playback or slow export speeds.
Optical Flow Stitching: An efficient stitching algorithm. This option is suitable for use when AI Stitching causes playback lag on your computer, or when you need to quickly export multiple videos.
Dynamic Stitching: A specialized stitching algorithm. Under normal circumstances, the other options offer superior results.
Off: Disables stitching algorithms and utilizes standard stitching. Generally not recommended, but can be tried in clips involving rapid scene changes or complex environments.
Imaging: Contains a wide variety of image settings you can use to adjust the look of your videos. Here's a brief rundown.
Exposure — Adjusts the overall lightness or darkness of the image.
Highlights — Controls detail and brightness in the brightest parts of the image.
Shadow — Adjusts detail and brightness in the darkest areas of the image.
Contrast — Increases or decreases the difference between light and dark tones.
Brightness — Makes the entire image appear lighter or darker.
Black Point — Sets how deep and rich the darkest parts of the image appear.
Saturation — Adjusts the intensity of all colors in the image.
Vibrance — Boosts muted colors more gently while protecting natural skin tones.
Temp — Warms or cools the image by shifting the color balance toward orange or blue.
Tint — Fine-tunes color balance by adding more green or magenta.
Definition — Enhances fine detail and texture to make the image look sharper.
You can also enable Motion ND to add a motion blur for a more natural look, Color Plus to enhance color richness, and Clarity Plus to improve sharpness (Note: Color Plus and Clarity Plus cannot be used at the same time). Experiment with these settings to find the look that works best for your work.
When you’ve finished editing, you can add the final touches to your video by going to the effects section in the Library (Project Only). There, you can choose an emotional soundtrack from our music collection, add stylish transitions to move seamlessly from clip to clip, or include text to give your story even more depth. Once everything is ready, click Export at the top. After your project finishes exporting, your video will be ready to share!