
According to the Civil Aviation Act, all unmanned aerial vehicles (UAVs) weighing 100 grams or more in Japan are required to be registered in accordance with the law, and the UAV registration number must be entered into the Remote ID module of the drone. Antigravity A1 is equipped with a built-in Remote ID module. You will need to input the drone registration number obtained from
the DISP official website into your drone.
To do this, perform the following actions:
Registration Number Application
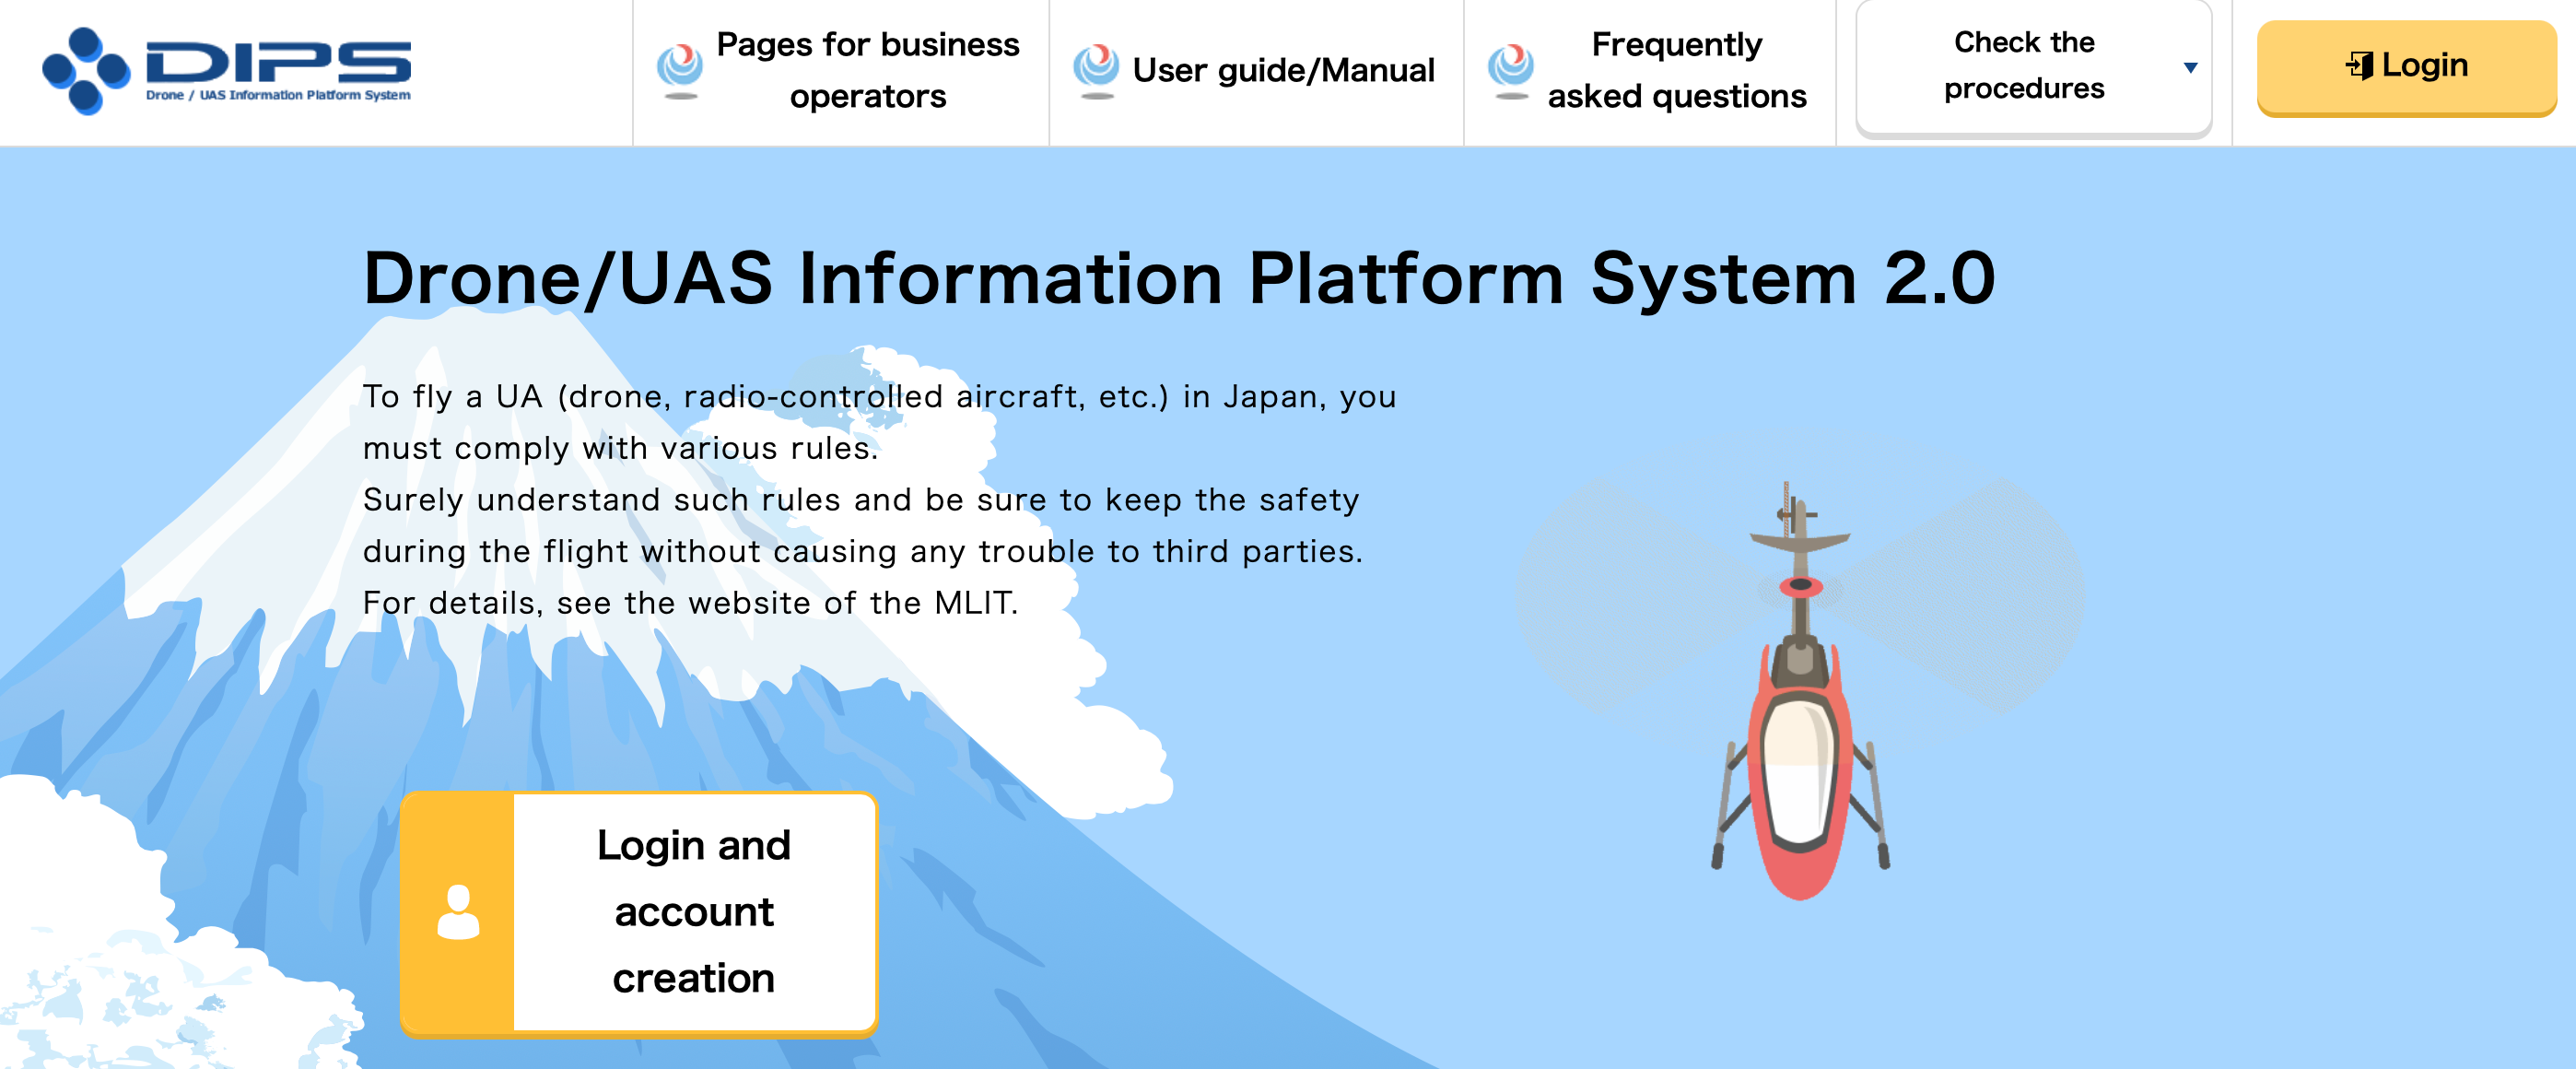
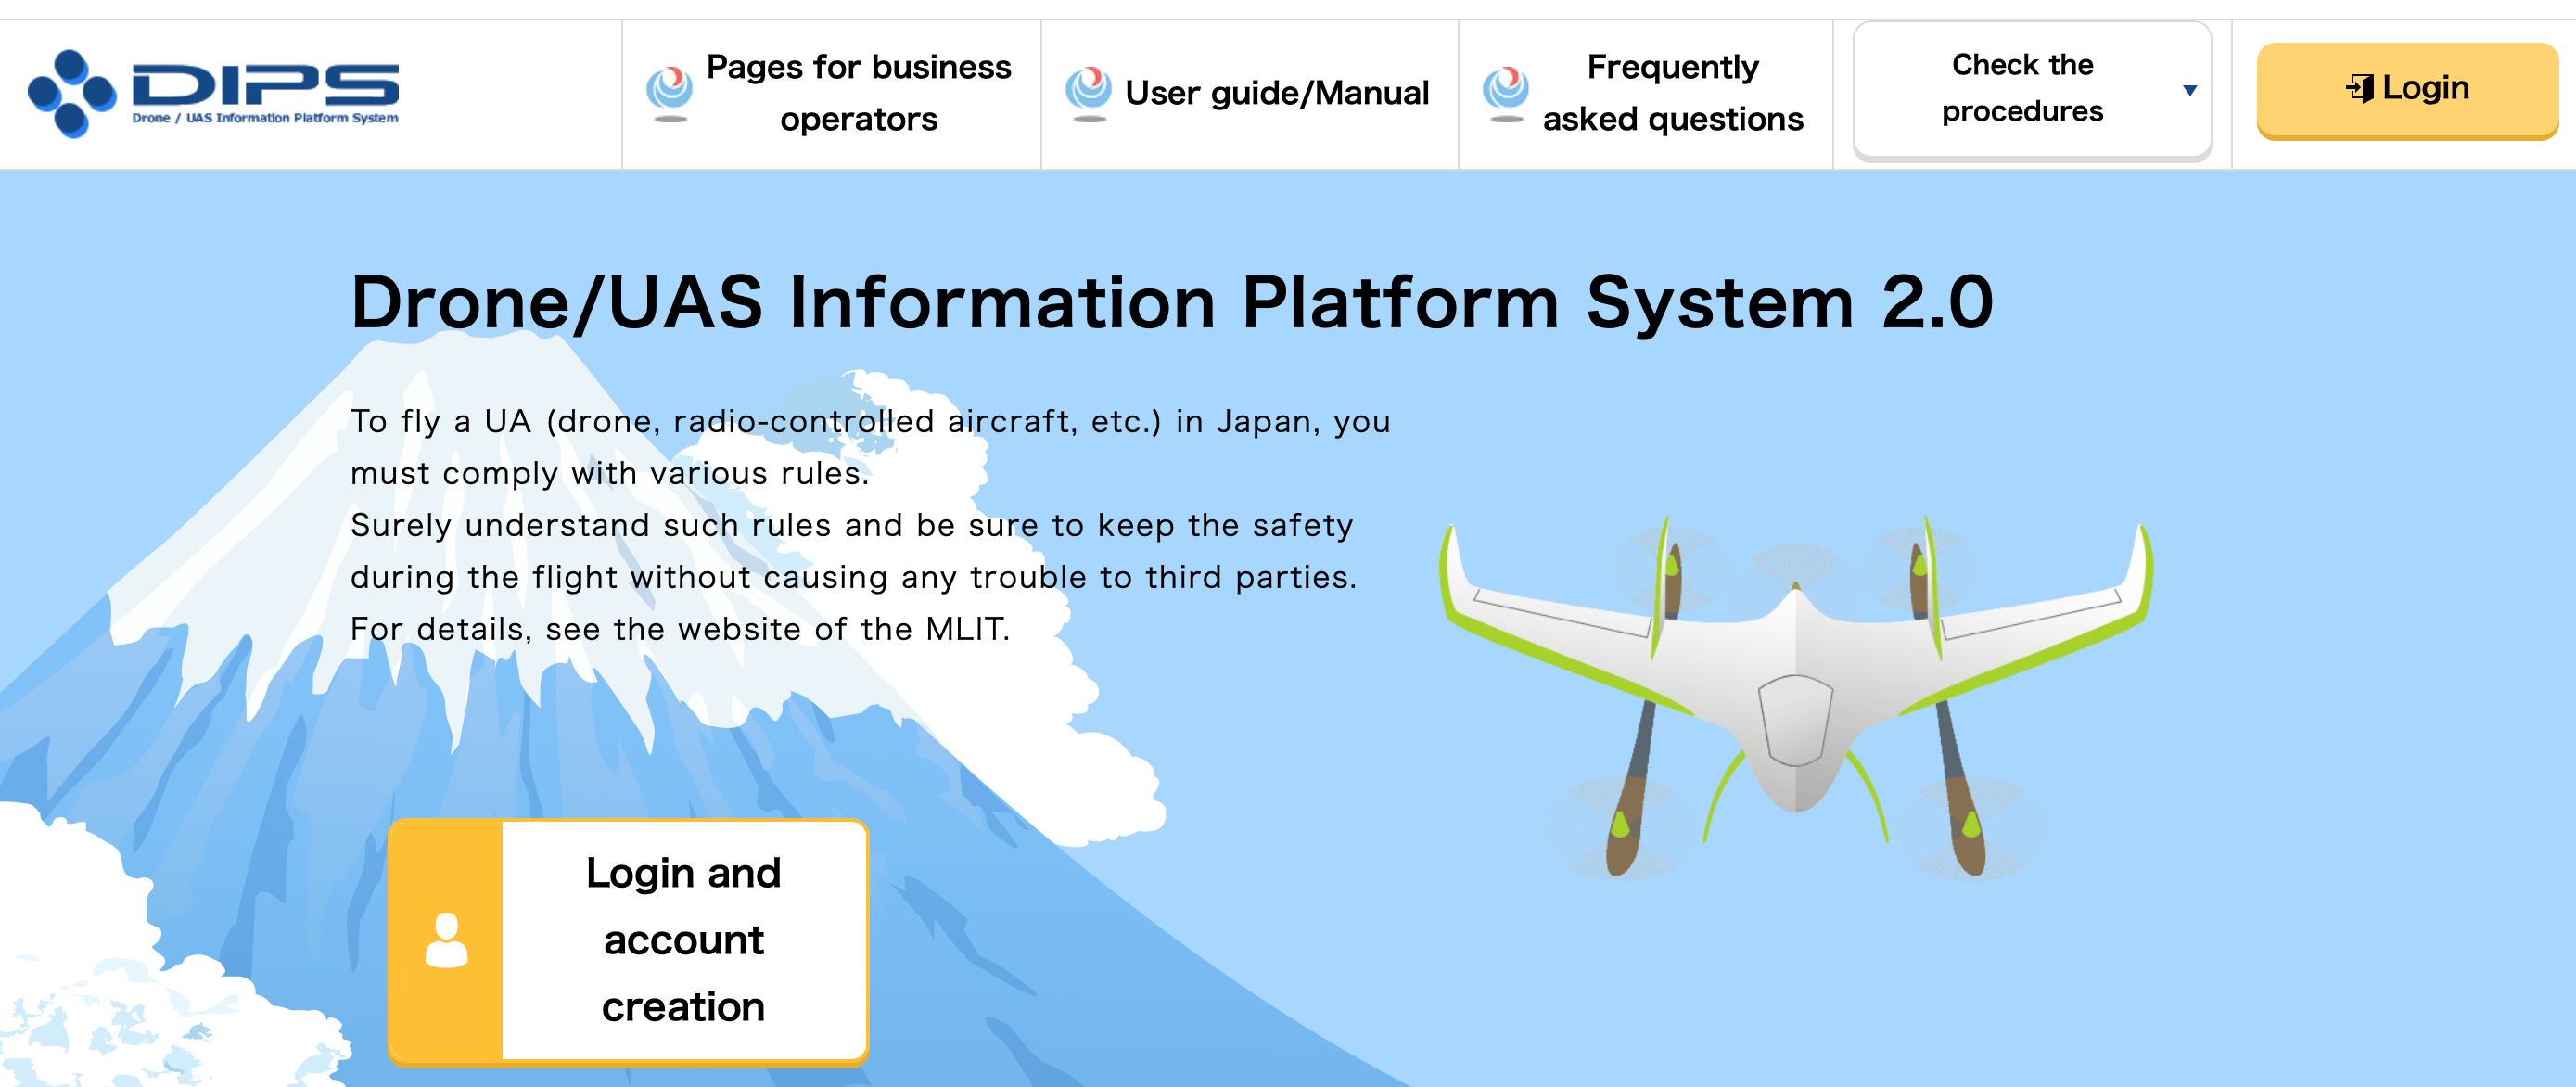
1.Access the System
Visit the website: https://www.ossportal.dips.mlit.go.jp/portal/top and click to enter the official application system.
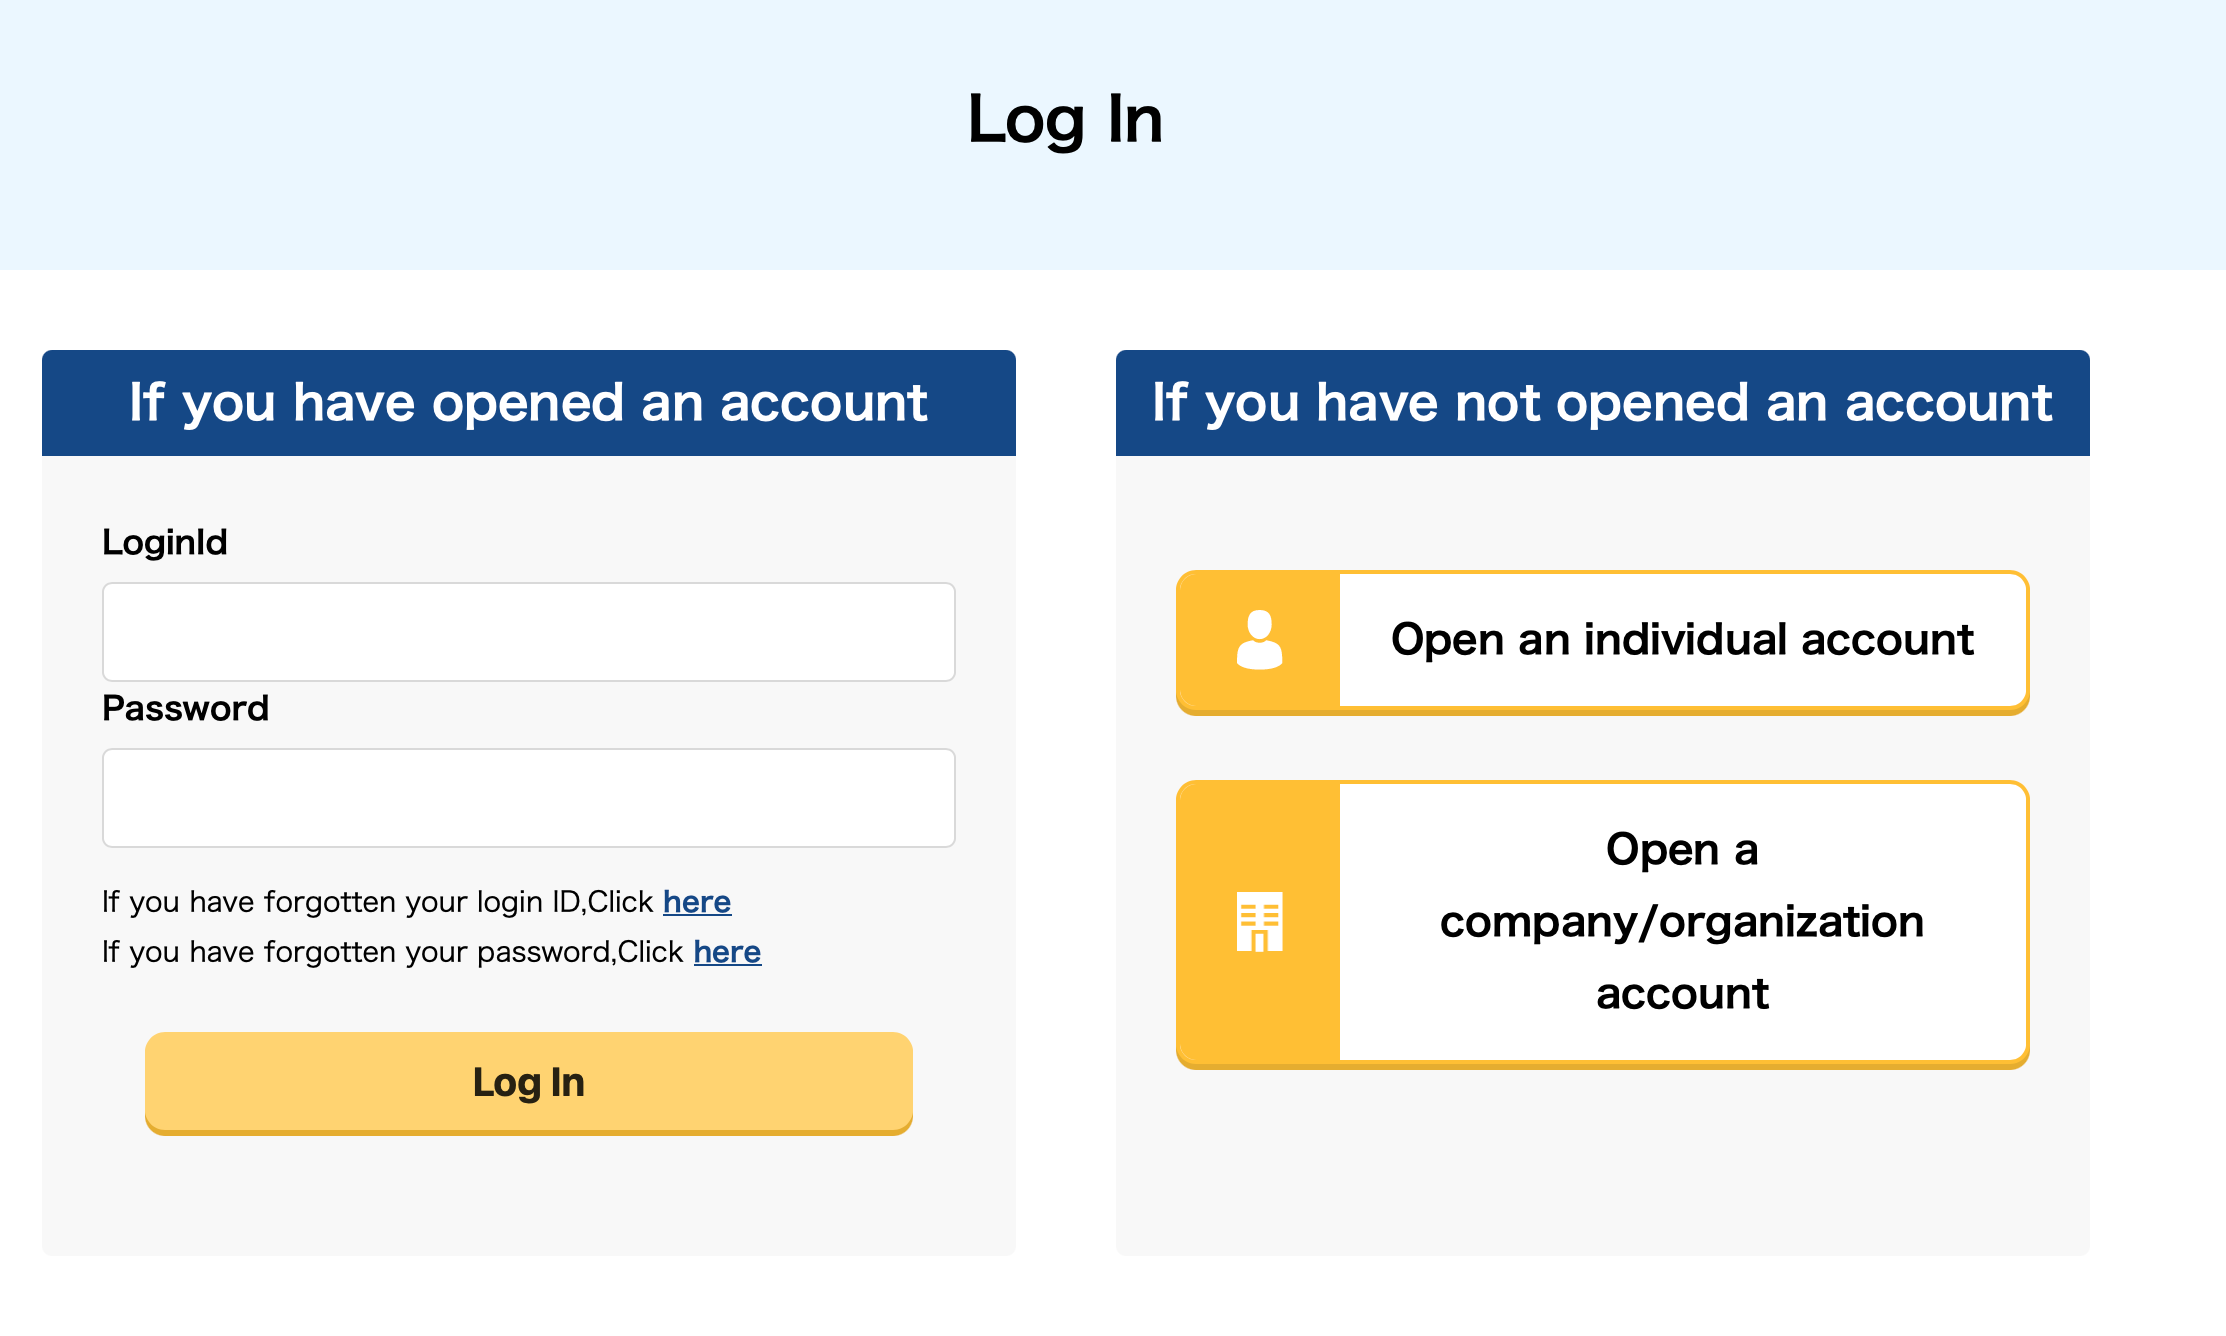
2.Register an Account
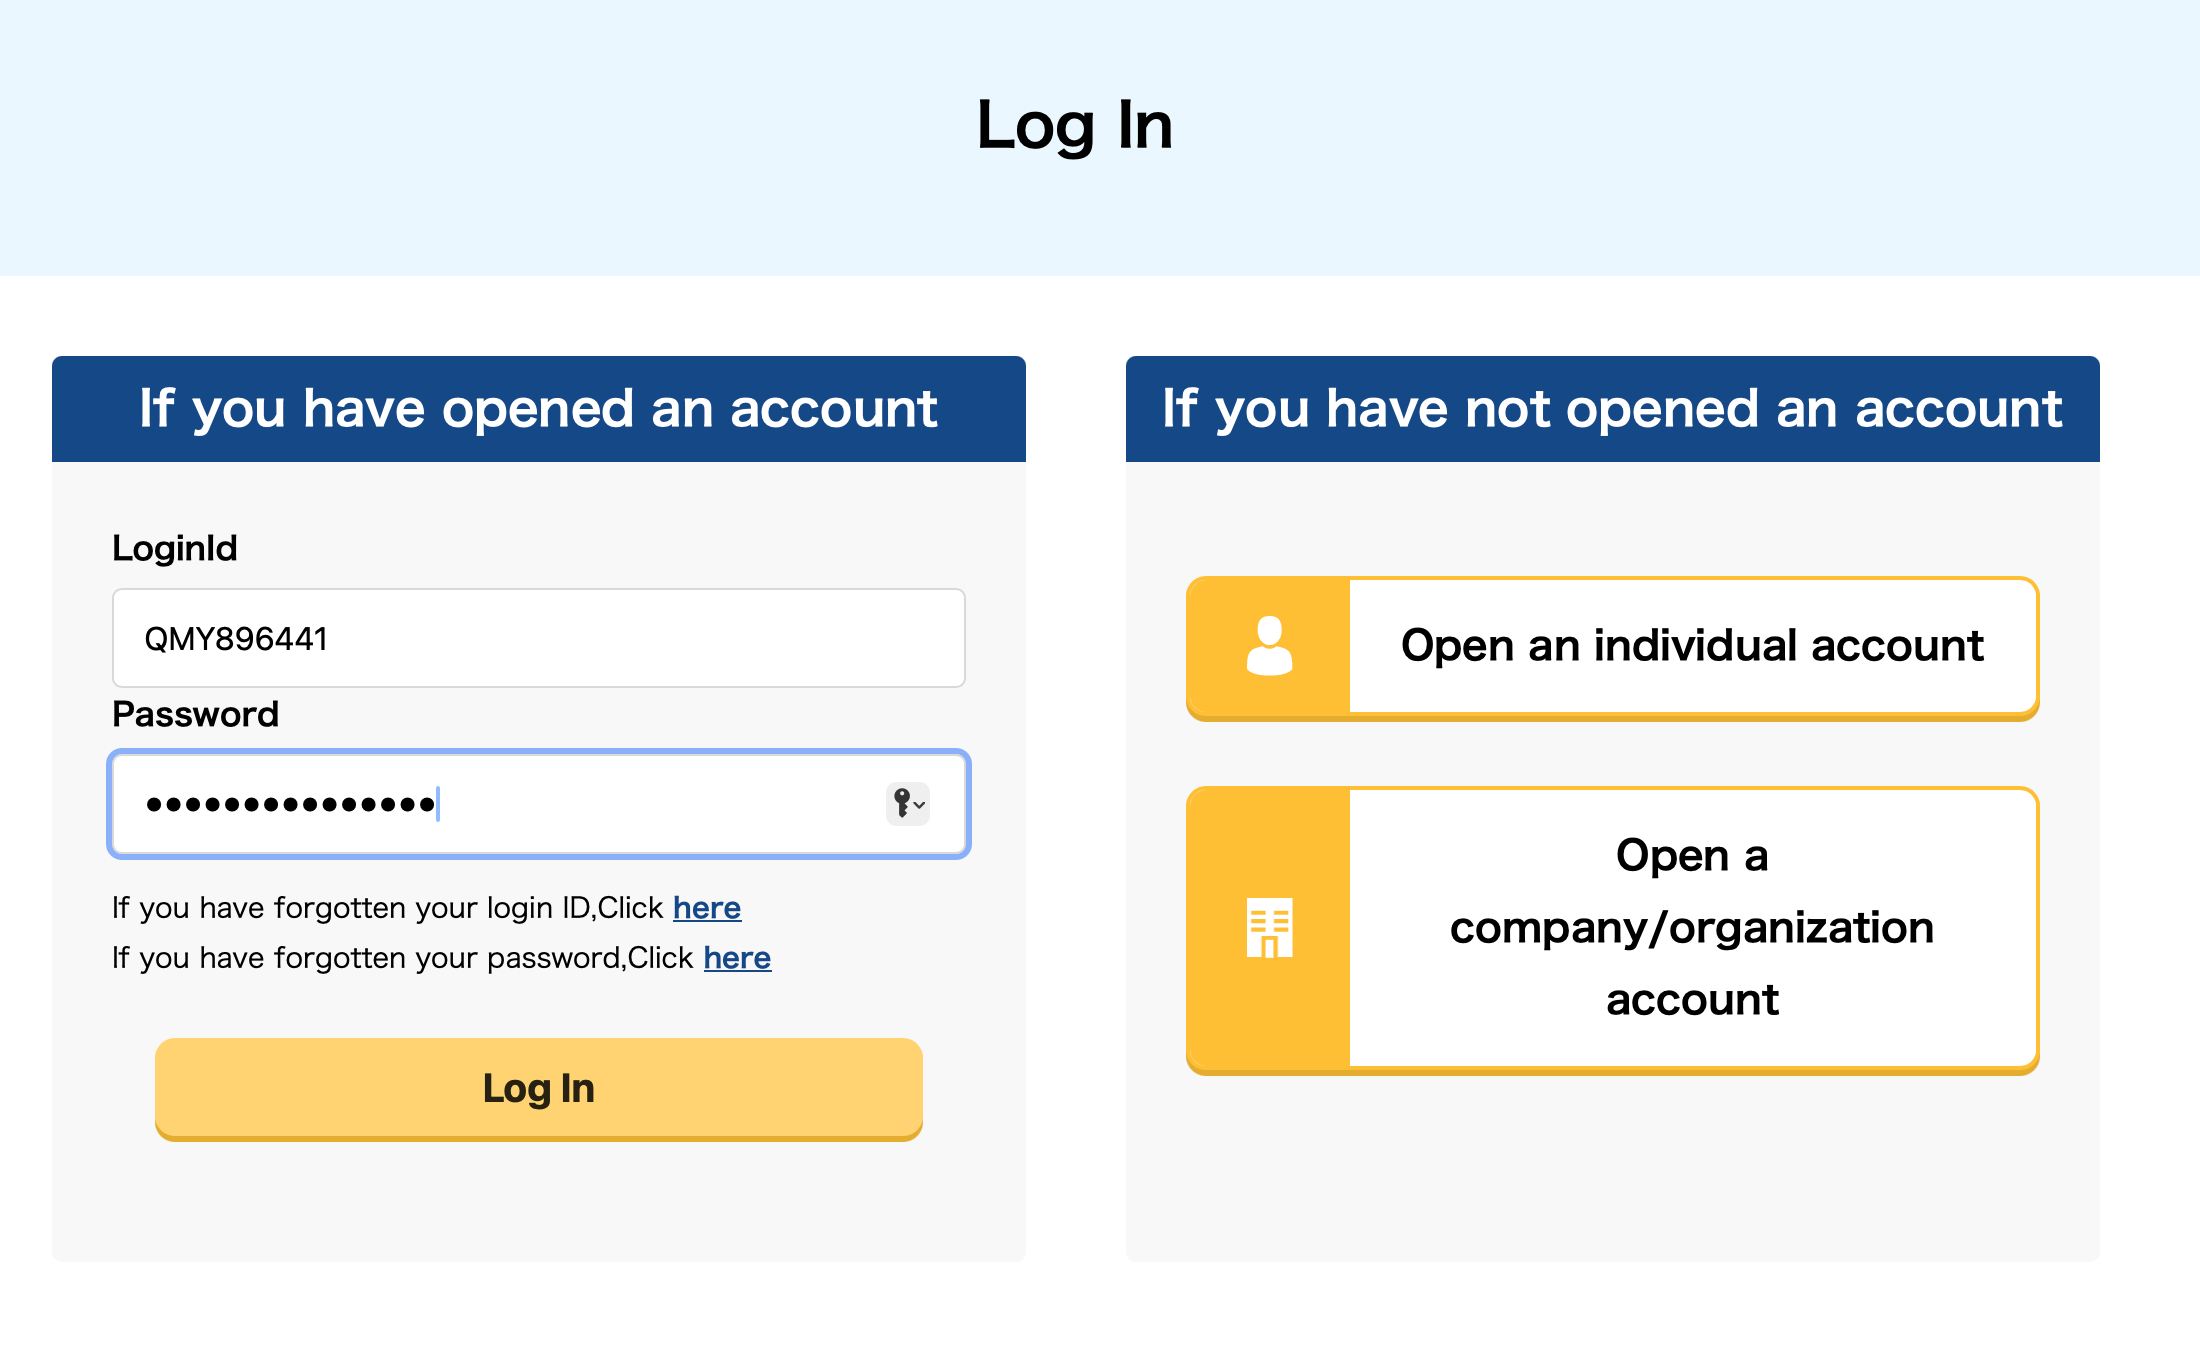
2.1Click the "Login and account creation" button on the page. On the redirected page, select "Open an individual account" to start the registration process. | ||
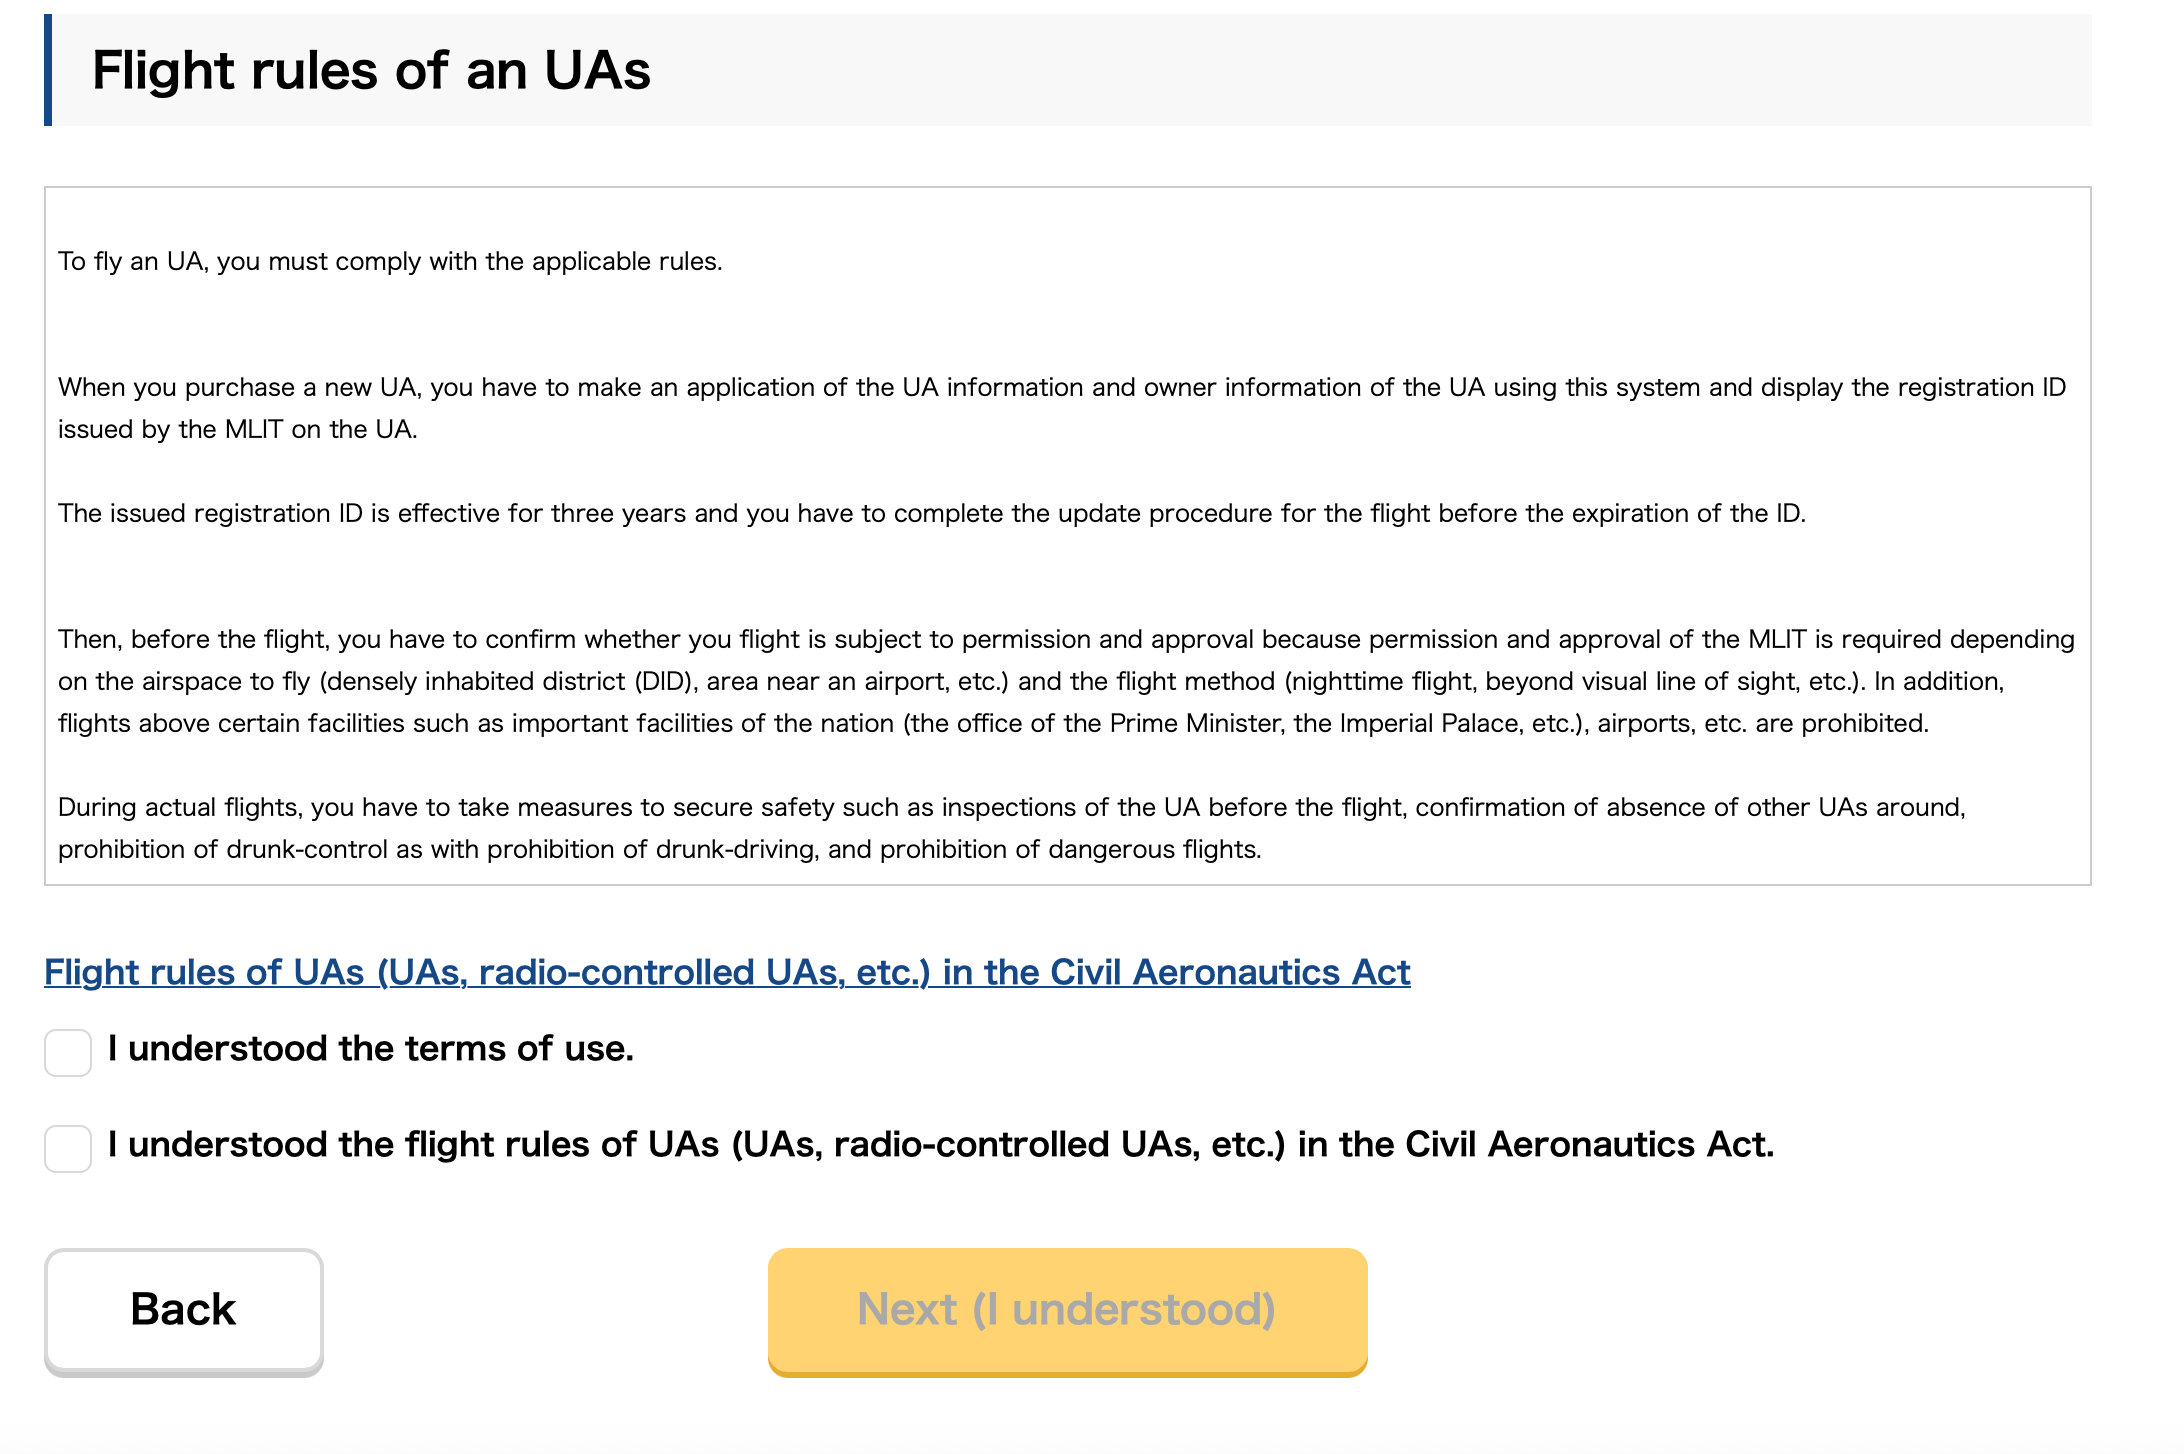
2.2Carefully read the relevant terms and conditions displayed on the system. After confirming there are no issues, check the "Agree" box. 【Note】If the "Agree" box cannot be checked, first scroll through and review the entire text of the terms completely. Then click the blue associated links within the terms to finish viewing them before attempting to check the box again. | ||
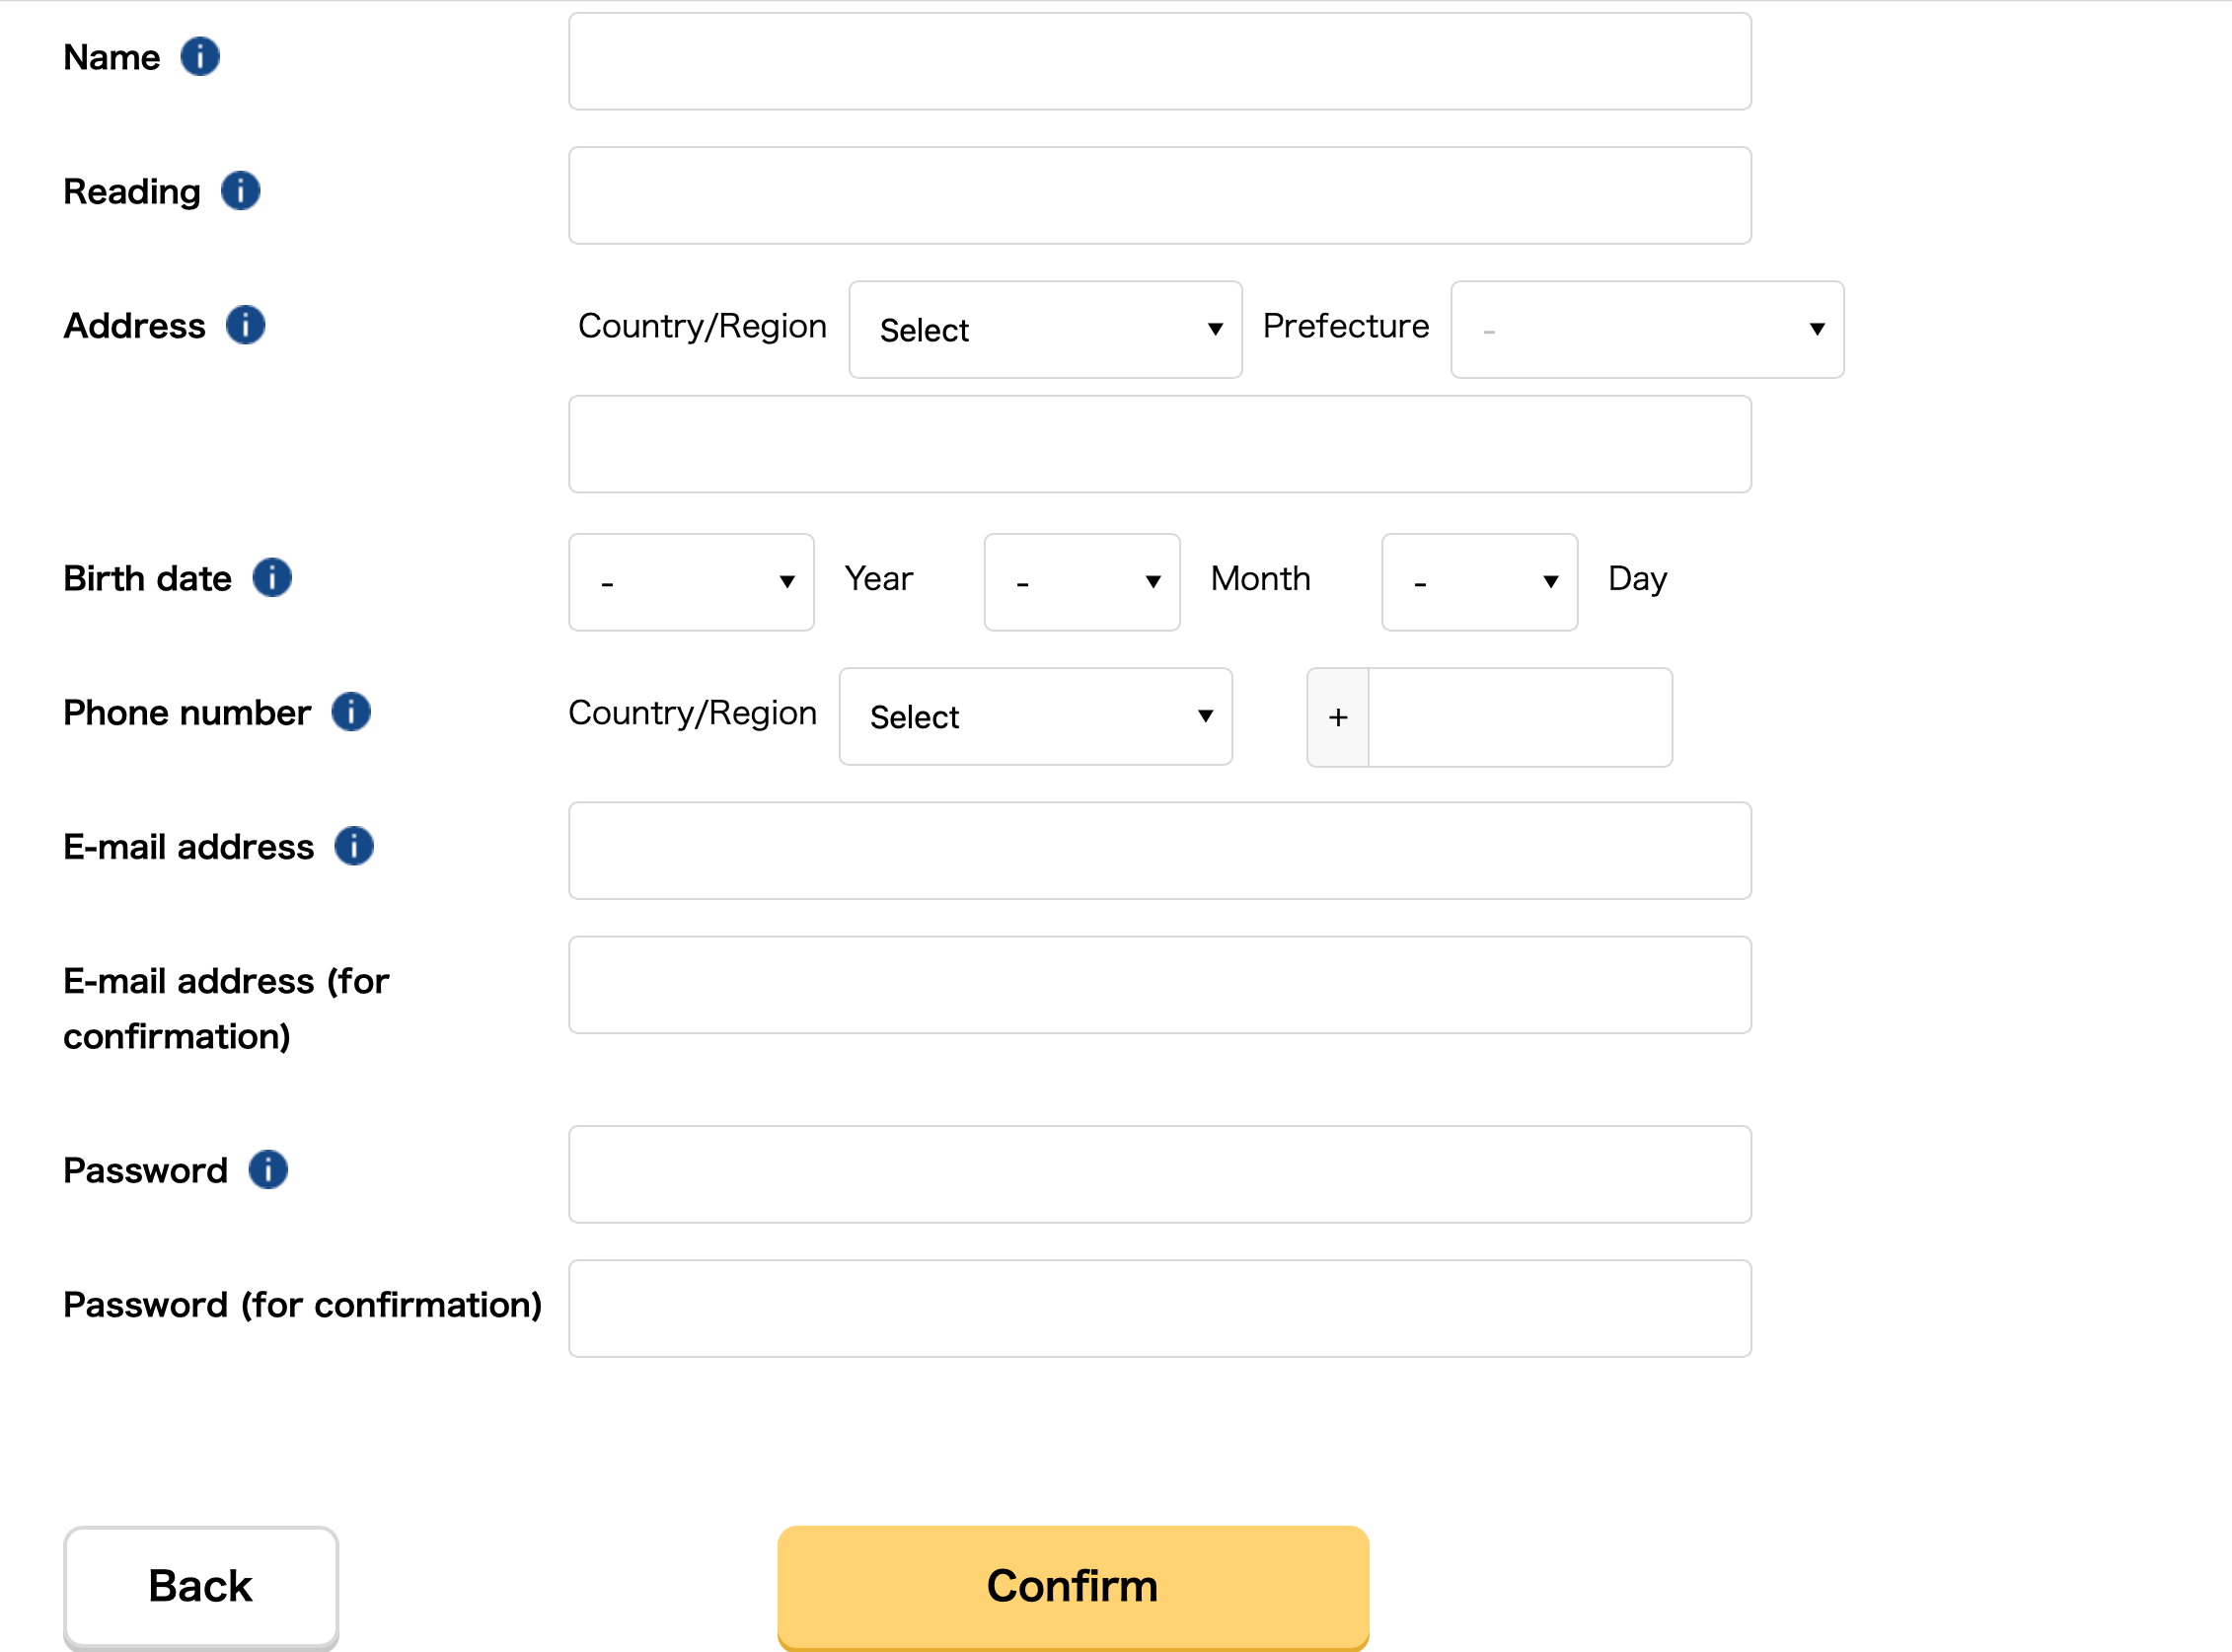
2.3Fill in your personal information completely in sequence as prompted by the system. 【Note】Address (consistent with the address on the driver's license), Phone number (enter the number after selecting the region) | ||
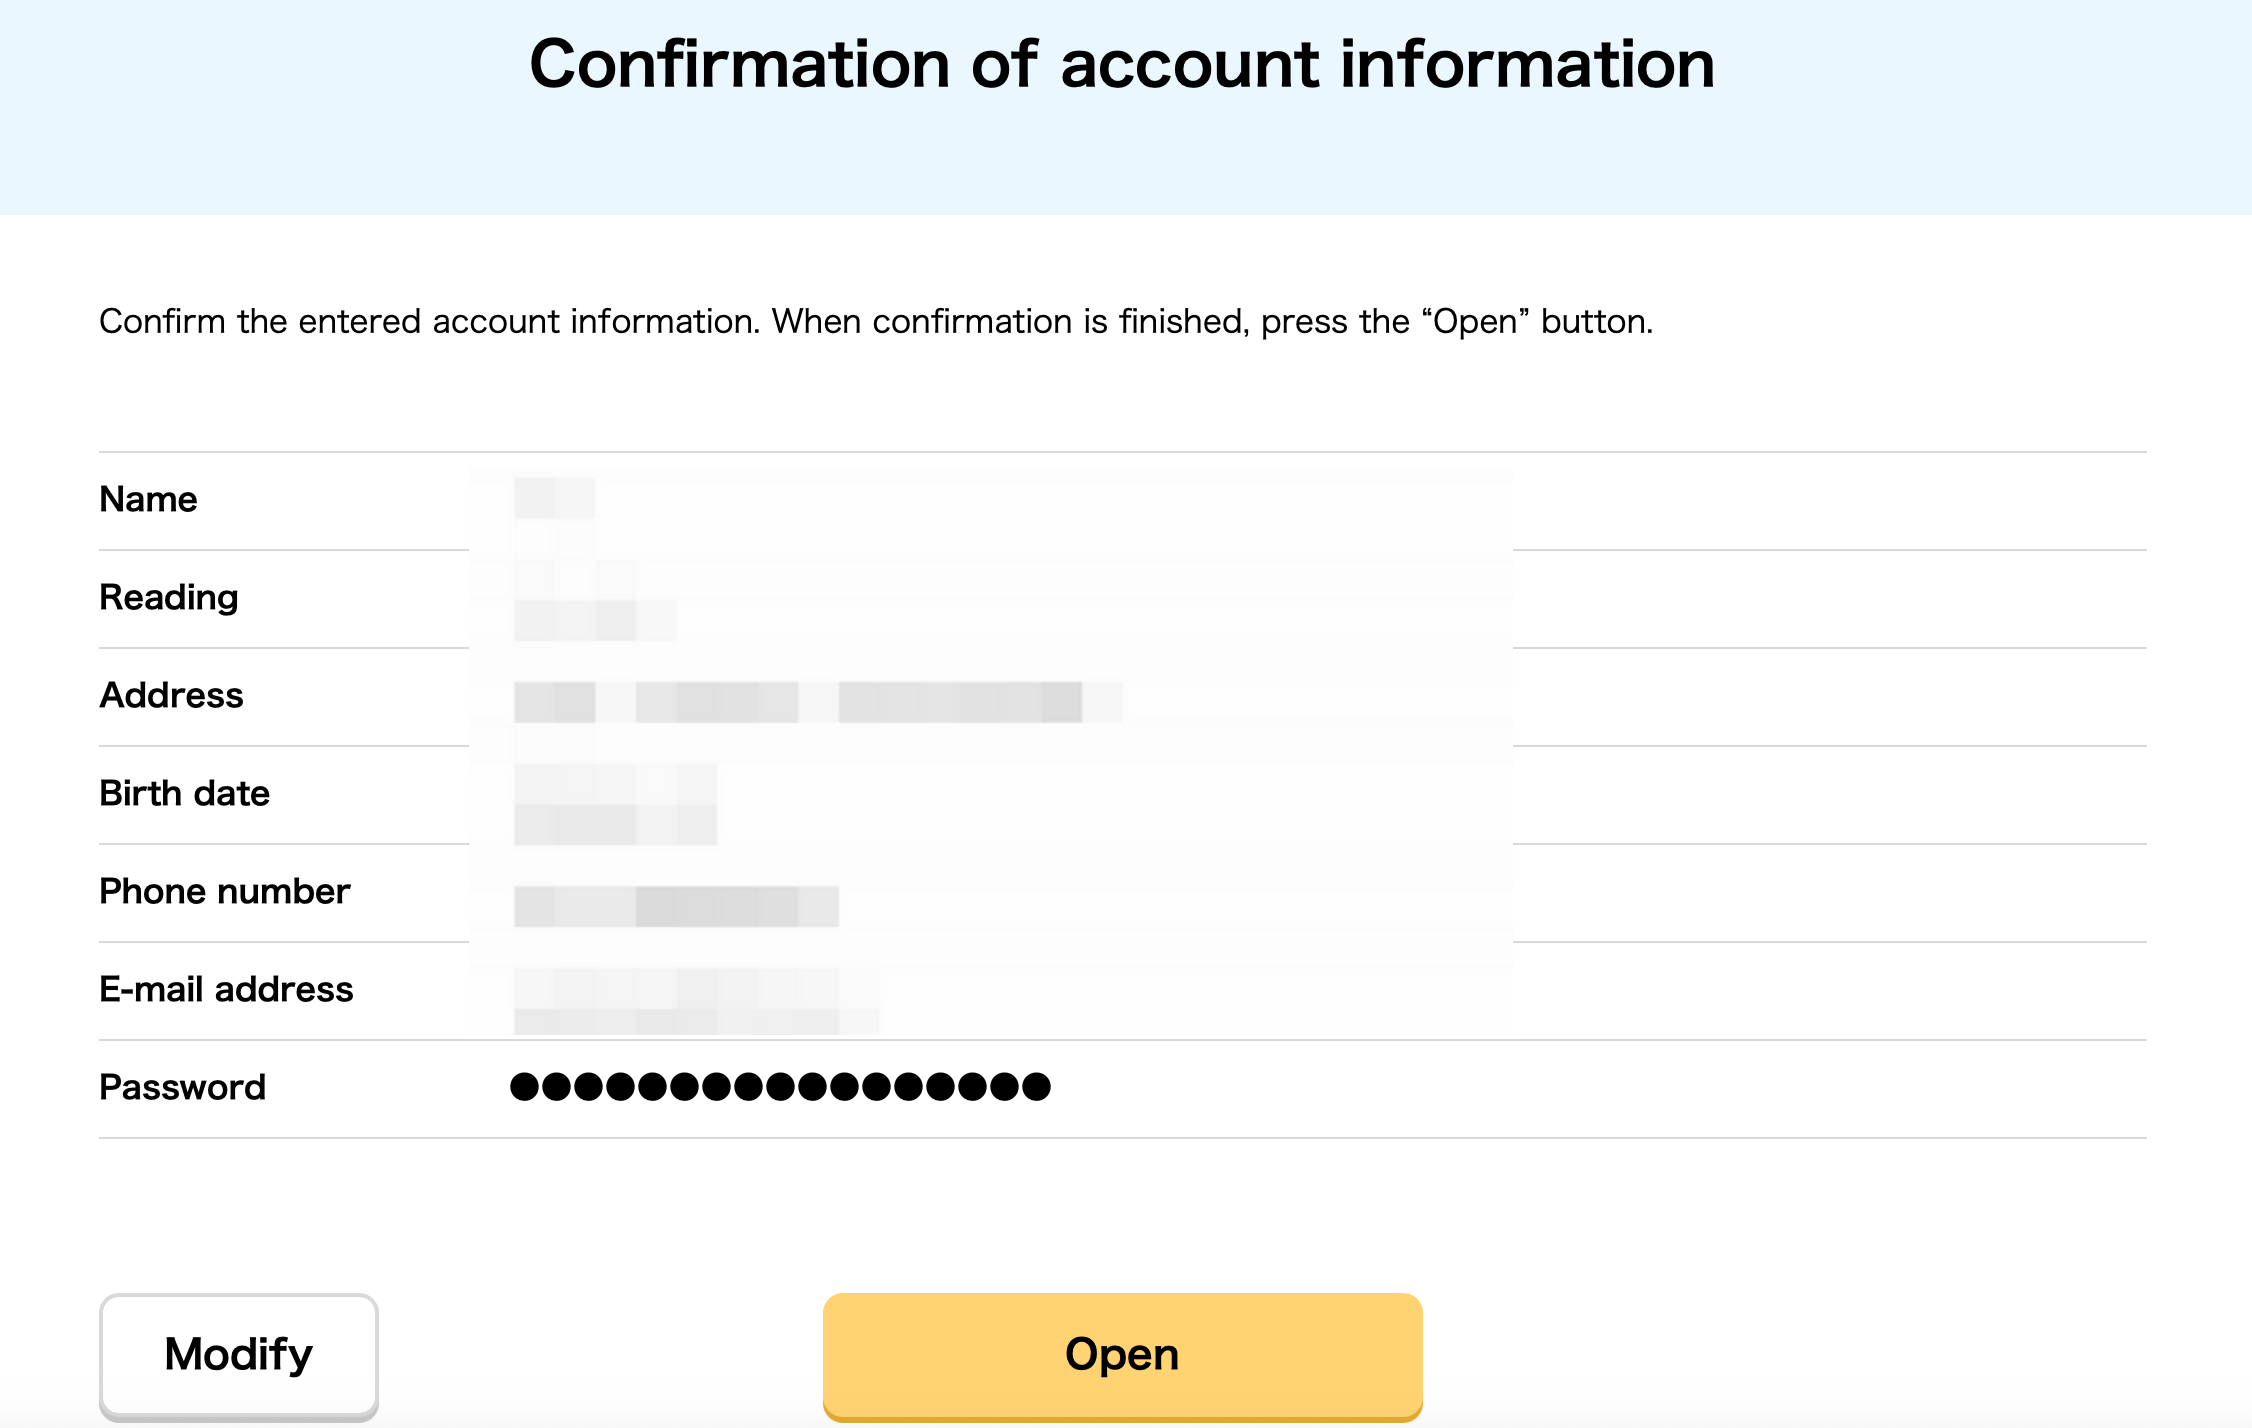
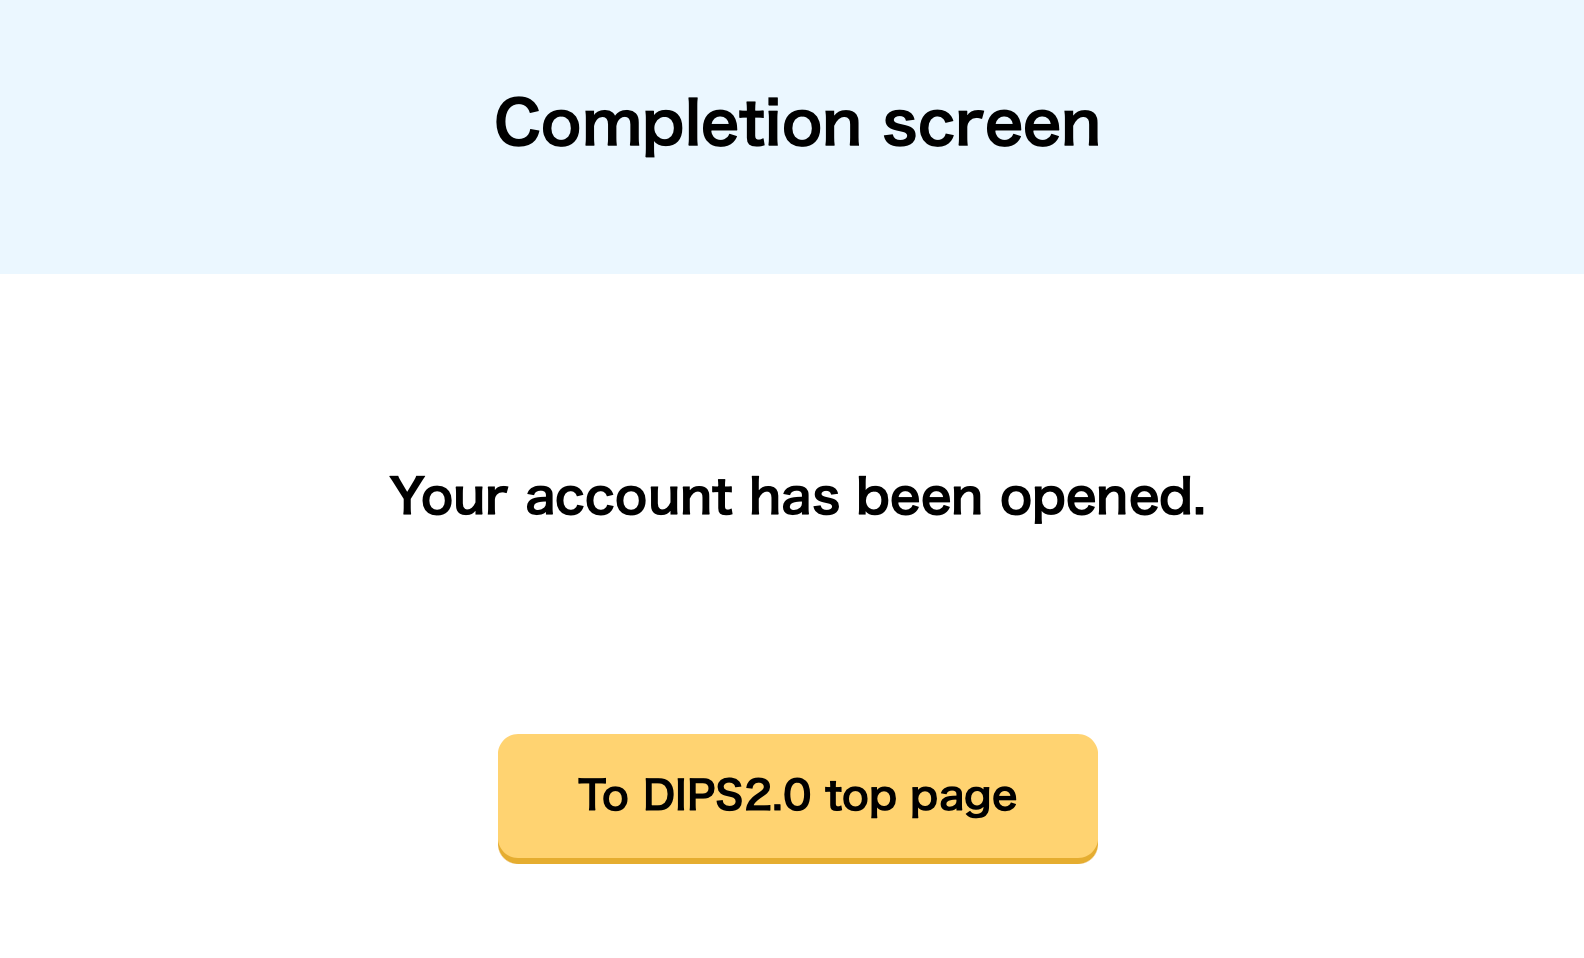
2.4Carefully check the filled-in personal information. After confirming it is correct, click "Open" to complete the submission; if the information needs modification, click "Modify" to return to the editing page for adjustments. After confirmation, click "Go to DIPS2.0 Homepage". | ||
3. Register drone information
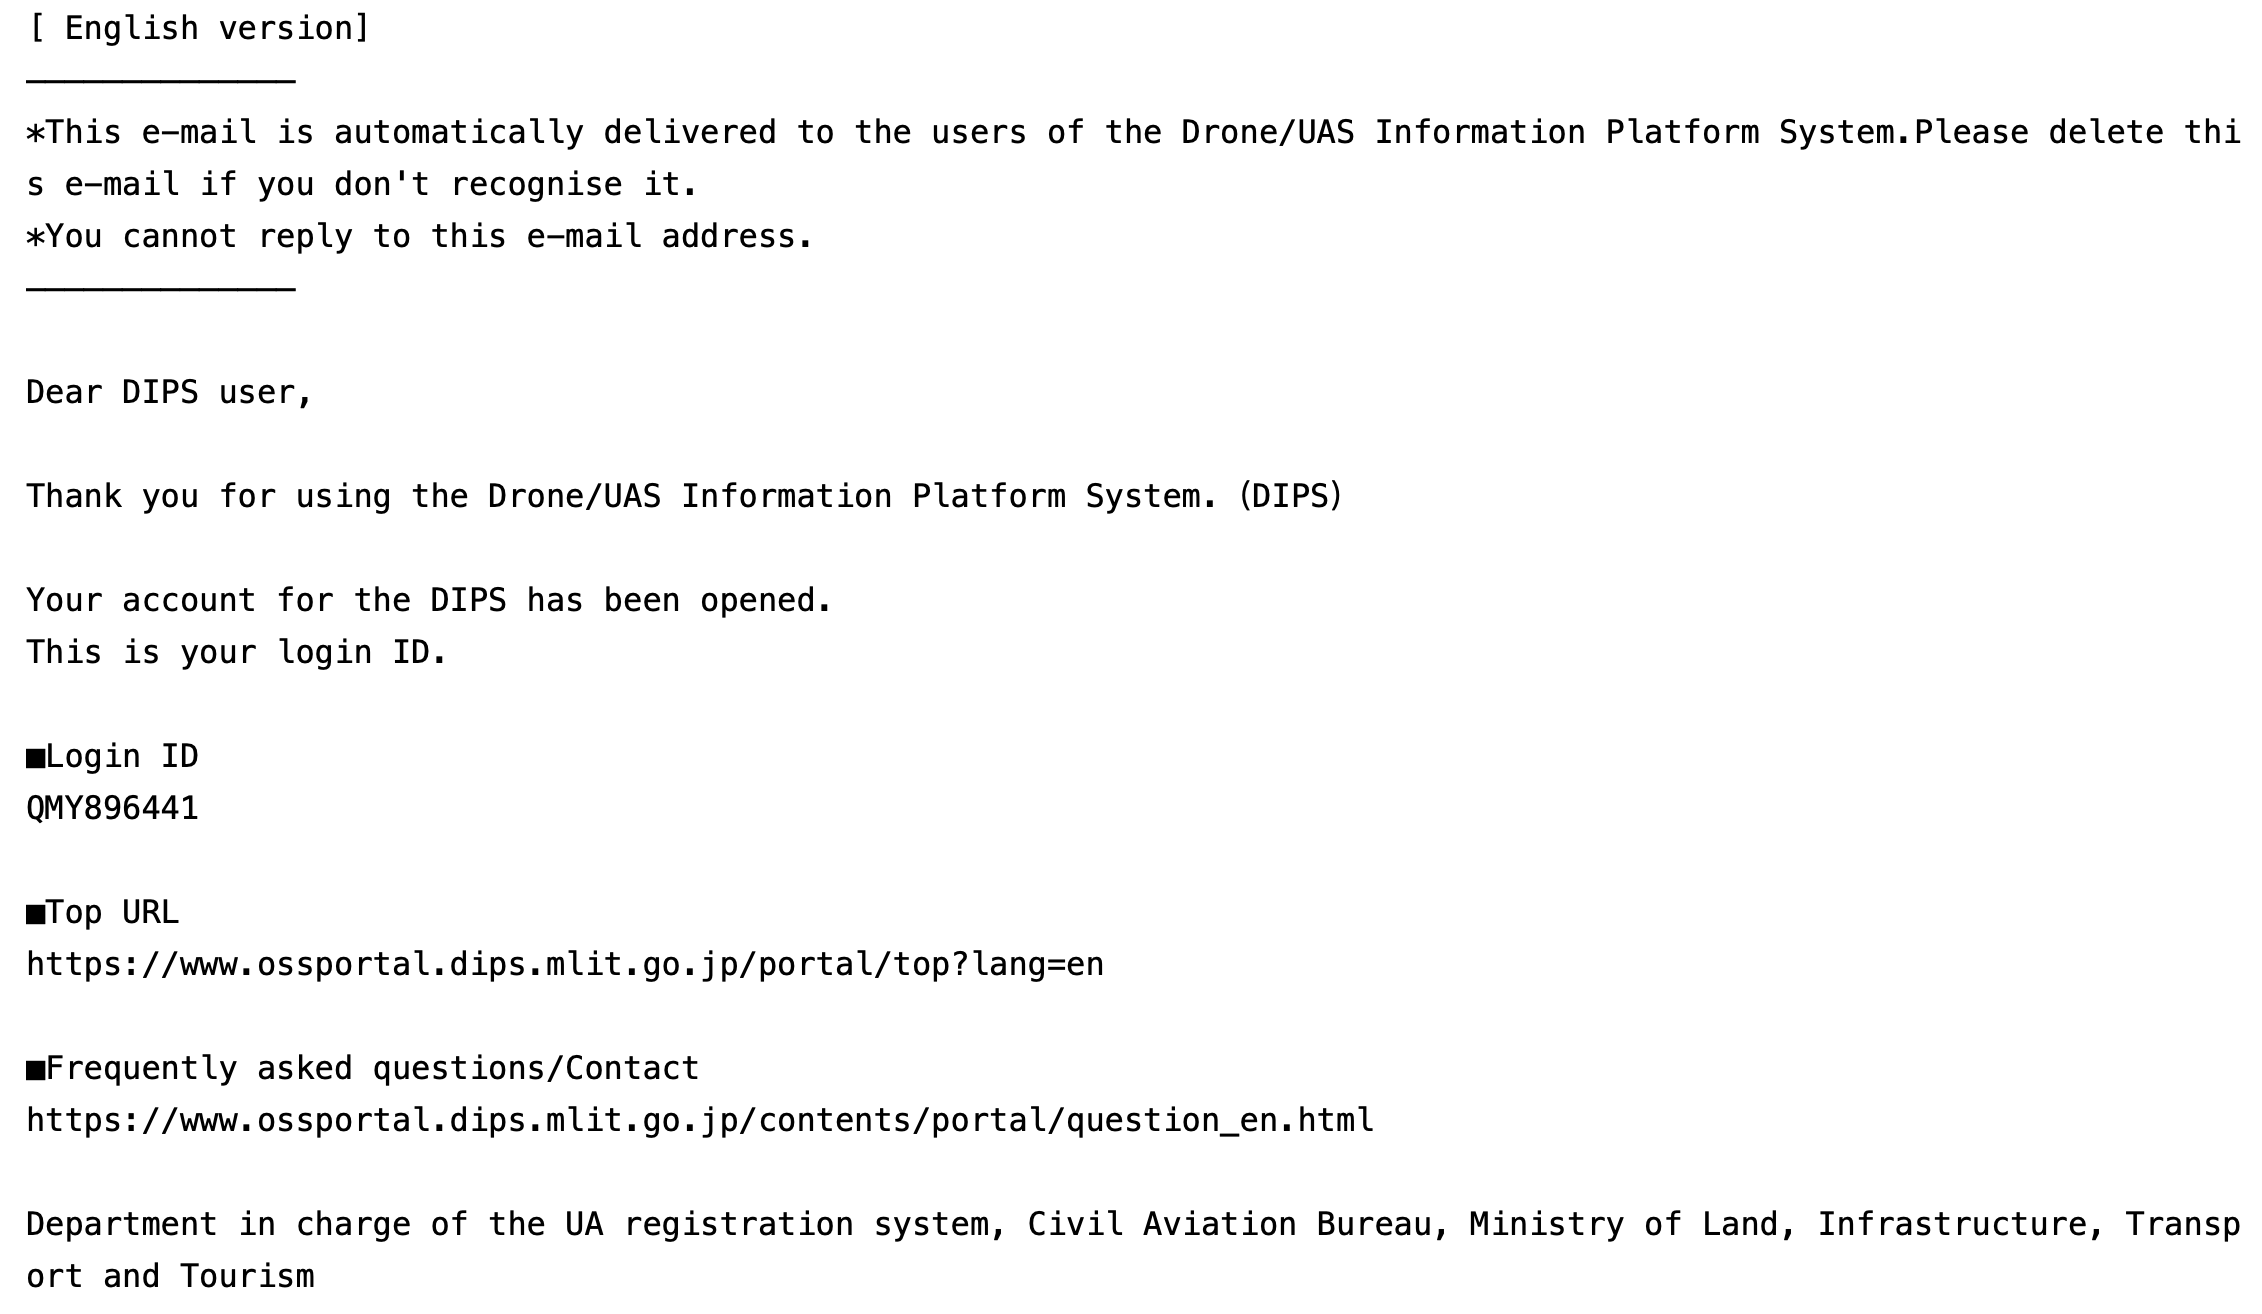
3.1After completing the account registration, you will receive an official email containing your login ID. Copy the login ID, then return to the website homepage. Log into the system by entering the login ID and password from the email accurately to complete the login. | |
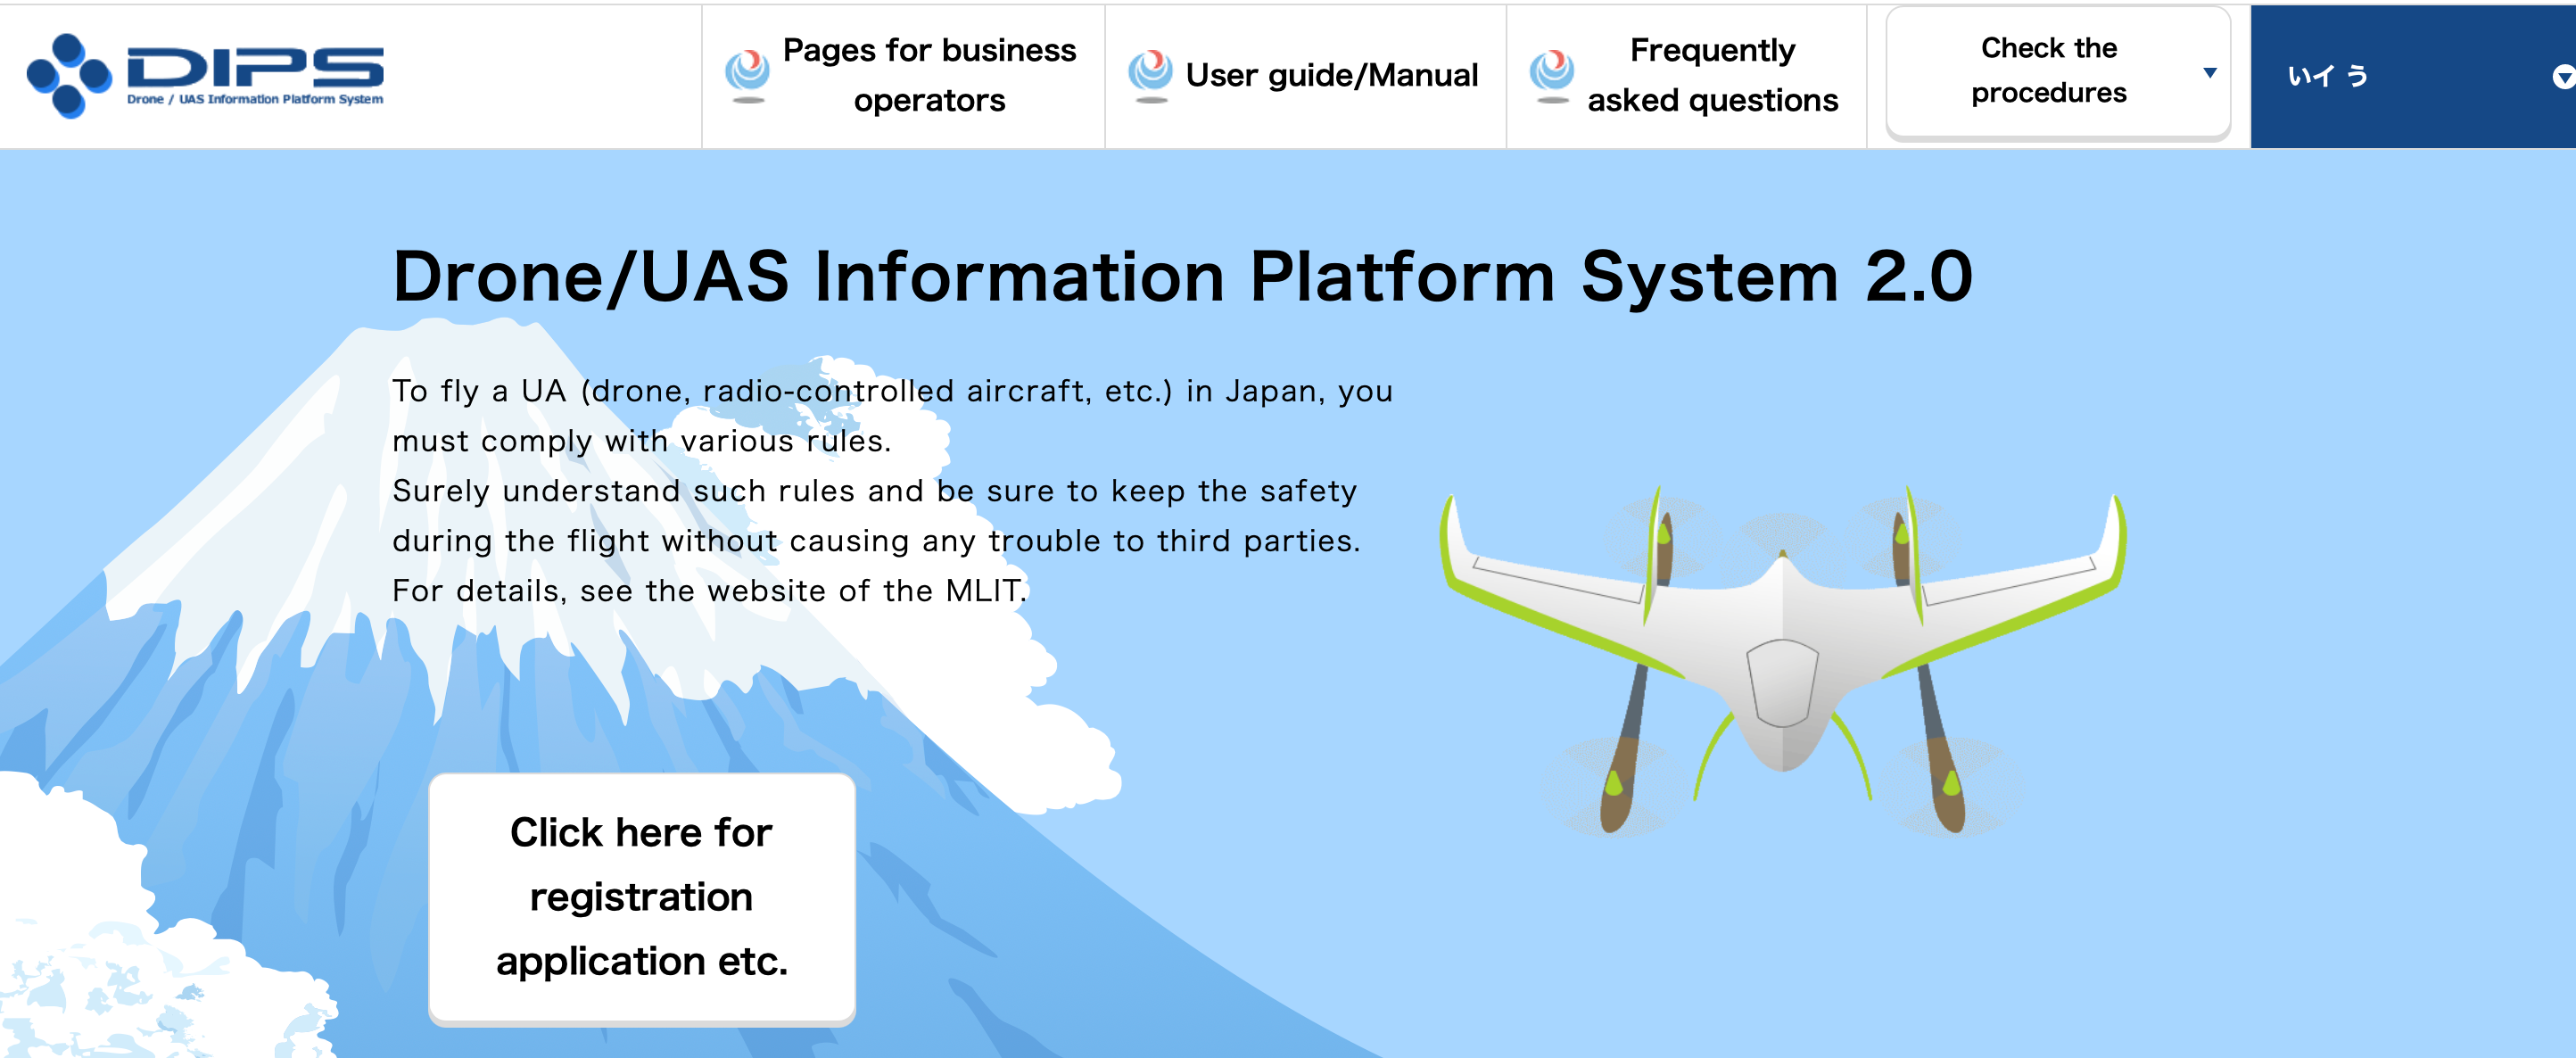
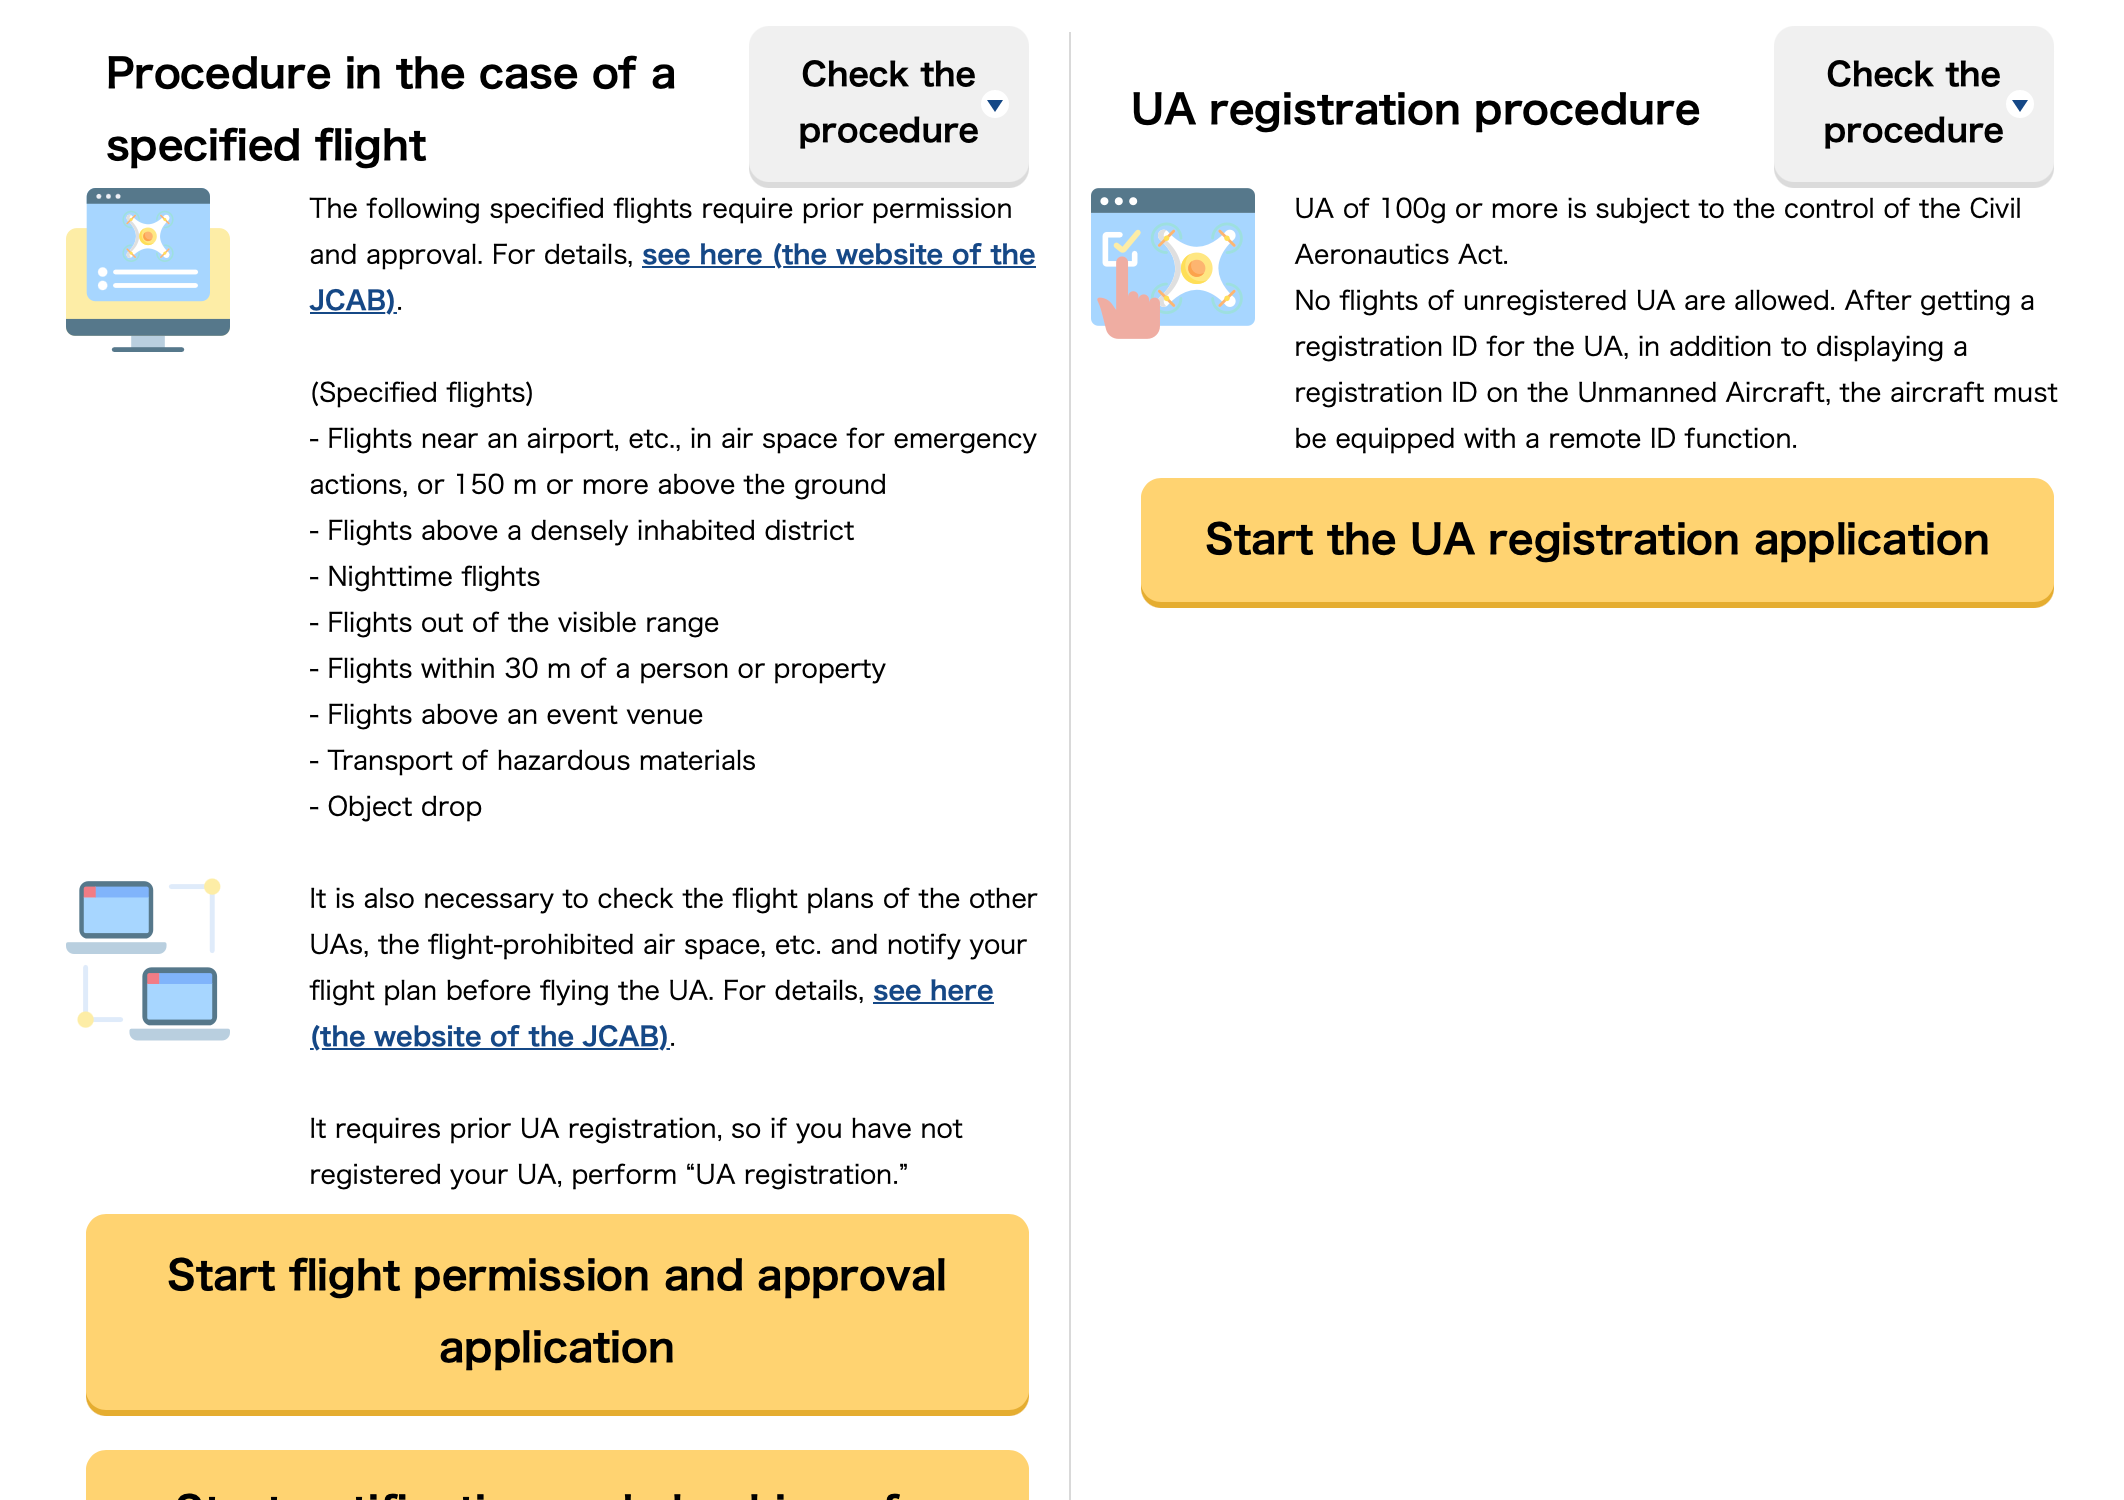
3.2After logging in, click "Click here for Registration application etc." on the system main interface. | |
3.3After being redirected to this interface, click "Start the UA registration application" on the right to start the registration process. | |
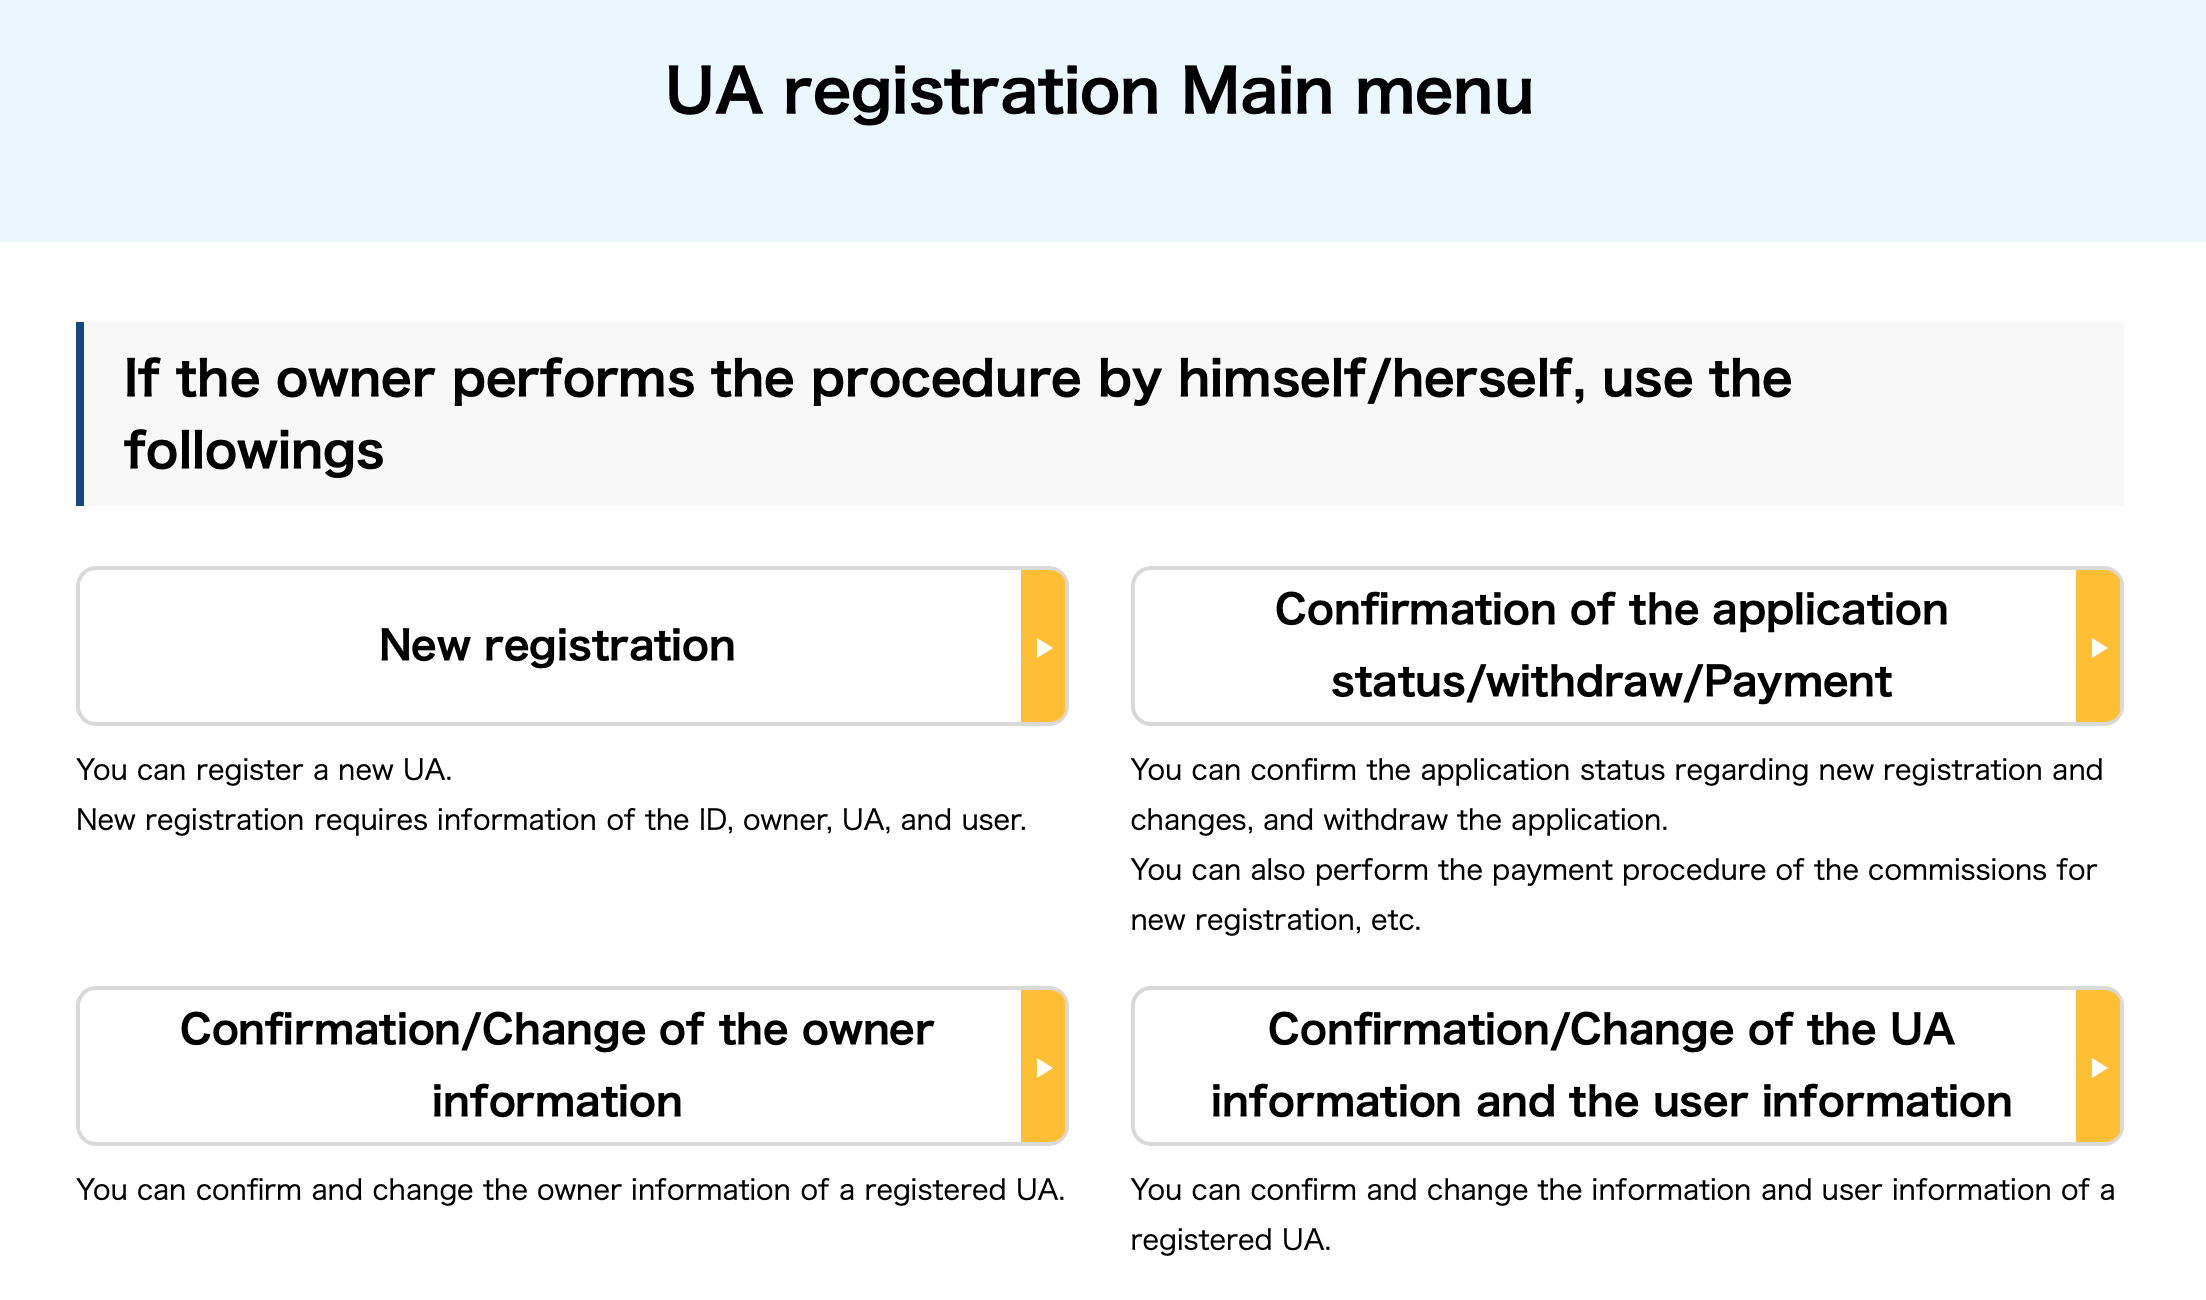
3.4Select "New registration". | |
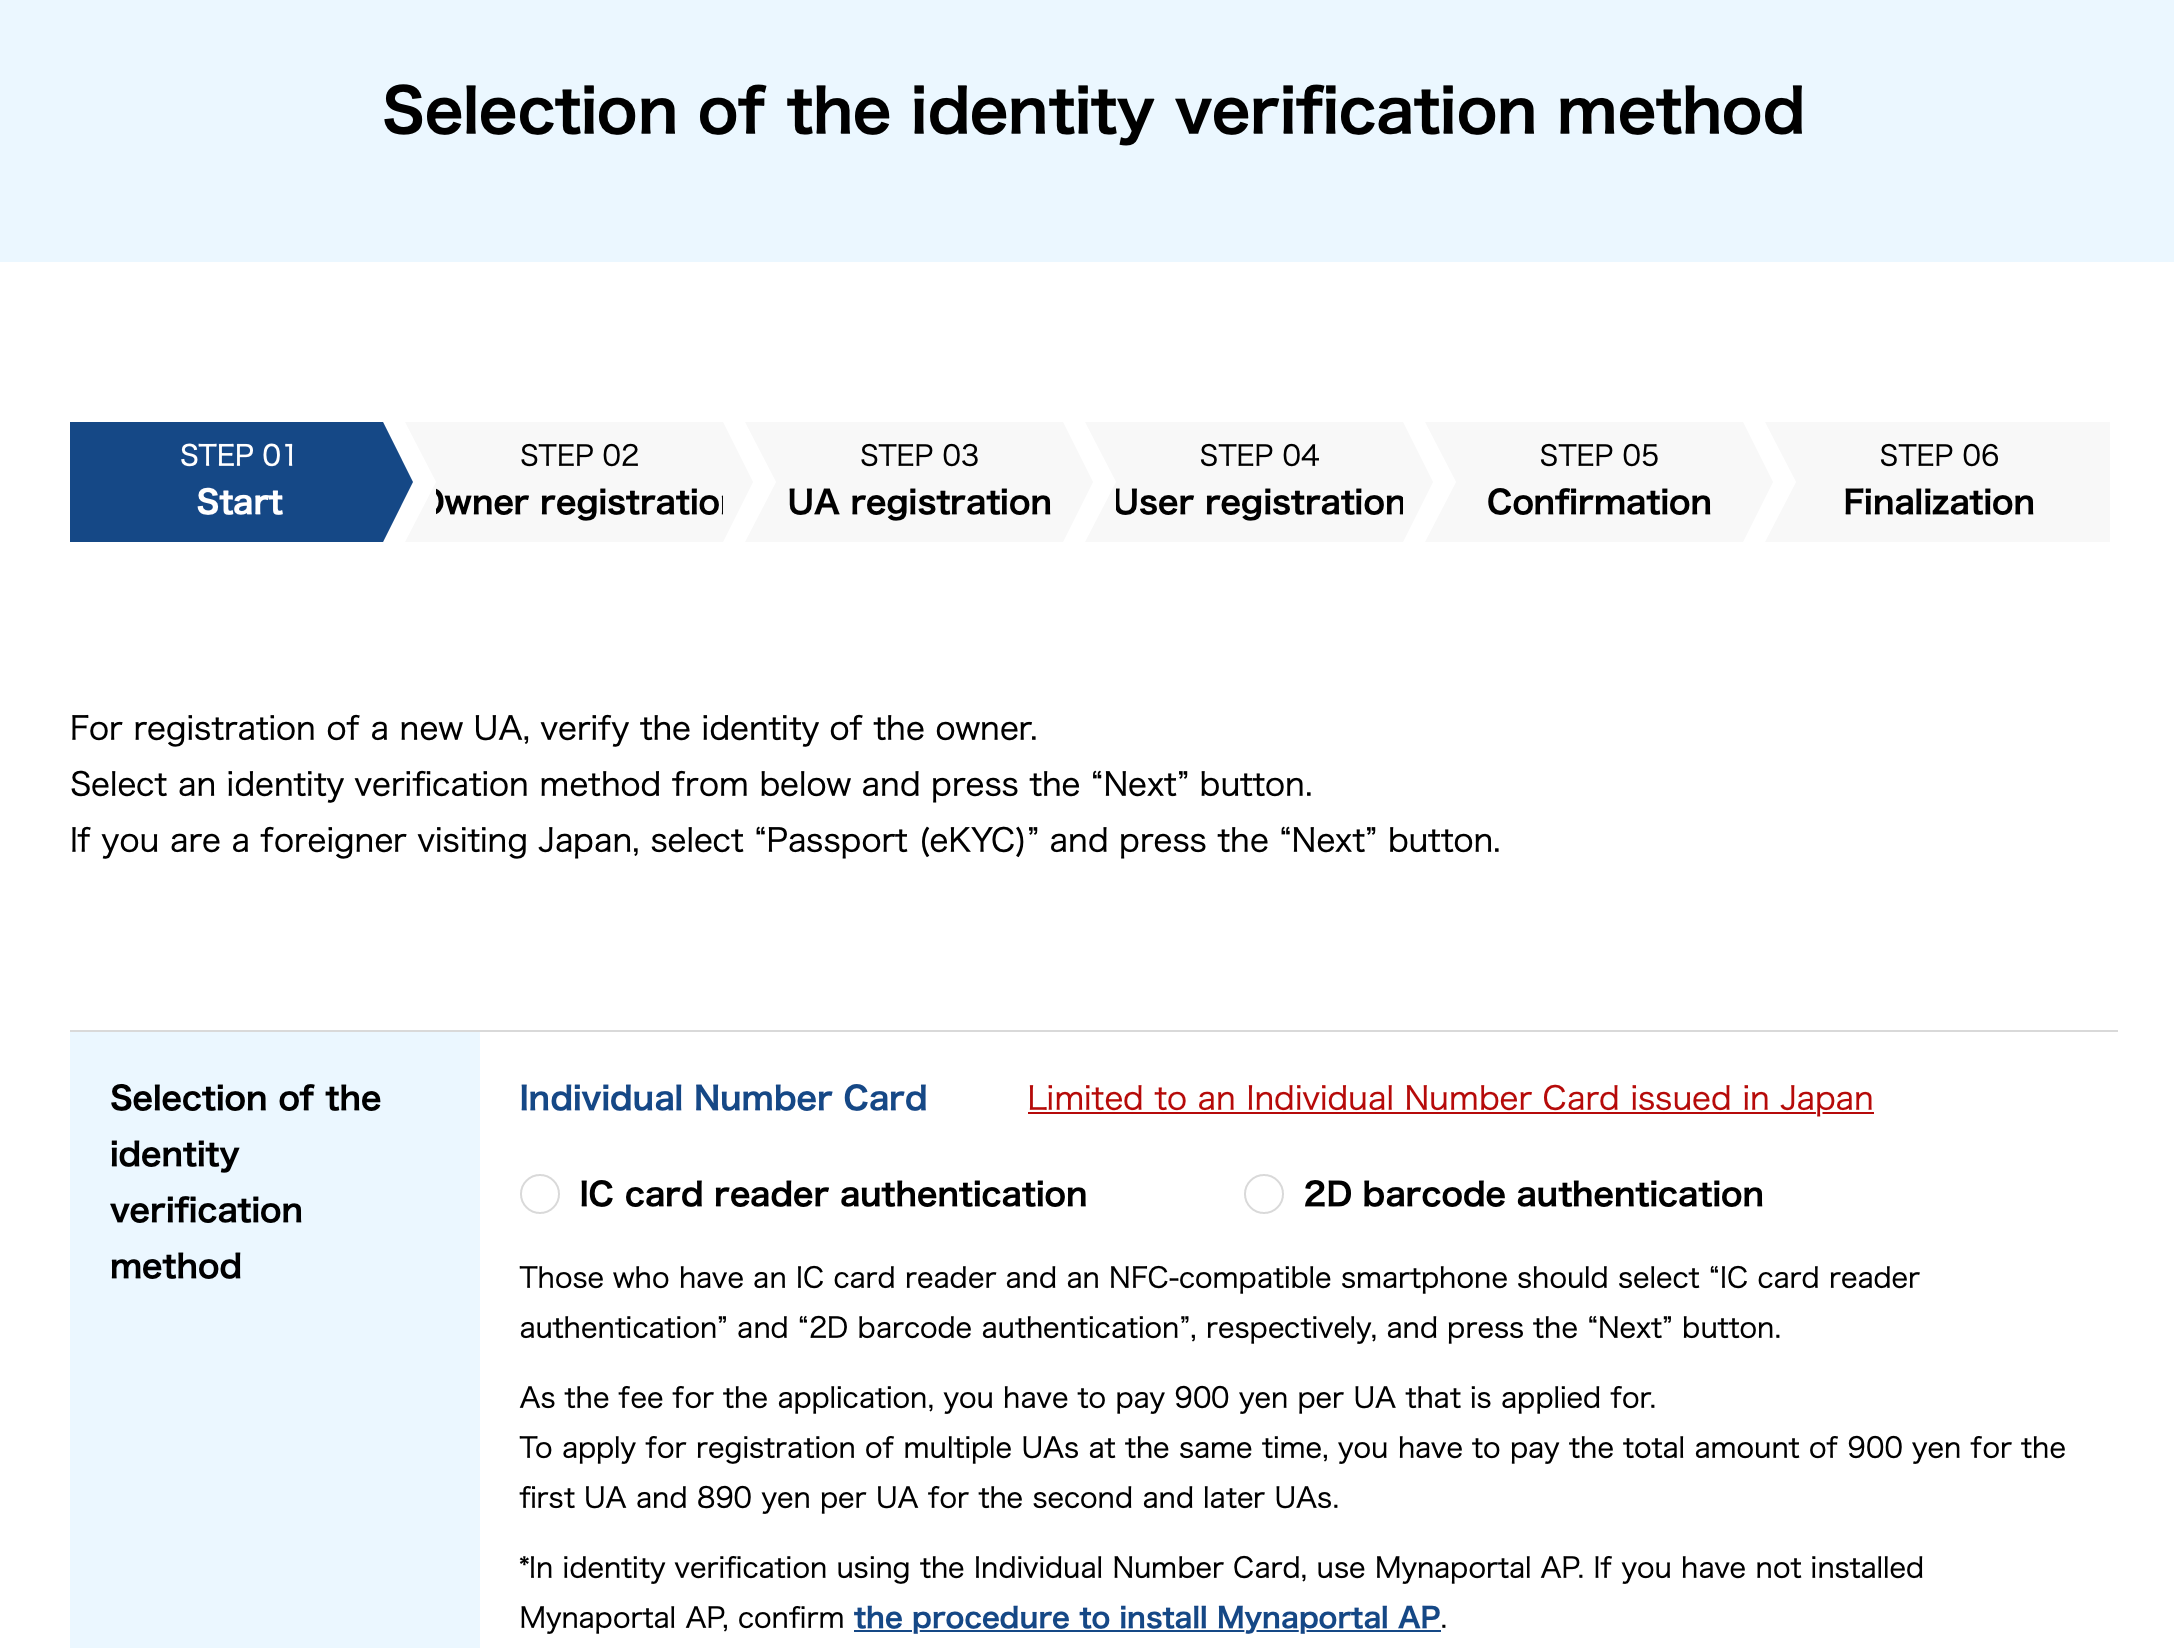
3.5Select the authentication method that best suits your situation, fill in the required information, then submit. | |
4.Approval and Payment
Once submission is completed, you will enter an approval waiting period. Once approval is granted, you will
receive an official email containing a payment link. Click the link to complete the payment of relevant fees.
After payment, the system will send a confirmation email and initiate the subsequent review process.
When the review is approved, you will receive an official email notification again.
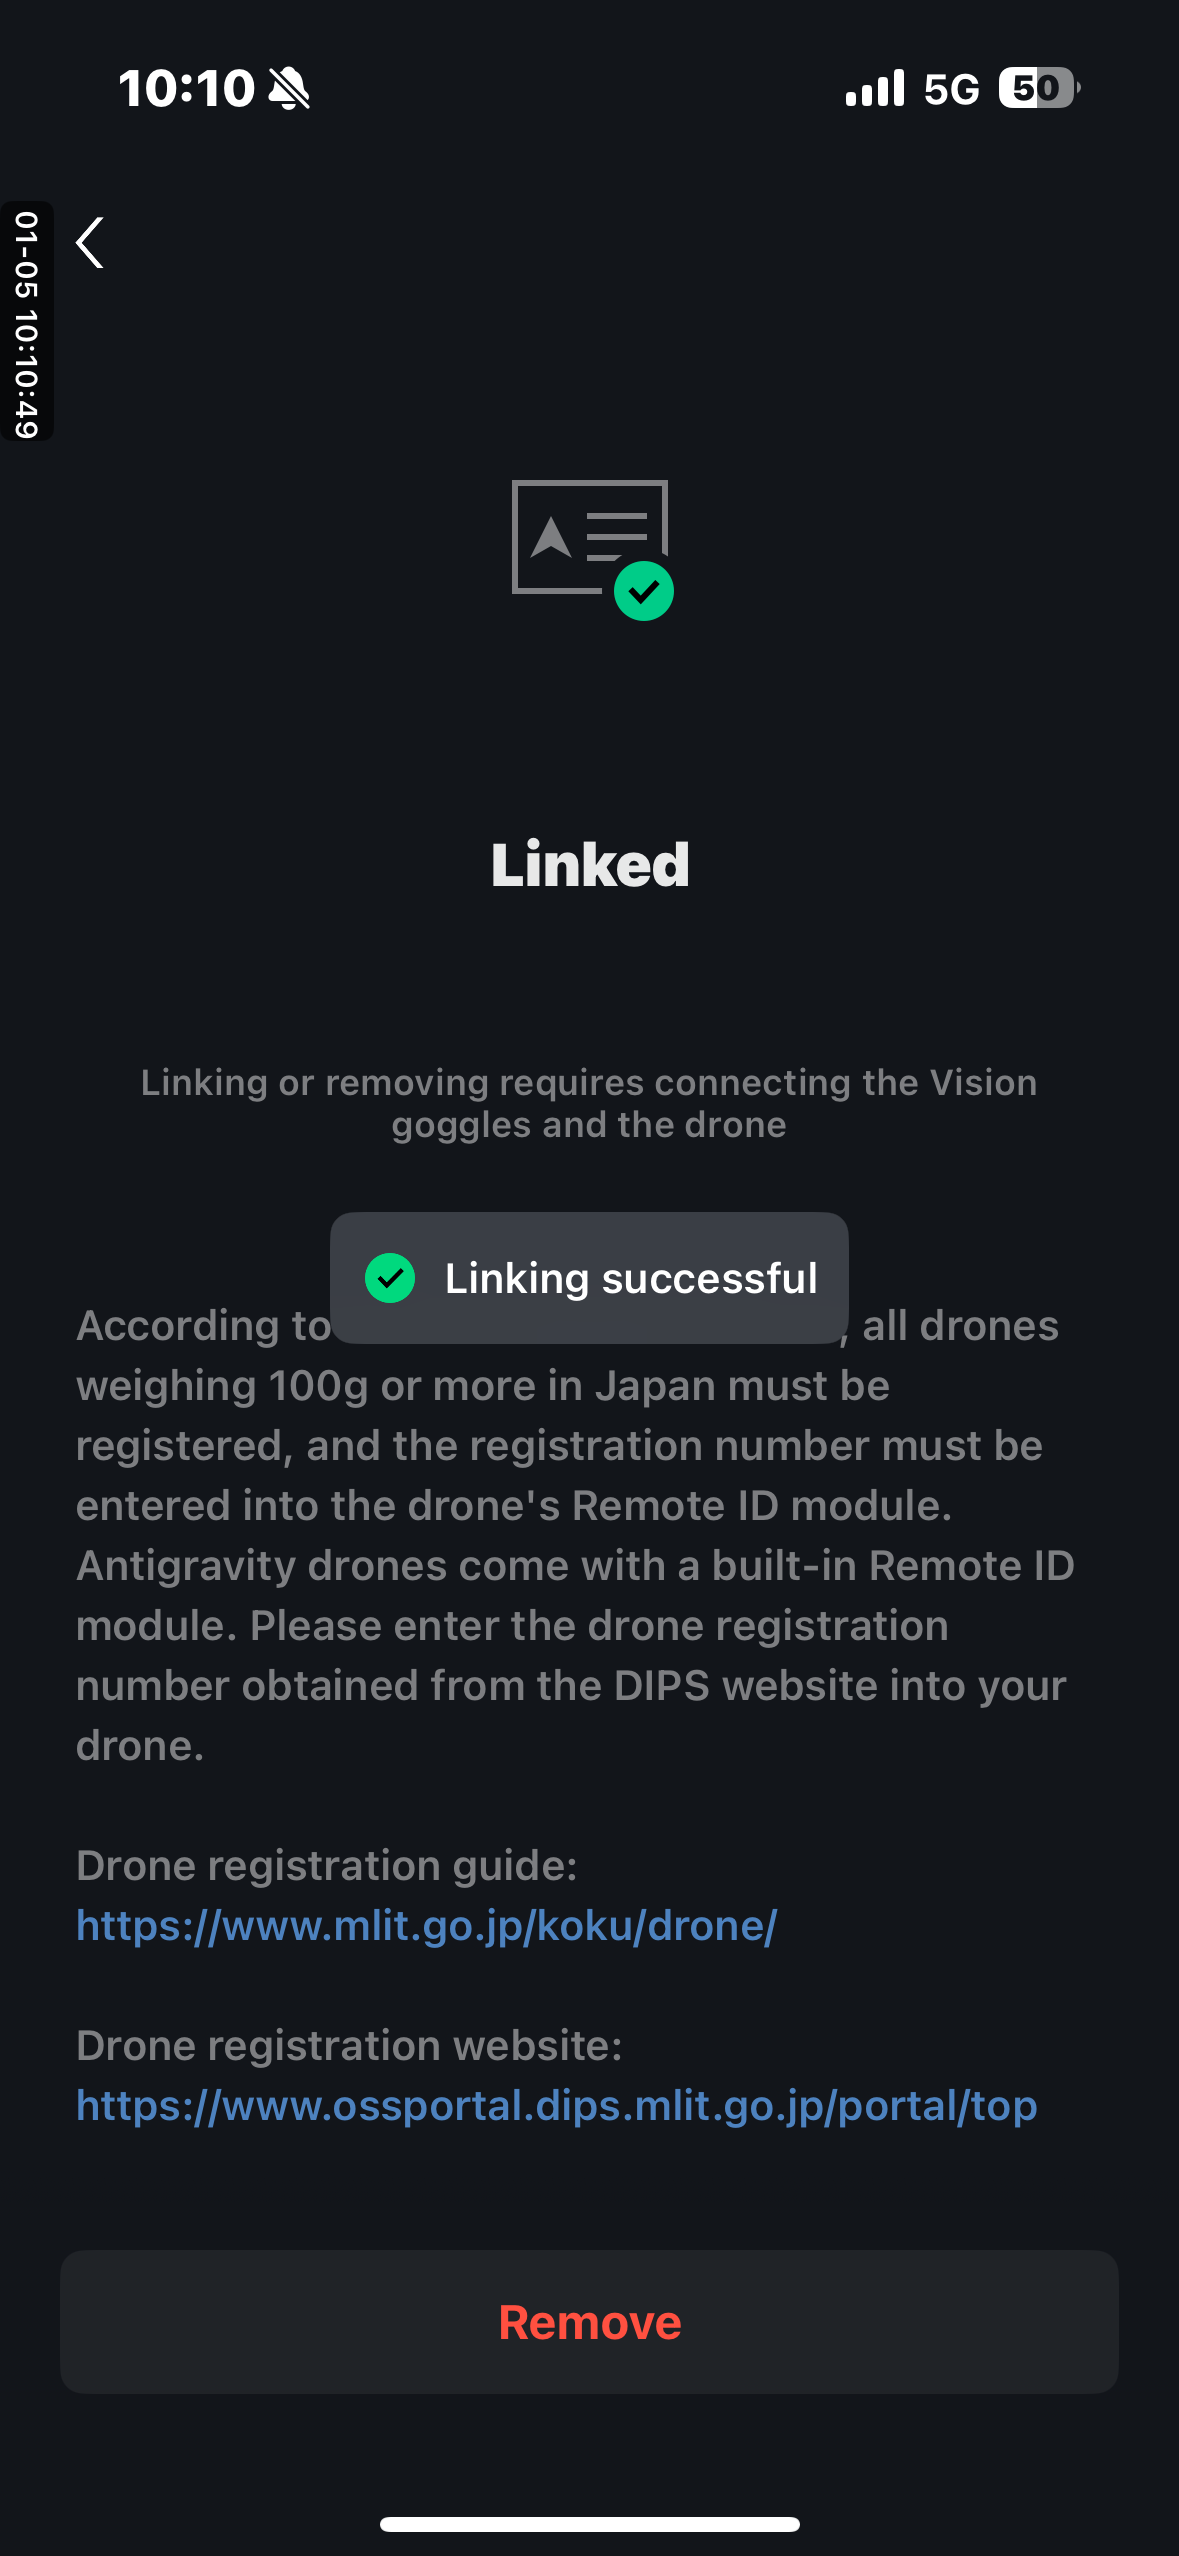
Enter the registration number into the drone
After you receive the official email notification of approval, you can proceed to the registration number entry stage.
【Note】Please make sure you are in Japan. If you are outside Japan, the “Drone Registration Number Entry”
option will not be displayed on the Device Management Details page of the Antigravity app.
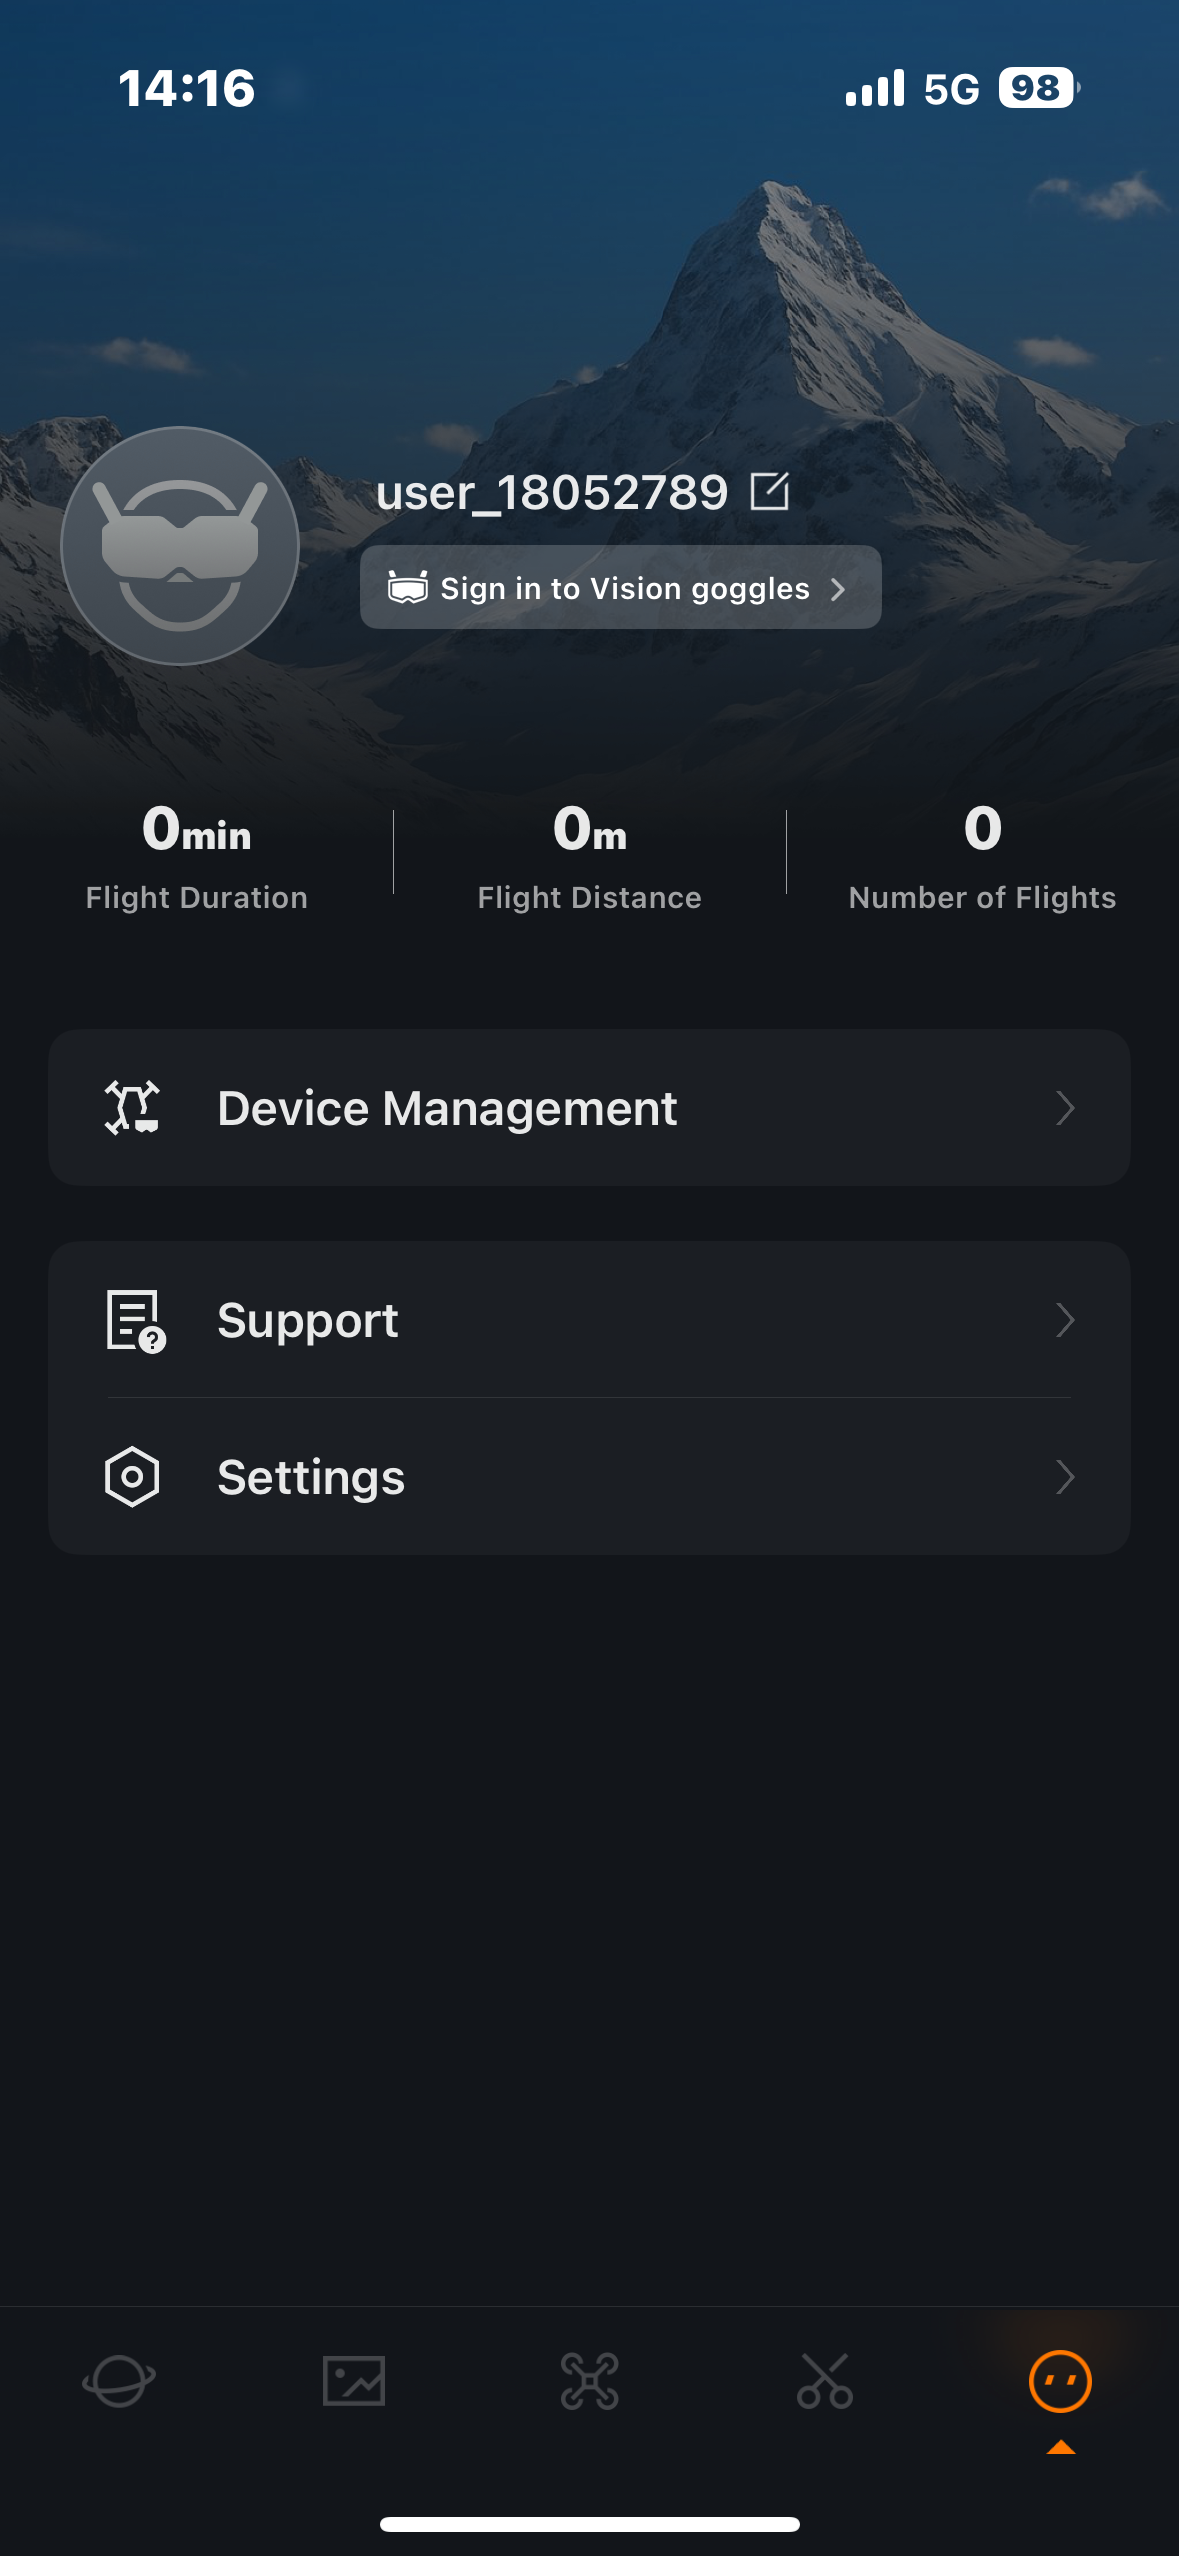
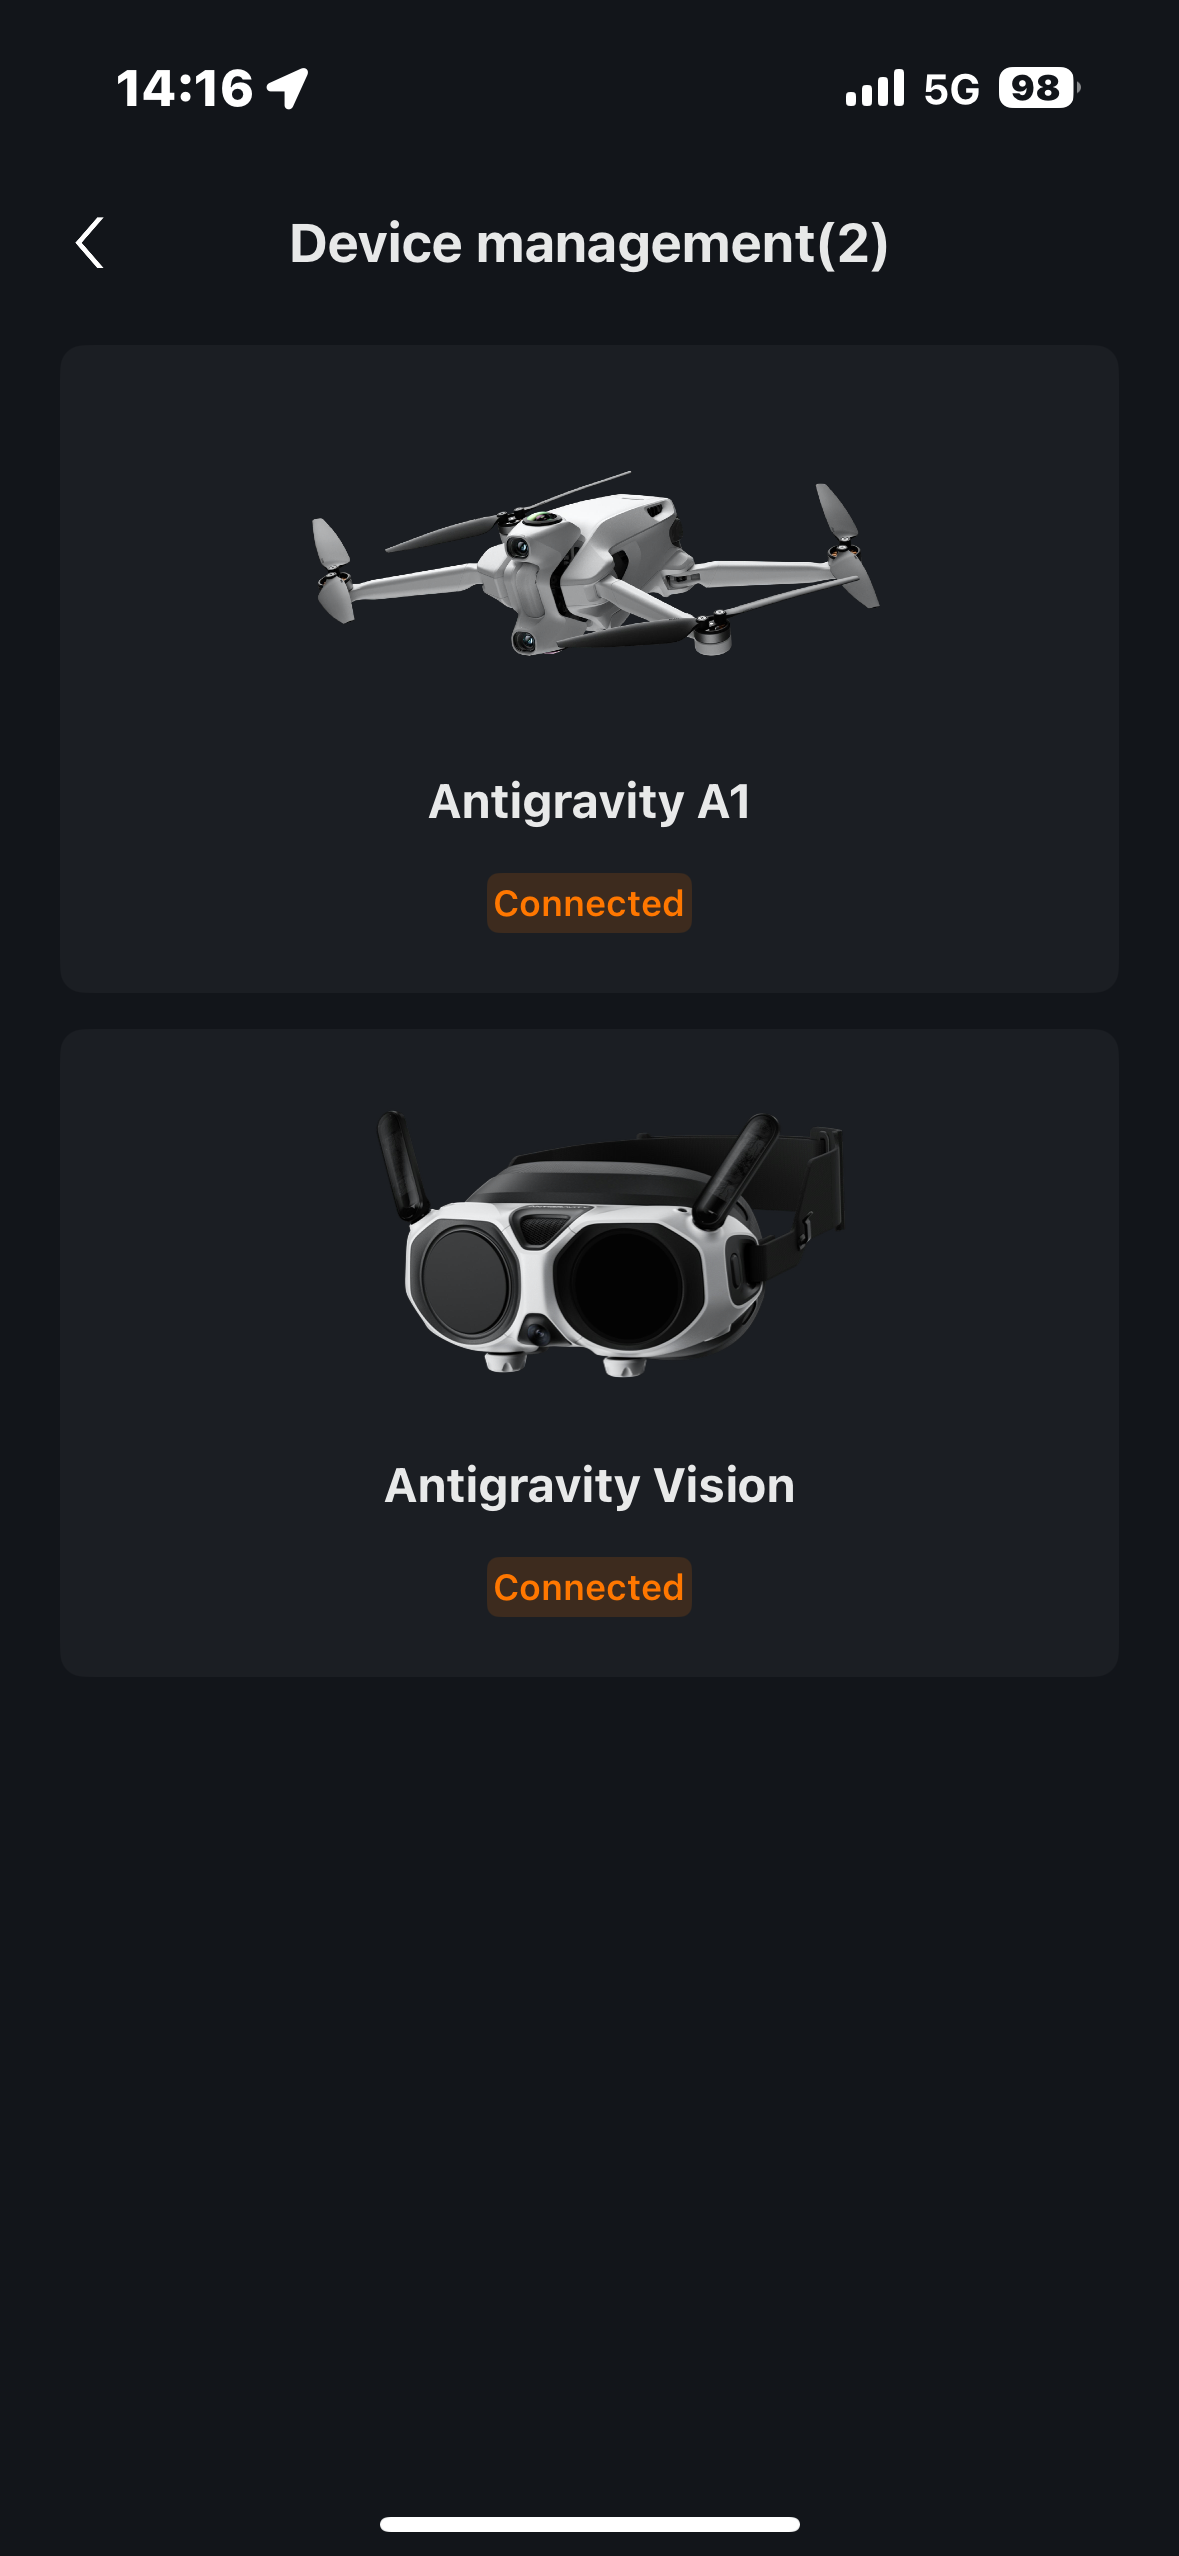
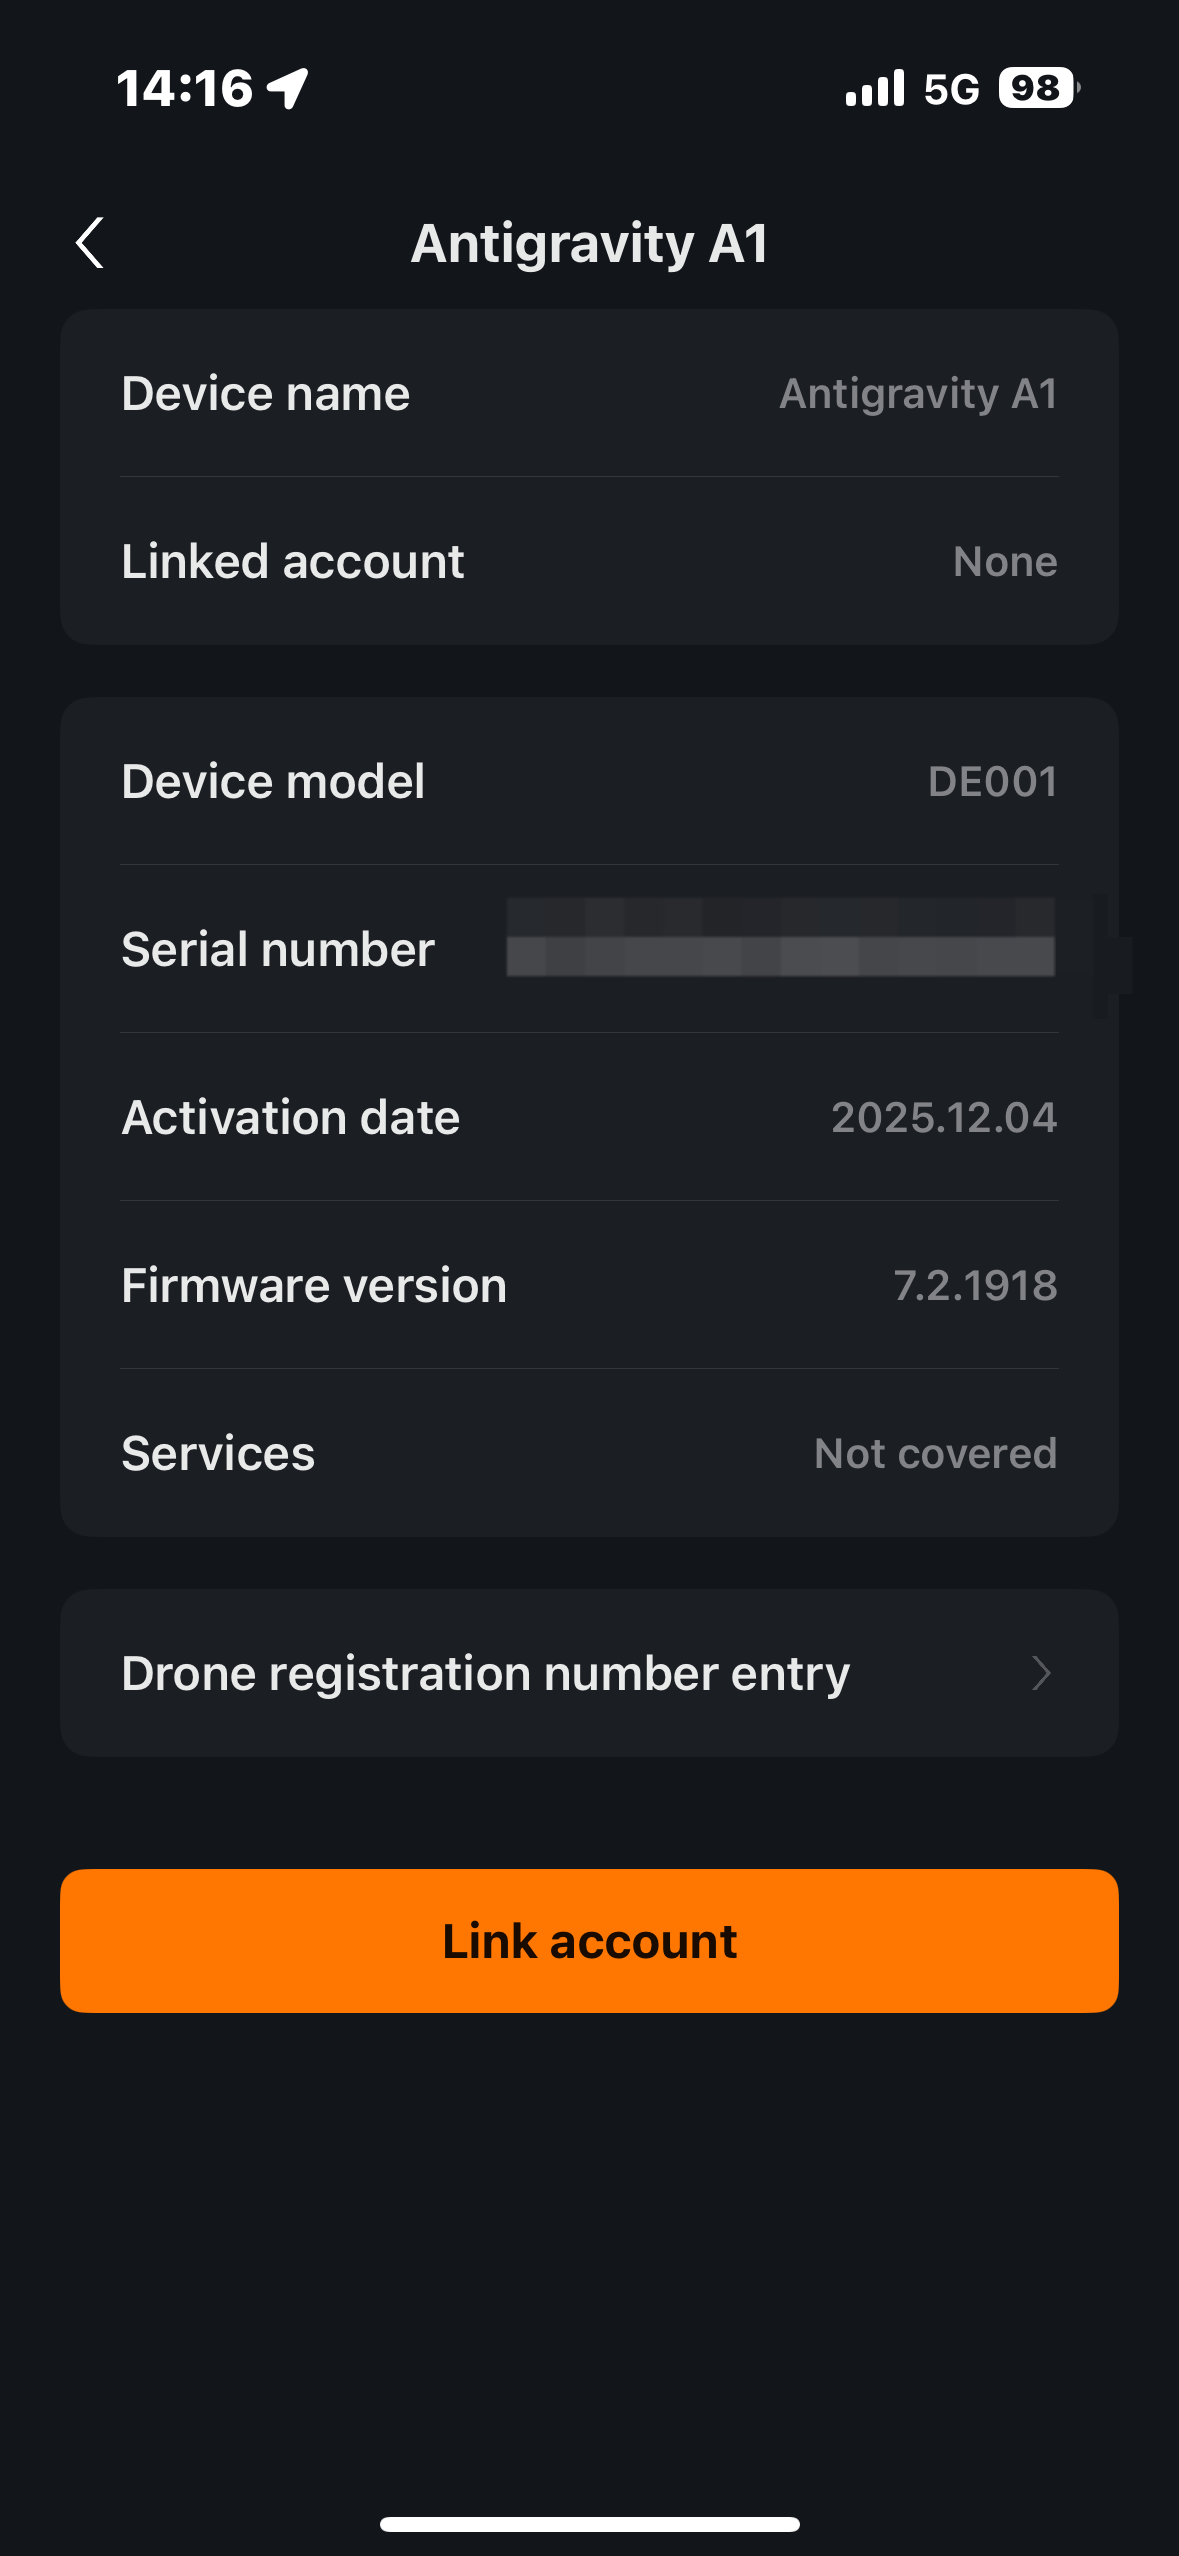
1. Open the Antigravity app, tap the rightmost button at the bottom, then select "Device Management". | 2.Select the device for registrati--on. | 3. Tap "Drone registration number entry". |
4.Once the Antigravity app has been connected to both the Vision goggl--es and the drone, press the Link | 5. Enter your ID and password to log in to your account. | 6. The Antigravity app will show a successful prompt. The interface will update to reflect this. |