The world's first drone equipped with 8K 360-degree capture. A1 redefines what drones can do by combining an immersive flying experience with intuitive controls. It breaks the limit of a single view and inspires unlimited creative freedom. If you want to learn how to power on and activate the drone after receiving it? How to charge it? Or want to learn more shooting skills to capture wonderful blockbusters? Check out this content to help you easily start a new flight experience.
01 Unboxing
In The Box
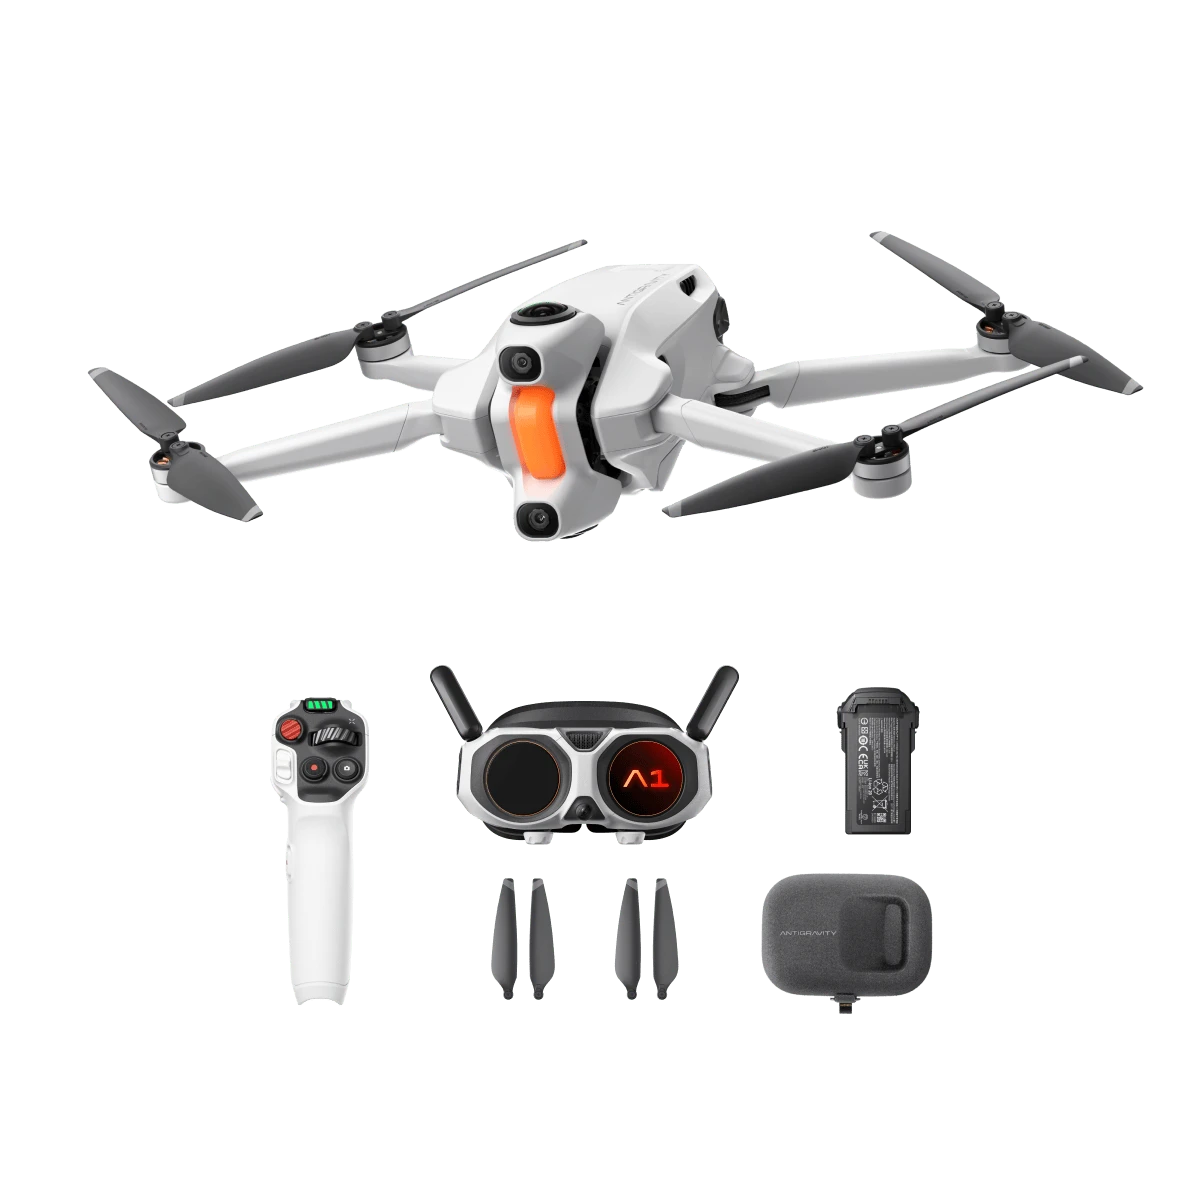
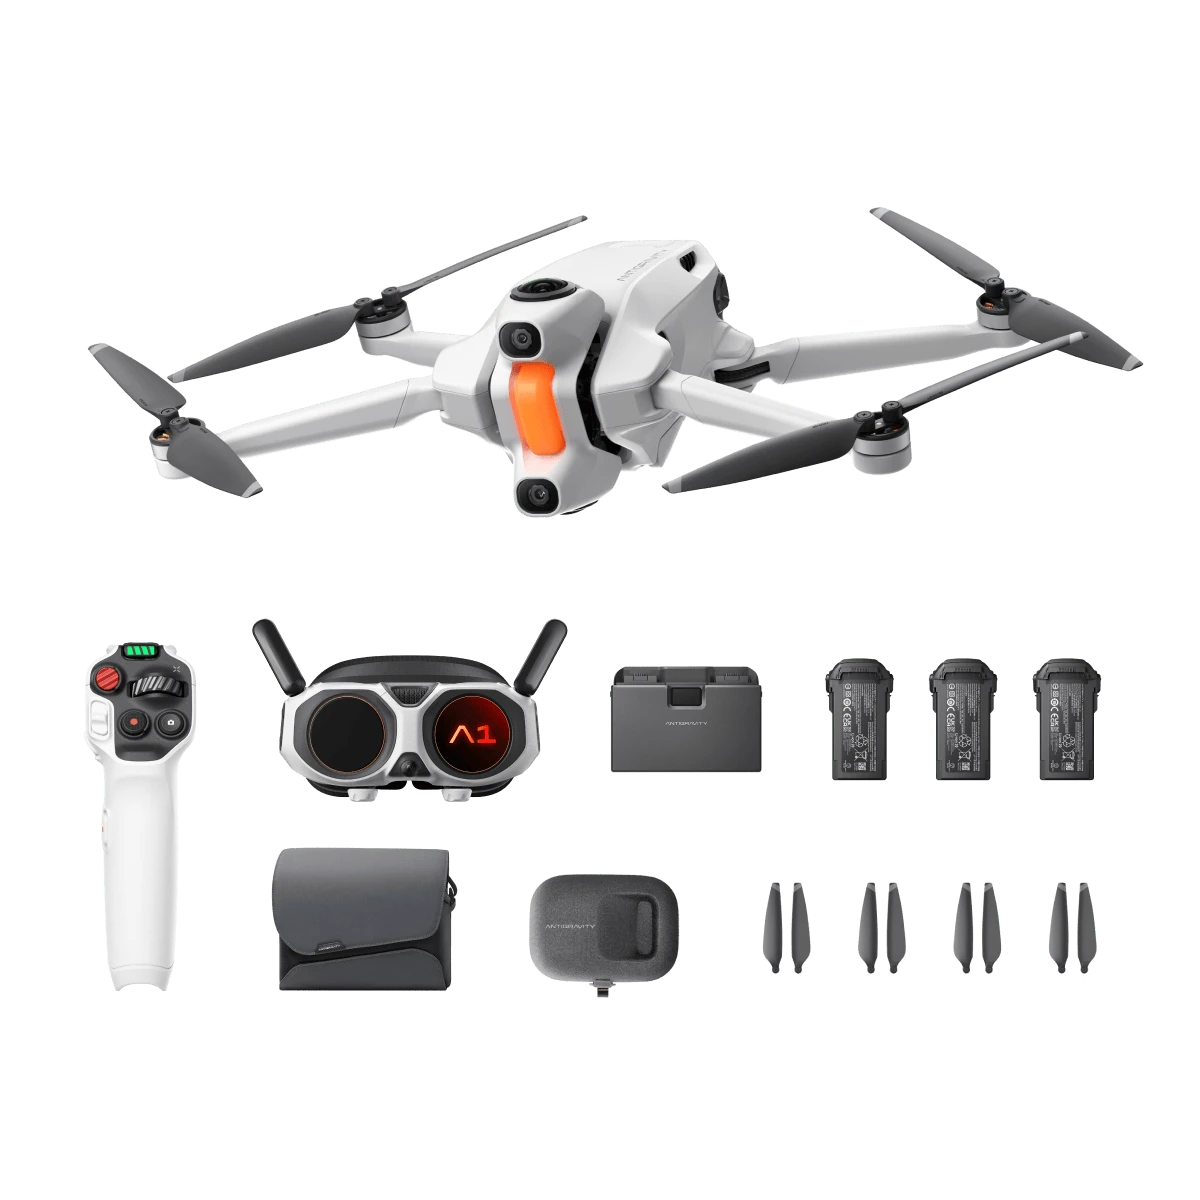
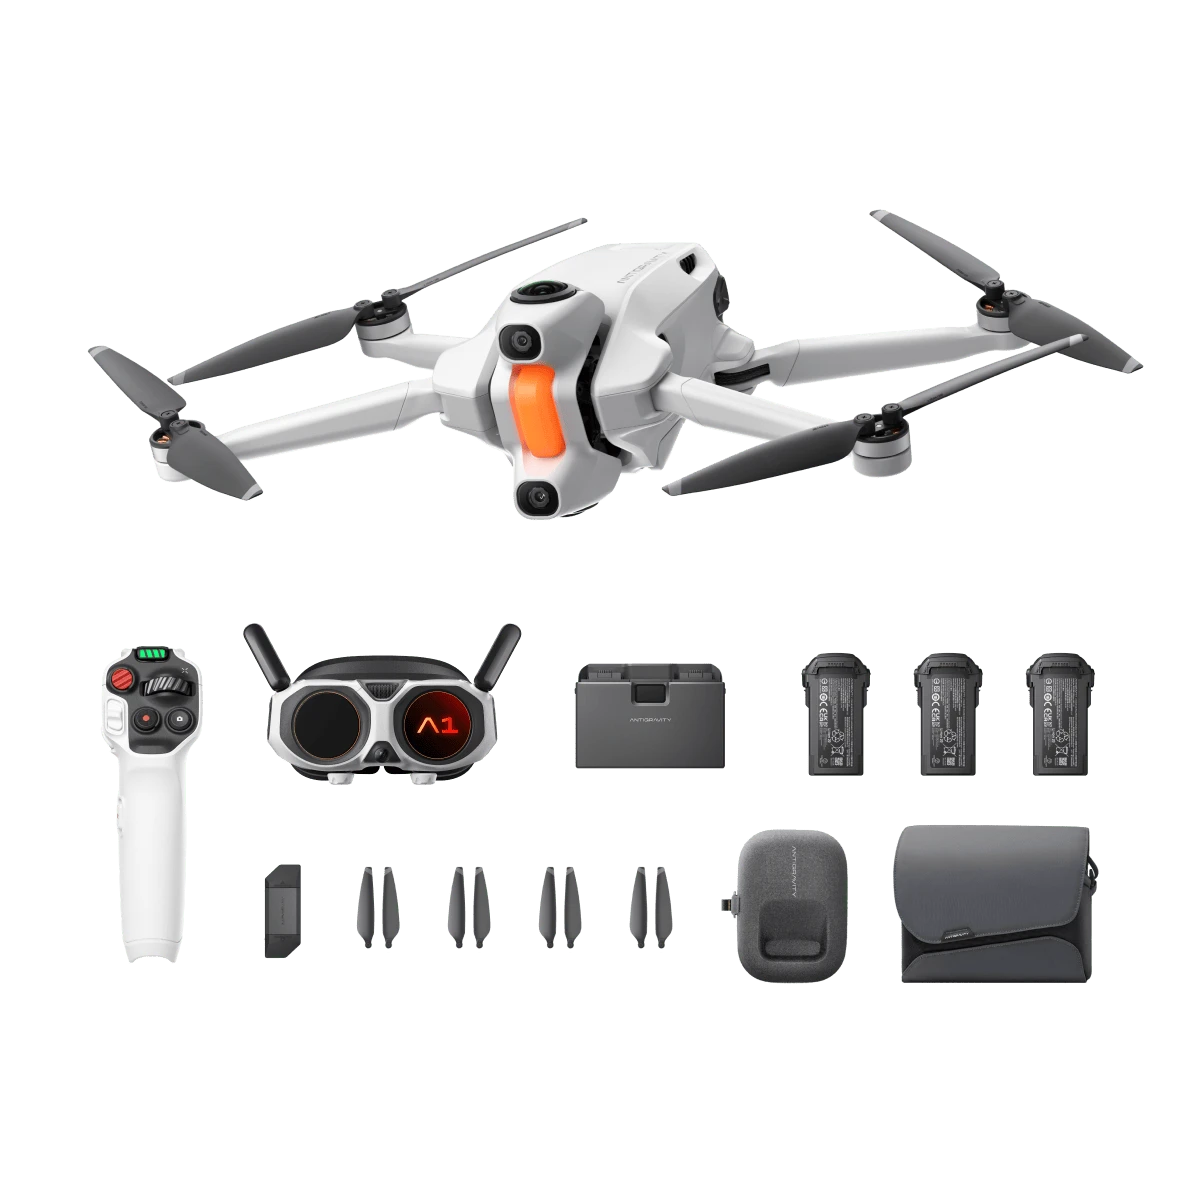
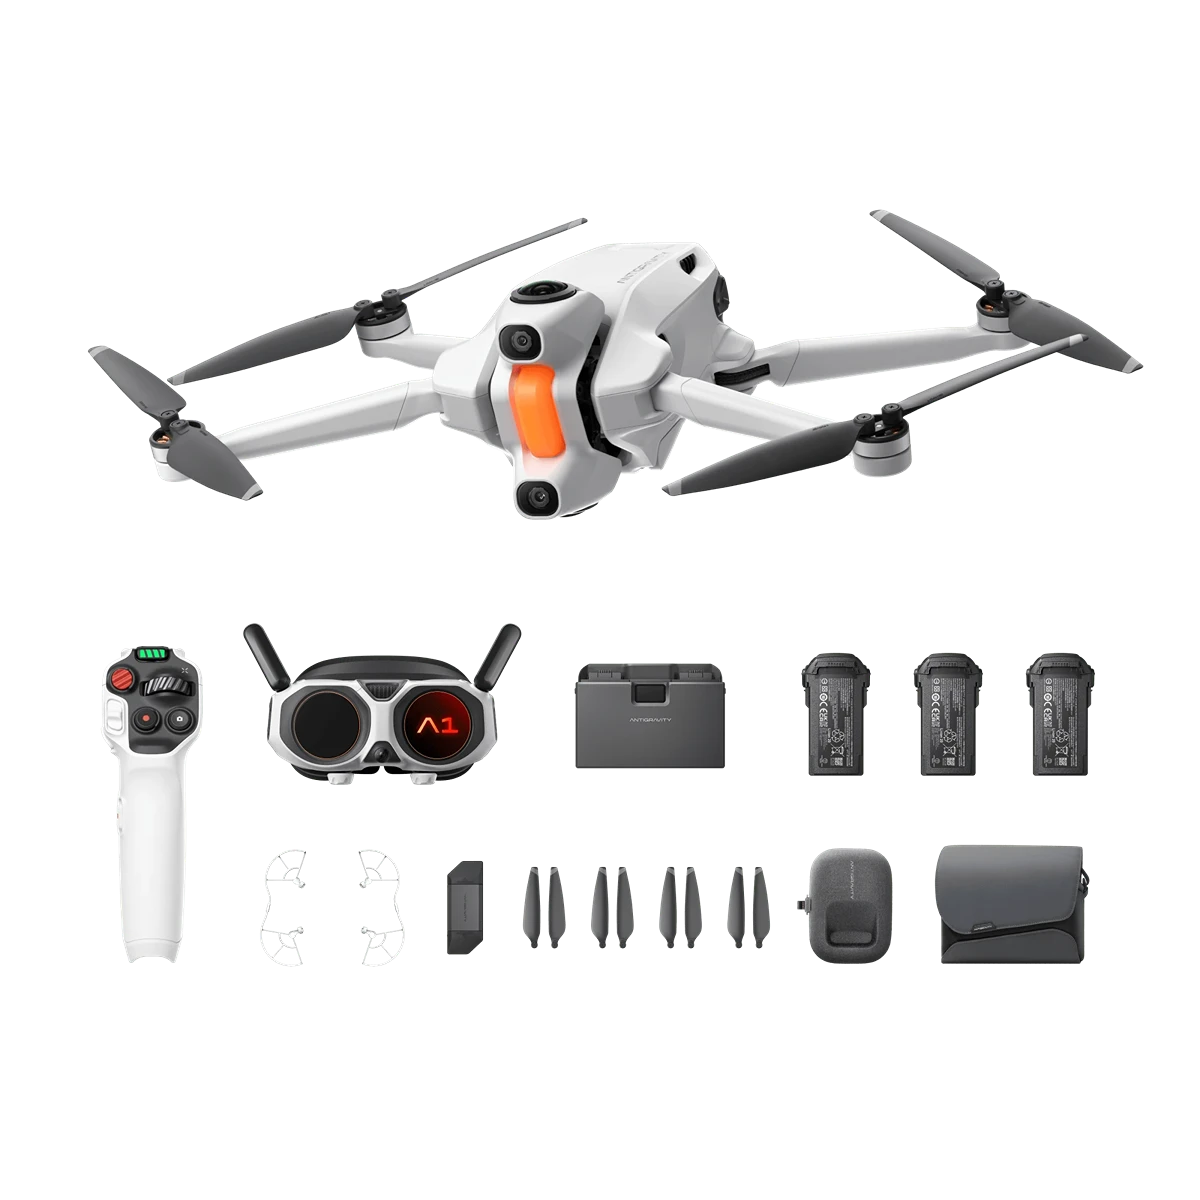
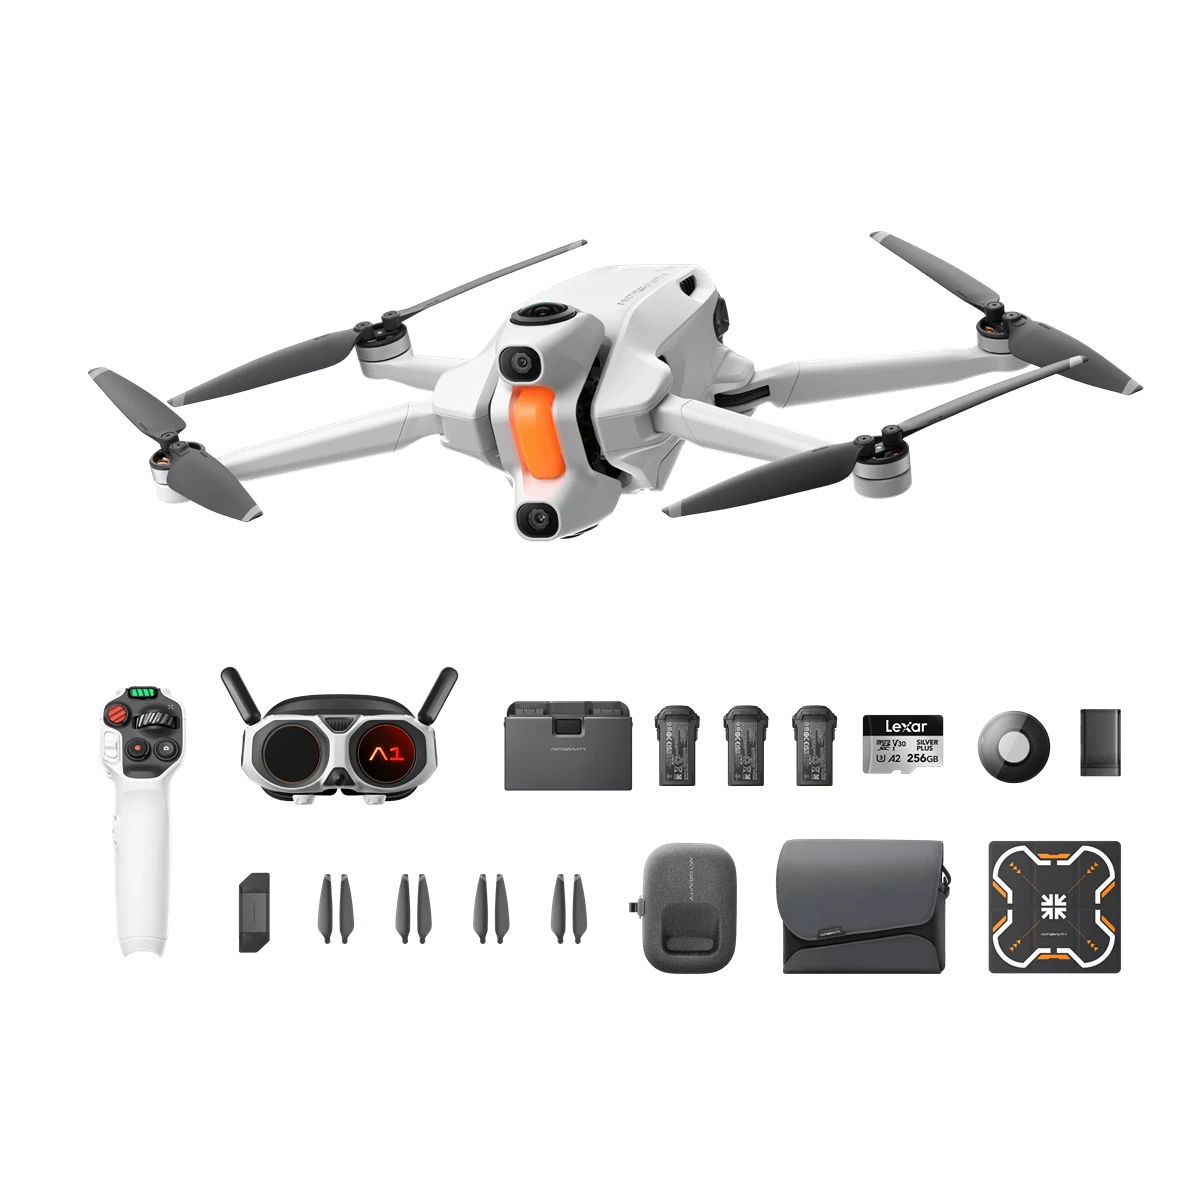
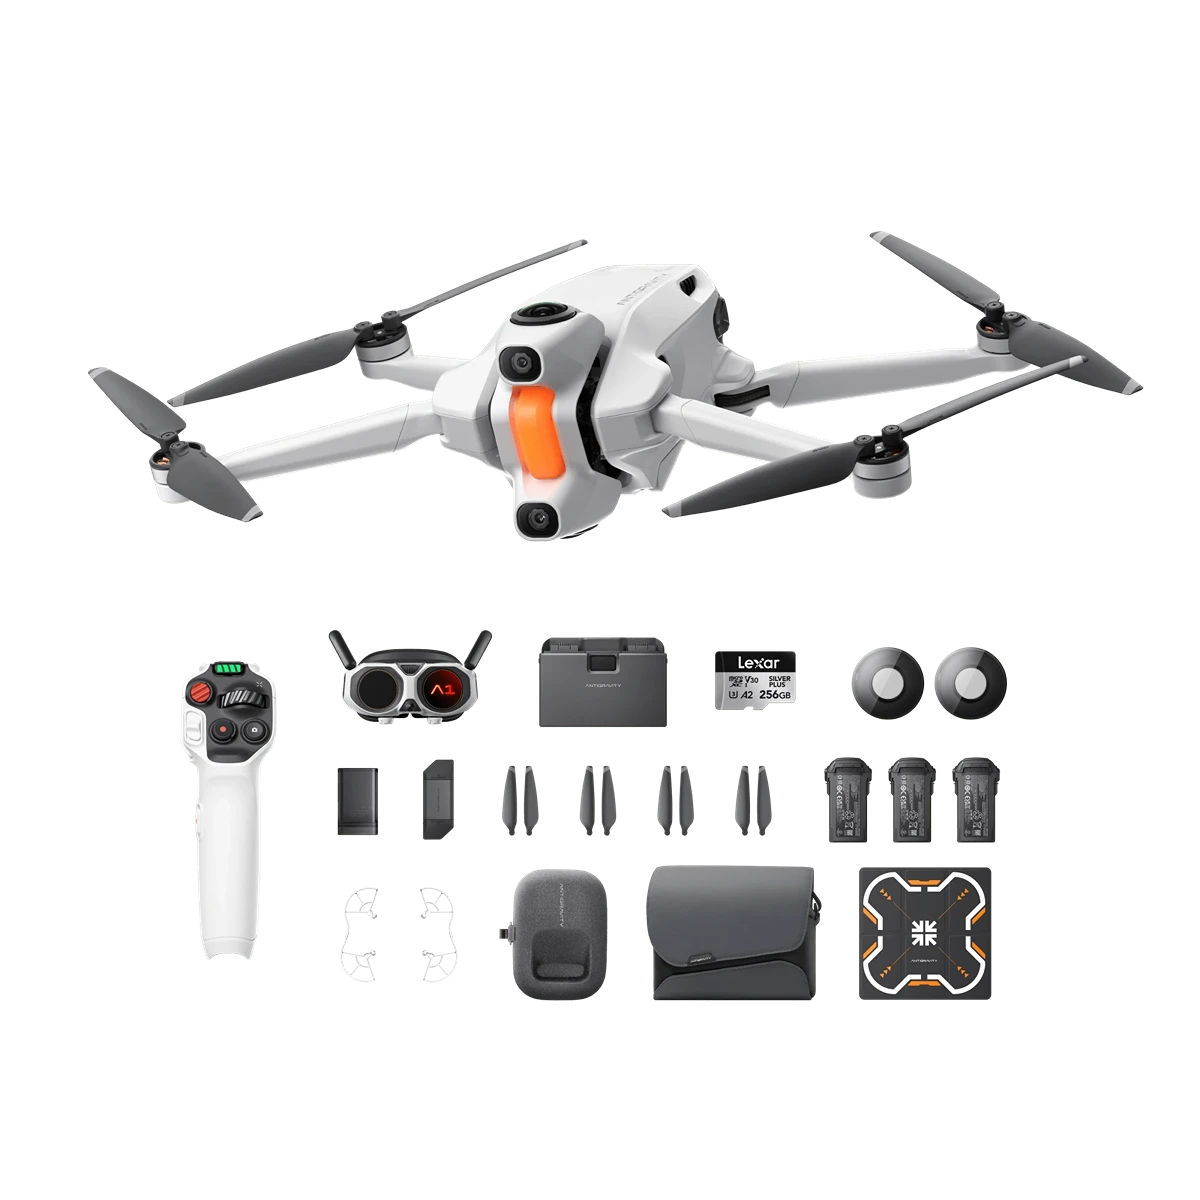
Open the package, and take out Antigravity A1 and its accessories in order, as shown below. Before discarding the packaging box, please make sure to check for any missing items.
Standard Bundle | Explorer Bundle | Infinity Bundle | Infinity Bundle + Propeller Guards | Ultimate Bundle (Lite) | Ultimate Bundle |
02 Preparing Antigravity A1
2.1 Preparing The Drone
Wake up the Device
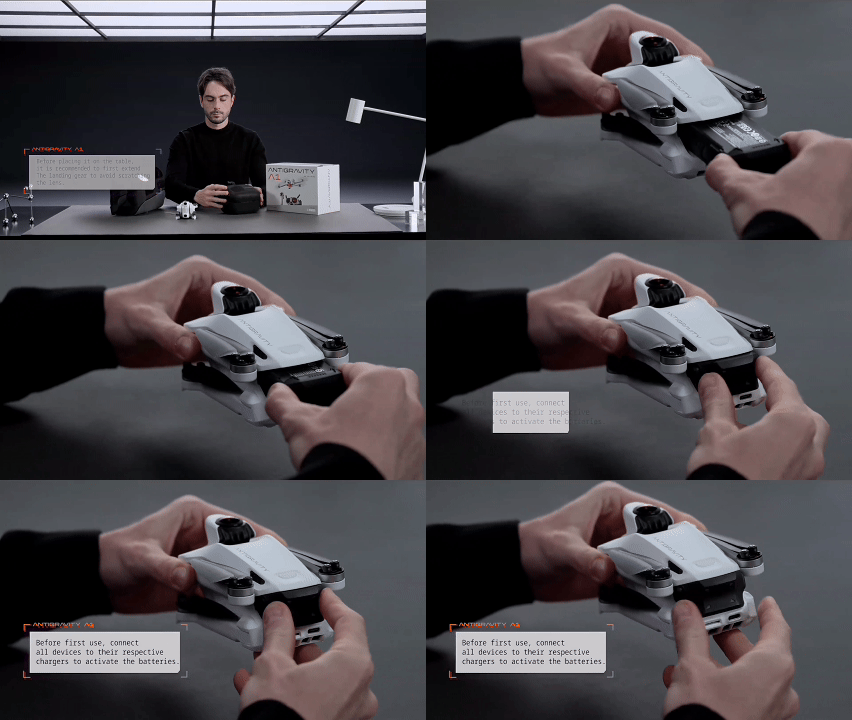
When using the flight battery for the first time, it needs to be charged to wake it up.
Connect the drone, Grip motion controller, and Vision Goggles to the charger separately. When the battery level indicator light turns on, it means the battery has been woken up.
Charging Method
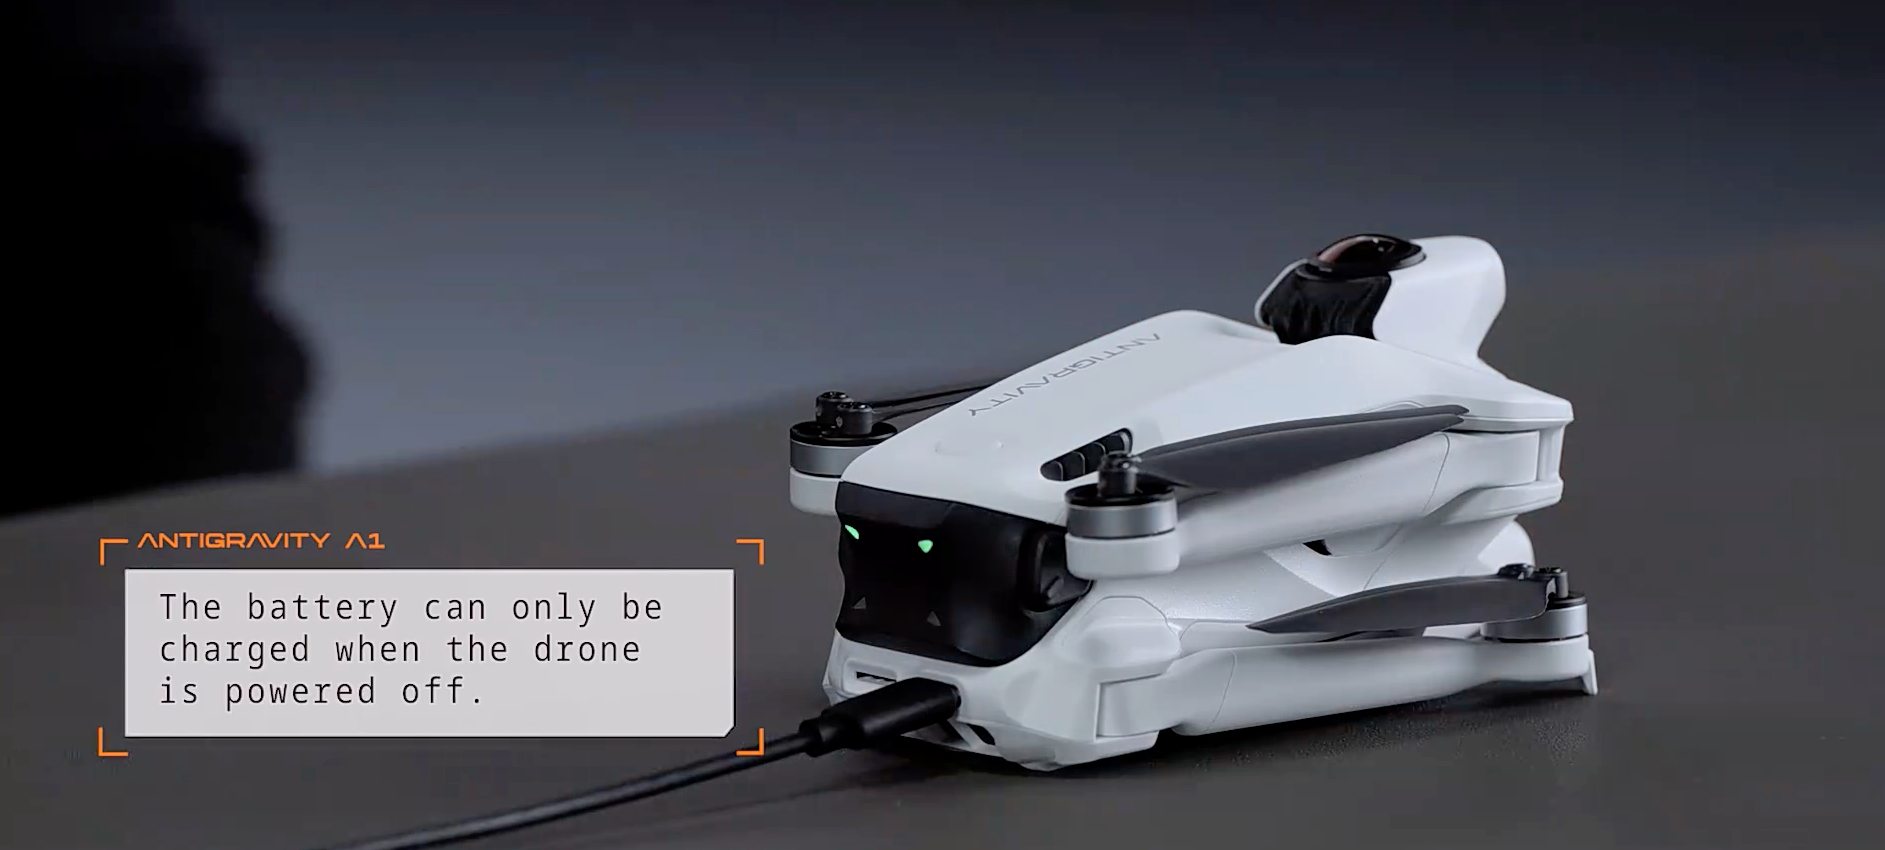
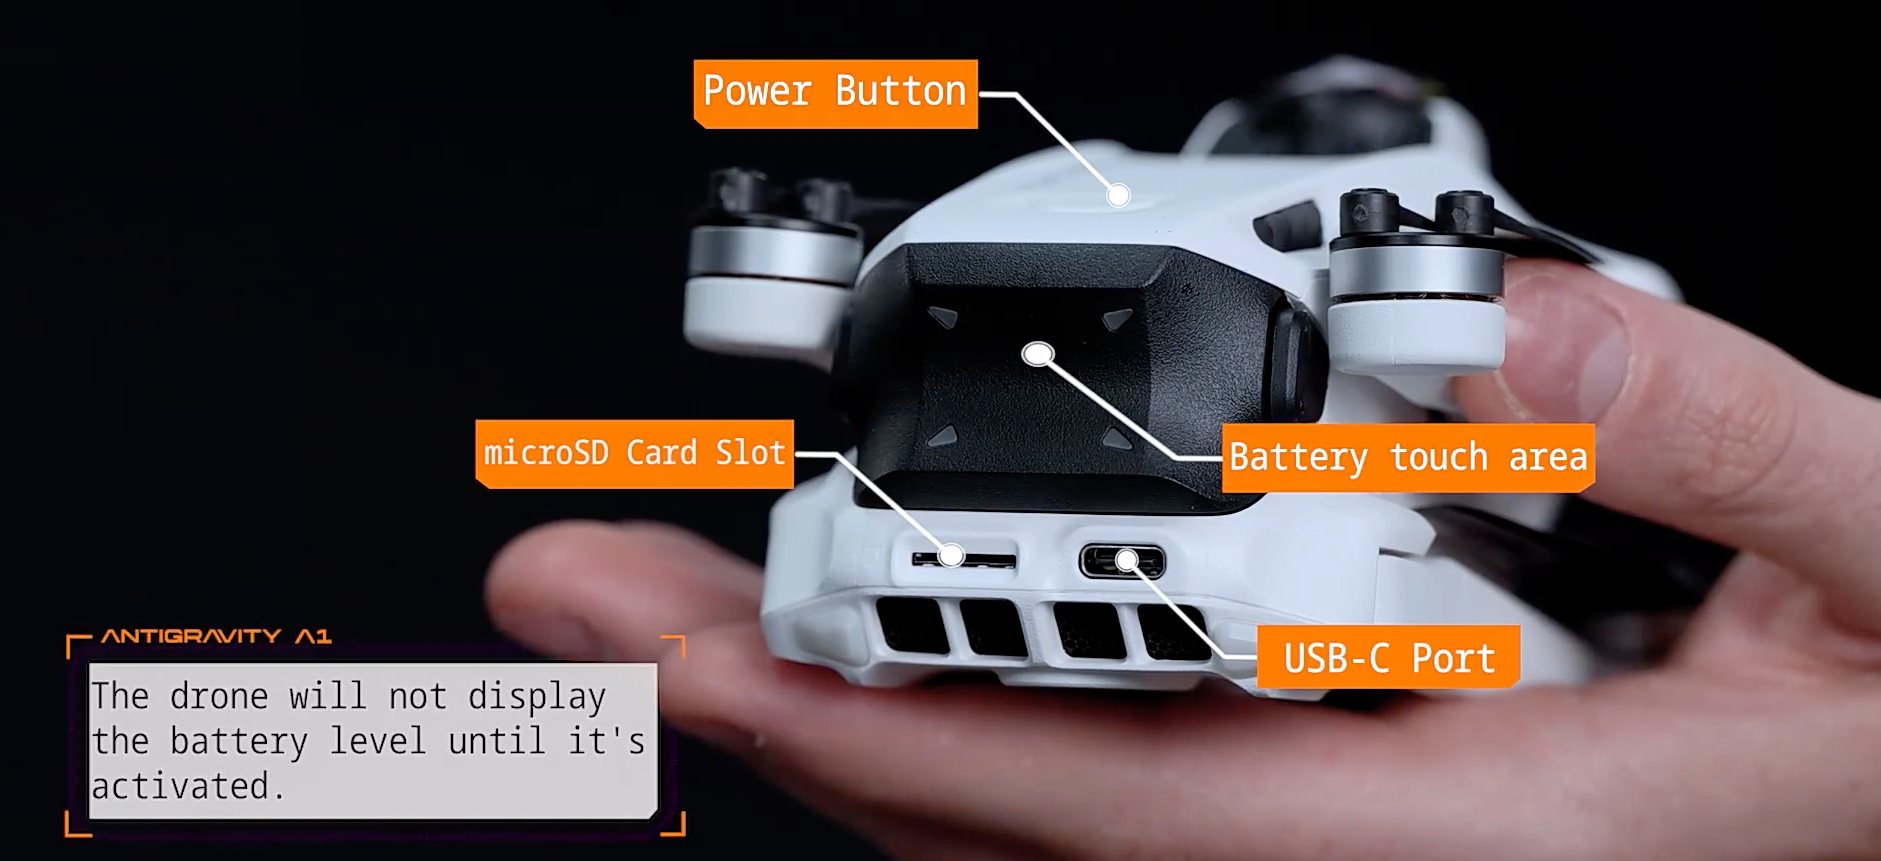
- Use the official cable to connect to the USB-C port on the drone body for charging. It is recommended to use the Antigravity 65W charger or other chargers that support the USB PD protocol.
- Using the charging Hub to charge the flight battery.
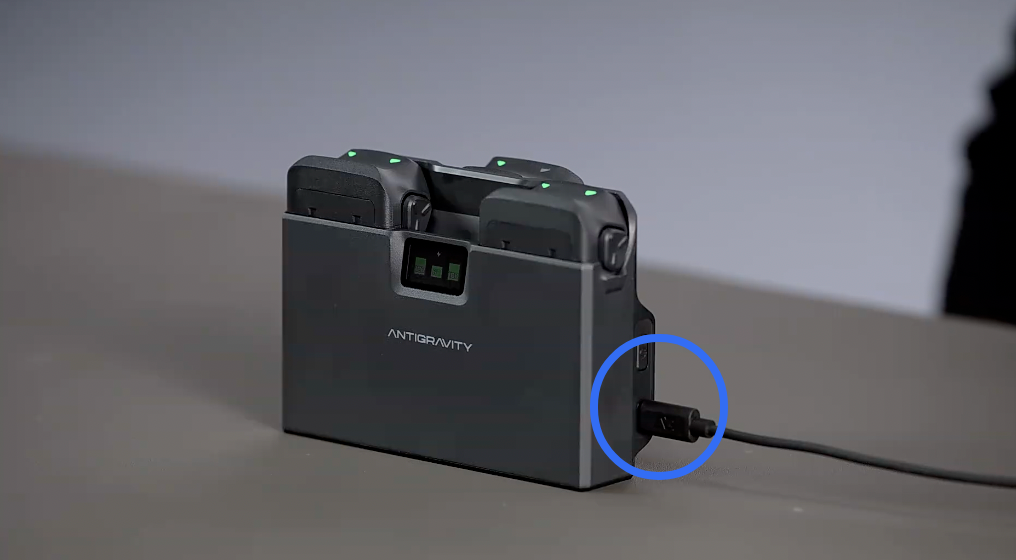
Notes
- The drone does not support charging while powered on.
- It is recommended to fully charge the Flight Battery before each use.
Checking the Battery Level
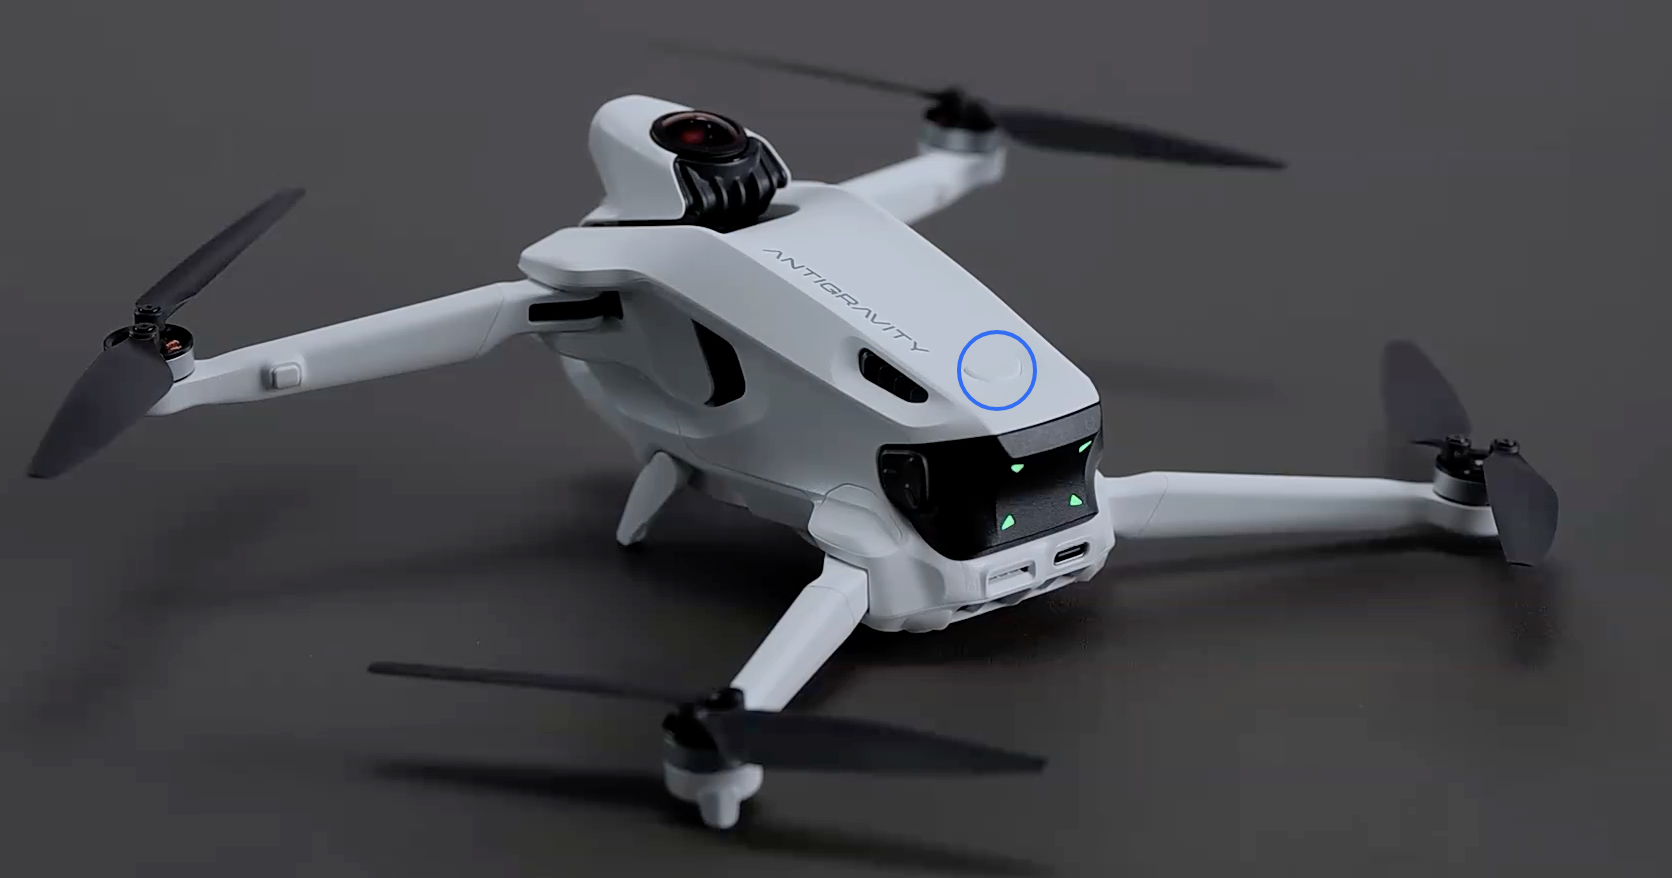
- When the battery is installed in the device: A single short press of the power button on the device allows you to check the current battery level.
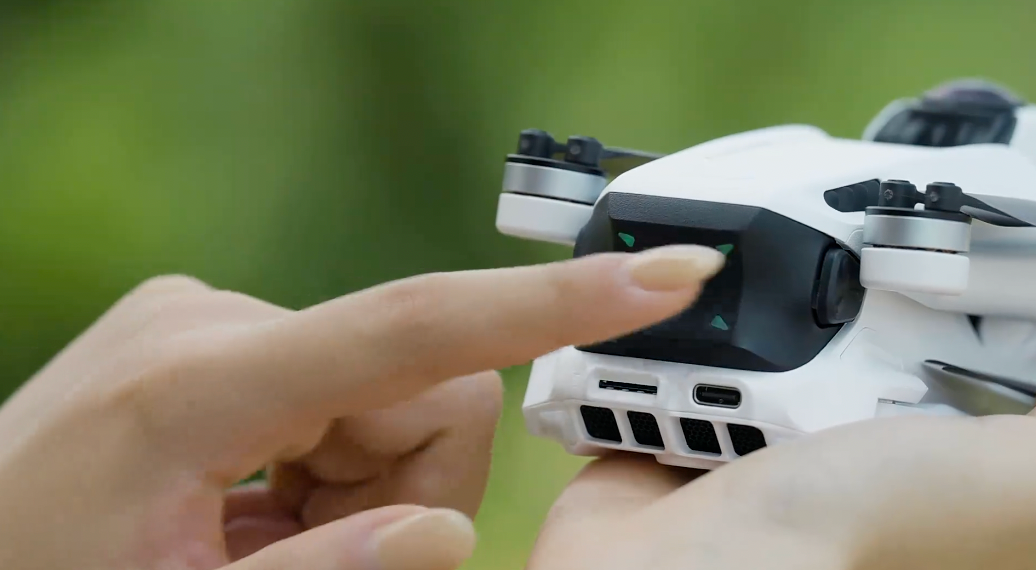
- Checking Separately: Touch the position of the battery level indicator once with your hand to check the current battery level.
Power on/off
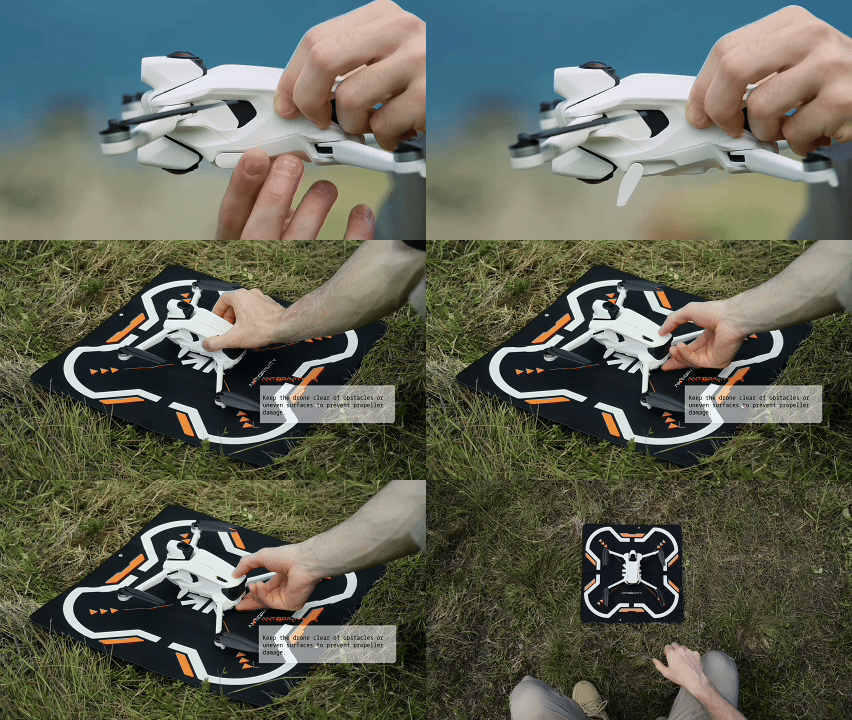
Press it once briefly, then press and hold for 2 seconds to power on or off the Drone.
Replacing the Propellers
When replacing the propellers, it is recommended to replace them in pairs and not mix different ones.
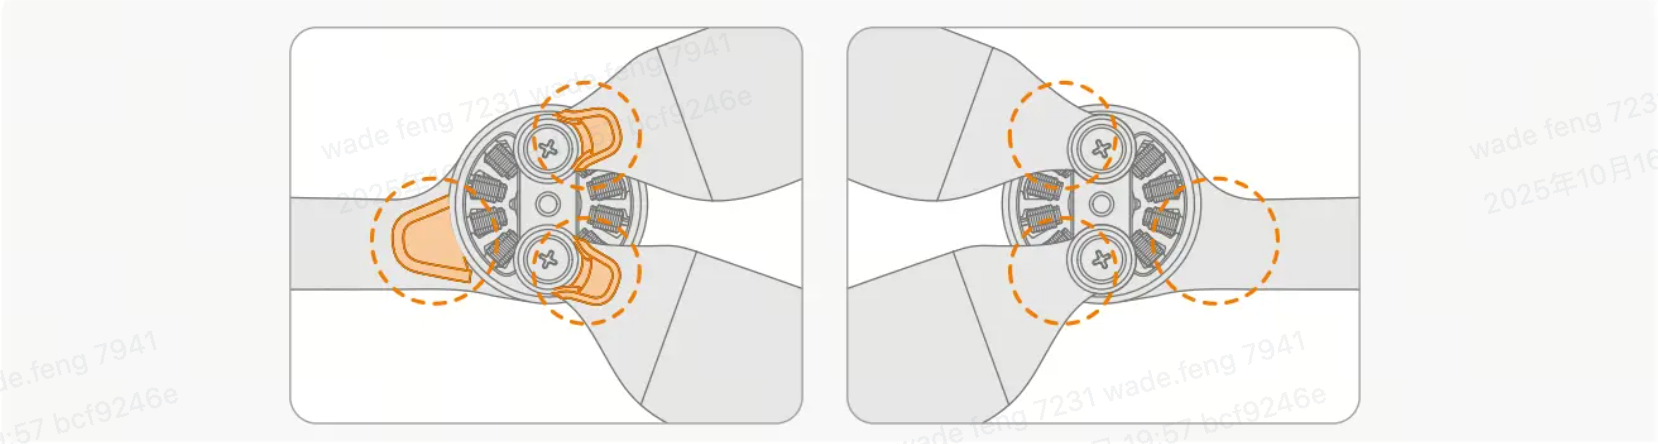
• Distinguishing the propellers
• Replace the propellers
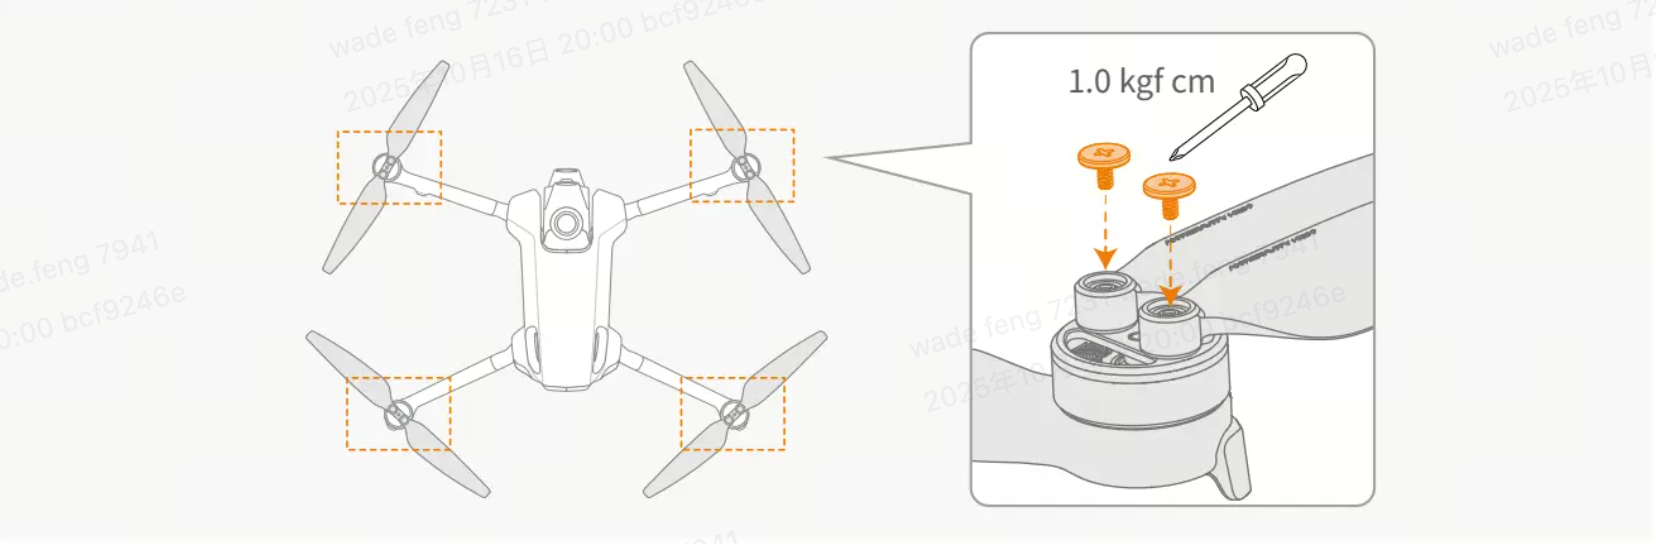
- Remove the screws (M 1.2 × 2) from the motor by using the supplied screwdriver from the bundle.
- Mount the marked propellers onto the motors with the marker, and the unmarked propellers onto the unmarked motors. Apply the specified torque when tightening the screws.
Installing the Propeller Guards
• The propeller guards needs to be purchased separately.
• After installation, the take-off weight of the drone will change, which will affect flight performance and flight endurance. Please fly with caution.
• It is not recommended to use the propeller guards in plateaus or strong wind conditions.
Insert the Battery
Make sure the battery is fully inserted and hear a click, indicating that the battery latch is securely fastened.
Check the SD card
The drone come with an built-in Storage for 20 GB.
Type: microSD, supporting SDXC, UHS-I, V30 or above, formatted as exFAT.
Maximum capacity: 1TB
Micro SD card installation Orientation: Contact Pins Upward.
List of Recommended Storage Card
SanDisk Extreme PRO 64GB V30 U3 A2 microSDXC
SanDisk Extreme PRO 128GB V30 U3 A2 microSDXC
SanDisk Extreme PRO 256GB V30 U3 A2 microSDXC
SanDisk Extreme PRO 512GB V30 U3 A2 microSDXC
SanDisk Extreme PRO 1TB V30 U3 A2 microSDXC
Lexar Silver Plus 64GB A2 V30 microSDXC
Lexar Silver Plus 128GB A2 V30 microSDXC
Lexar Silver Plus 256GB A2 V30 microSDXC
Lexar Silver Plus 512GB A2 V30 microSDXC
Lexar Silver Plus 1TB A2 V30 microSDXC
Kingston CANVAS Go! Plus 64GB A2 V30 microSDXC
Kingston CANVAS Go! Plus 128GB A2 V30 microSDXC
Kingston CANVAS Go! Plus 256GB A2 V30 microSDXC
Kingston CANVAS Go! Plus 512GB A2 V30 microSDXC
Kingston CANVAS Go! Plus 1TB A2 V30 microSDXC
2.2 Preparing the Grip Motion Controller
Charging Method
How to Charge: Connect the charger to the USB-C port of the Grip Motion Controller for charging.
Power on/off
Press it once briefly, then press and hold for 2 seconds to power on or off the Grip Motion Controller.
Introduction to the Button Function
Please refer to the tutorial below to learn about the button function.
2.3 Preparing the Vision Goggles
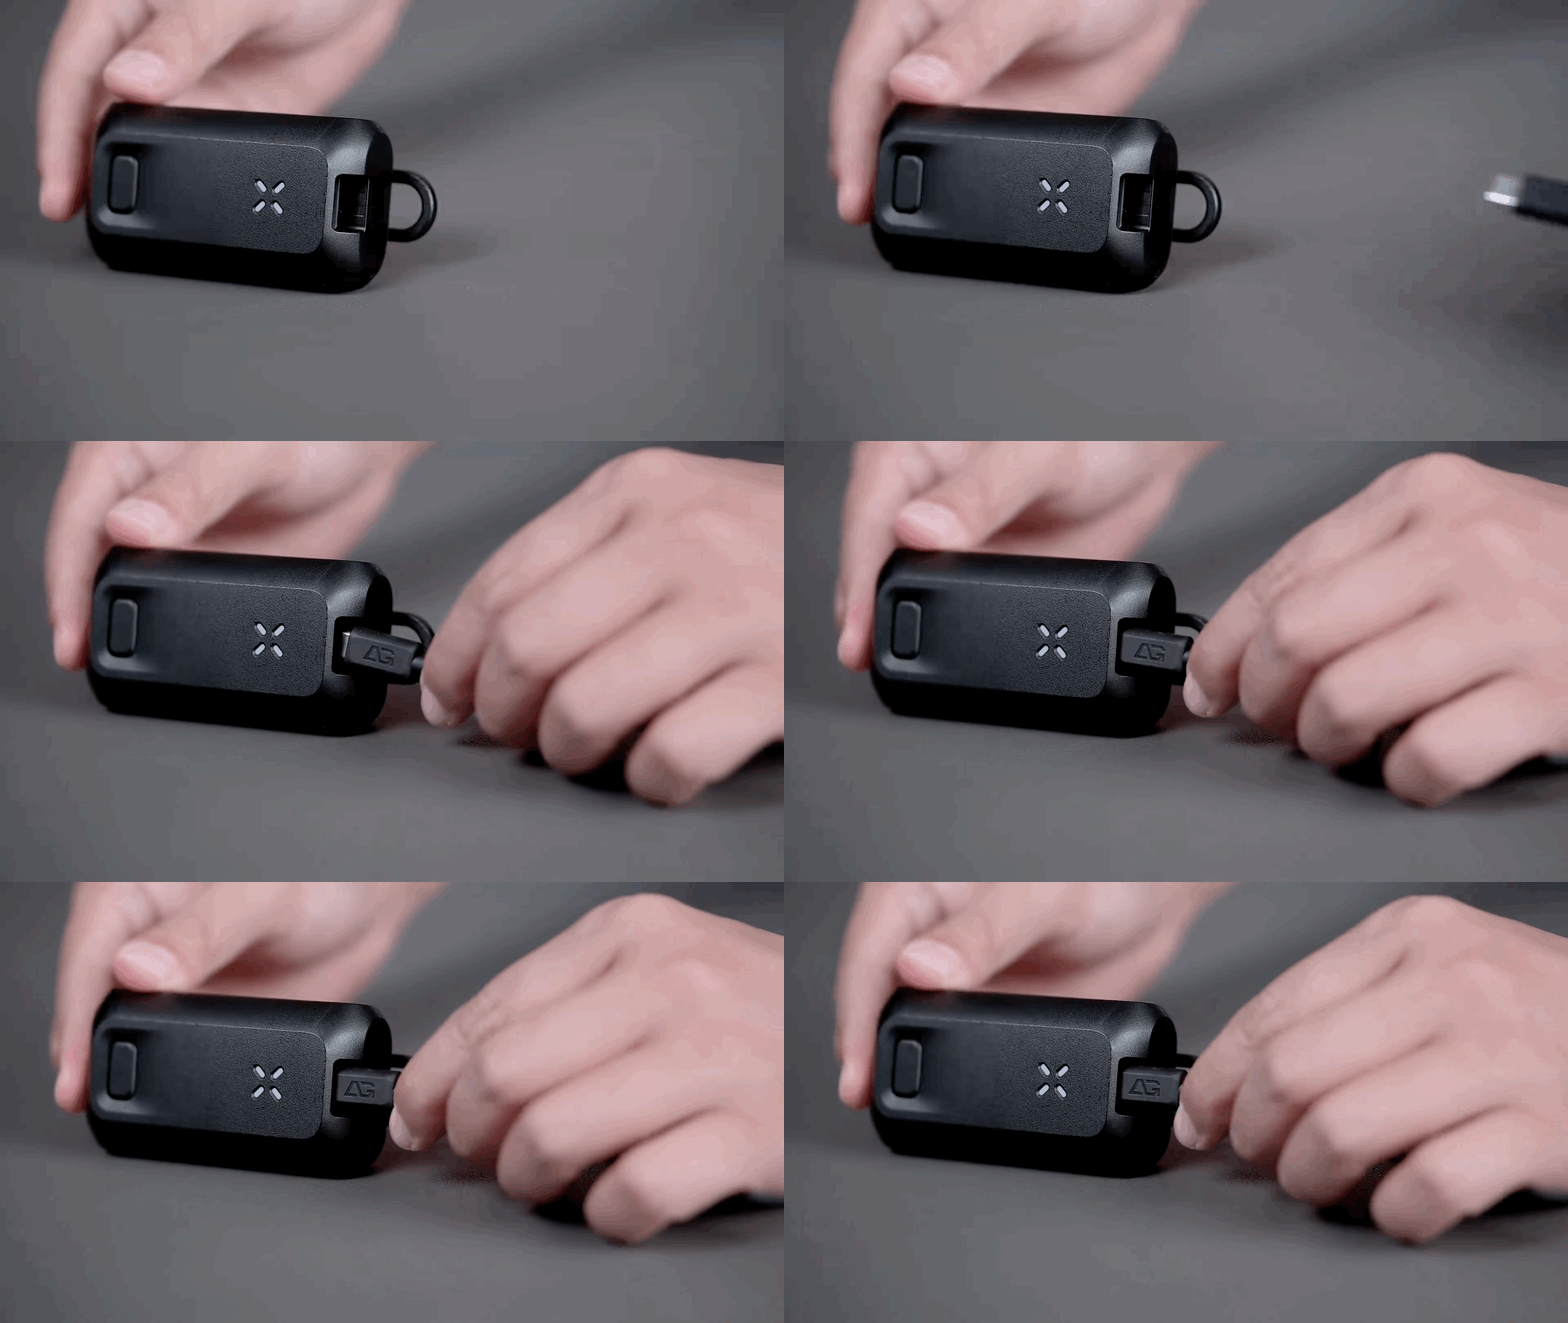
Charging Method
Connect the charger to the USB-C port of the battery of the Vision Goggles.
Power on/off the Vision Goggles
Press and hold the power button for two seconds to power on or off the Vision Goggles.
Using Instruction Of Vision Goggles
Please refer to the tutorial below to learn about the button function of Vision Goggles.
Storage of Vision Goggles
The Vision Goggles come with 30GB of built-in storage for storing flight telemetry data, screen recordings, and other files. They support MicroSD expansion, and the recommended memory card list is as follows:
SanDisk Extreme PRO 64GB V30 U3 A2 microSDXC
SanDisk Extreme PRO 128GB V30 U3 A2 microSDXC
SanDisk Extreme PRO 256GB V30 U3 A2 microSDXC
SanDisk Extreme PRO 512GB V30 U3 A2 microSDXC
SanDisk Extreme PRO 1TB V30 U3 A2 microSDXC
Lexar Silver Plus 64GB A2 V30 microSDXC
Lexar Silver Plus 128GB A2 V30 microSDXC
Lexar Silver Plus 256GB A2 V30 microSDXC
Lexar Silver Plus 512GB A2 V30 microSDXC
Lexar Silver Plus 1TB A2 V30 microSDXC
Kingston CANVAS Go! Plus 64GB A2 V30 microSDXC
Kingston CANVAS Go! Plus 128GB A2 V30 microSDXC
Kingston CANVAS Go! Plus 256GB A2 V30 microSDXC
Kingston CANVAS Go! Plus 512GB A2 V30 microSDXC
Kingston CANVAS Go! Plus 1TB A2 V30 microSDXC
How To Export Material Form Vision Goggles
Storage
The Vision Goggles are equipped with built-in storage and support external memory card installation.
Vision Goggles' screen recording material will be saved to the goggles' internal storage default.
You can select your own preferred storage location in the menu interface.
Export footage from Vision Goggles
To export screen recording footage from vision goggles, please refer to How To Export Footage From Vision Goggles.
2.4 Device Connection
Please refer to the following tutorial to learn about how to connect the devices.
2.5 Antigravity App Function
Please refer to the following tutorial to learn the Antigravity App Function.
2.6 Activation
Before using the A1 drone for the first time, you will need to activate it through the Antigravity App to comply with regulations.
Power on the A1 drone, Vision Goggles, and Grip Controller. Download the Antigravity app and ensure Wi-Fi and Bluetooth are enabled on your mobile device. Follow the on-screen instructions to activate your drone.

2.7 Firmware Update
It is important to keep your firmware up to date to ensure optimal performance and compatibility with any new features or improvements.
Make sure to regularly check for any firmware update by launching the Antigravity App, check the notifications and follow the on-screen instructions from the App or the menu of the Vision Goggles to perform the firmware update.
[Notices]
-
Do not disconnect the power supply or exit the Antigravity app during the upgrade process.
-
After the upgrade is completed, the aircraft will shut down automatically. Please restart it manually.
03 For Beginners
3.1 Obstacle Avoidance Feature
Please refer to the following tutorial to learn the obstacle avoidance feature.
3.2 Flight Policies
Before flight, operators must obtain the latest information on the intended flight area, as well as relevant flight restrictions and requirements, and strictly adhere to these regulations during drone operation.
To help you fly safely and responsibly, we've listed key drone flight regulations below.
3.3 Flight Environment
Although the drone supports obstacle avoidance, it is recommended to fly in open areas that have good lighting without obstacles.
• Do not direct the aircraft towards people, animals, small objects (such as branches or wires), or transparent objects (such as glass or water surfaces).
• Do not fly on rainy or foggy days, or in any other conditions with low visibility (less than 100 m).
3.4 Component Protection
To maintain your aircraft in the best condition over time, please take care of important parts during use.
Camera: Avoid exposing the camera lens to environments with laser beams (such as laser shows) or capturing objects which have intense light sources (such as the sun) for a long time to prevent damage to the sensor.
04 Getting Ready for the First Flight
4.1 Takeoff and Landing
• Takeoff: Push the slider upward twice to start the drones. Then, keep pushing the slider upward, and the drone will automatically take off to a height of 1.2 meters and hover.
• Landing: Keep pushing the slider downward. The drone will automatically land on the ground and stop the motors.
4.2 Flight Control
Please refer to the following tutorial to learn the basic flight operations.
4.3 Flight and Shooting Modes
The button with a red dot in the center of the Grip Motion Controller is the recording button. A short press switches it to recording mode, and another short press starts or stops recording. For more instructions, please refer to the tutorial video.
4.4 Intelligent Flight
Flight Techniques
This video will demonstrate common flight maneuvers for the Antigravity A1 drone, including side flight, reverse flight, ascending/descending with tilt shots, and and orbiting subject.
Flight Modes
Please refer to the following tutorial to learn the FreeMotion Mode and the immersive FPV Mode.
Deep Track
Please refer to the following tutorial to learn the Deep Track feature.
Sky Genie
Please refer to the following tutorial to learn how to use Sky Genie.
Sky Path
Unlock your creativity with Sky Path. This tutorial shows you how to plan waypoints and use preset flight routes.
4.5 Return To Home
Please refer to the following tutorial to learn about the RTH feature.
05 After Flight
5.1 Transfer Footage
This guide covers high-speed wireless transfer to your phone and the classic USB-C cable connection.
5.2 Device Storage
After flight, fold the arms properly and then place the aircraft into the storage case.
Improper placement of the aircraft will squeeze the propellers, resulting in propeller deformation and reduced power performance.
06 Antigravity Care
Antigravity Care provides coverage for product damage resulting from normal use, including: Accidental drops and crashes, water ingress, lost connections leading to unrecoverable drones and natural wear and tear.
Scenarios not covered include damage caused by intentional misuse, as well as direct or indirect losses due to force majeure events. For full details, please refer to Antigravity Care.
07 Support
Antigravity Service is dedicated to providing you with comprehensive product services and support, ensuring you enjoy the drone operation experience.
Device Information: Keep track of your device details at any time, including activation date, warranty status, and service history records.
Service Progress Tracking: Check the real-time progress of device repairs, including service-related information such as quotation, logistics updates, and inspection reports, so that you can stay informed of the service status at all times.
For more product usage information, please refer to the user manual.